And this is Teddy, a very sweet and traditional looking crochet bear amigurumi.
Most of my crochet animals are made with Istex Lett Lopi, a rough and fuzzy 100% wool yarn from Iceland. But this Teddy bear I made with another kind of yarn. I found it in a local shop and just fell in love with it.
 It was such a soft and beautiful coloured yarn, just perfect for a little Teddy. All I remember is that it was a Phildar worsted weight yarn. It’s not available anymore but that doesn’t really matter, there are so many suitable yarns to make a cute Teddy and I bet it isn’t hard to find these colours.
I designed this bear as a ‘quick to crochet’ pattern. It will only take you a day to make this bear. It’s not a big bear, but if you want to make a bigger bear, just use the heaviest yarn and the hook that works best with it to get a significantly larger bear.
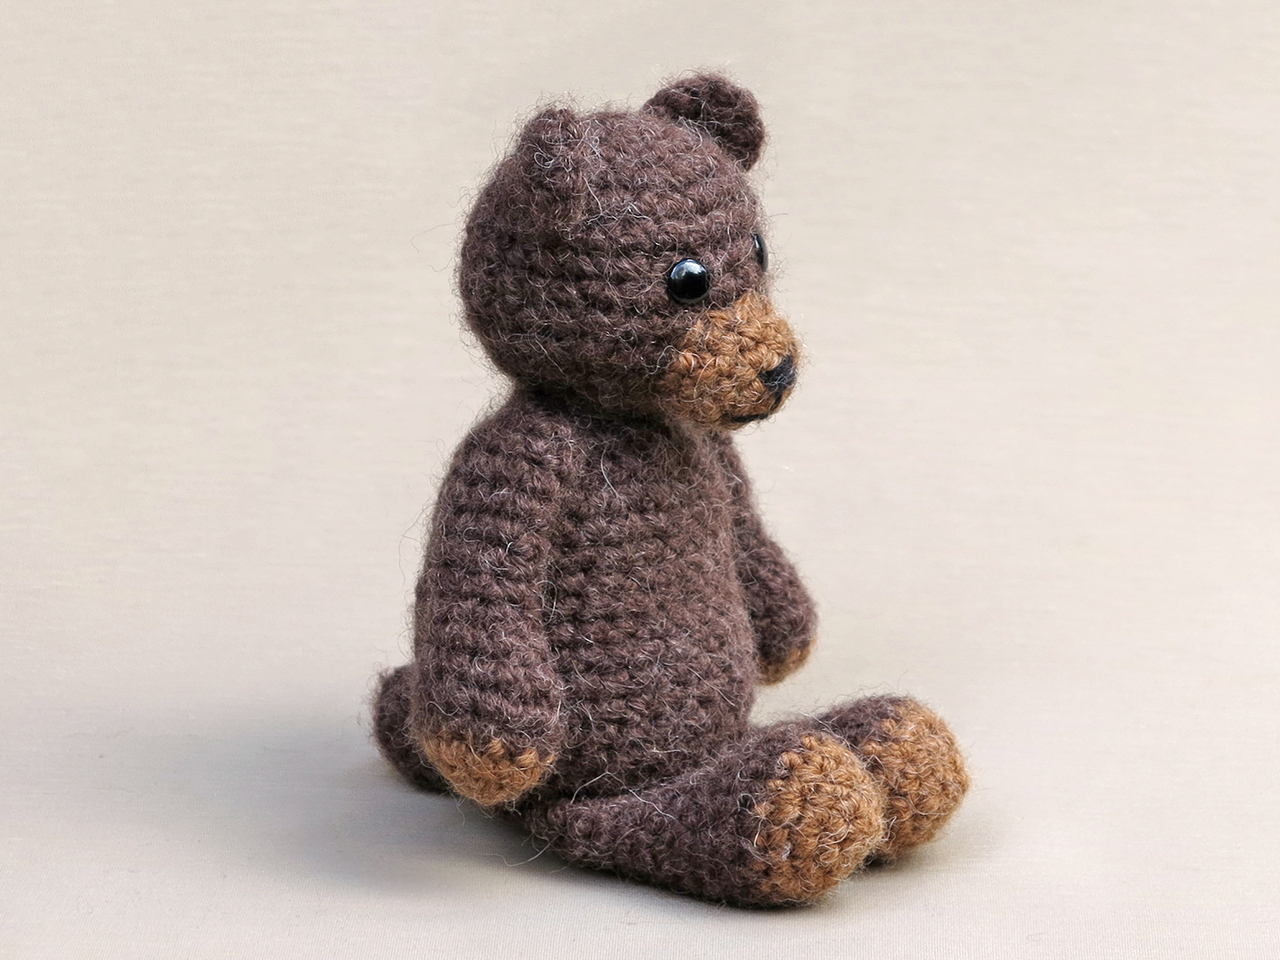
Here are some more pictures of the finished crochet bear and below them you can find info about & links to buy the pattern.


This crochet bear amigurumi is made with fuzzy worsted weight yarn. Teddy is sitting 5.5 inch / 14 cm. The pattern contains a clear and colour coded description of how to crochet and assemble this animal, with extra illustrations and example pictures at the bottom to help you get everything right. In the pattern you can also find what materials you need, the yarn colour numbers, in short, everything you need to know to make your own sweet Teddy bear. All the additional information you need to know about this pattern you can find in the shop listings.The pattern for this crochet teddy bear you can find in my Ravelry shop, Etsy shop and you can also order it directly from me here. The pattern is written in standard American crochet terms.
I hope you enjoy making this crochet teddy bear!

I was waiting to see how this would turn out. He looks great! I can’t wait to make one of my own, and thank you again for sharing the pattern. 🙂
My pleasure!
These are the cutest bears ever! Thank you for sharing your pattern!
My pleasure! And thanks for your comment.
Thank you for sharing this pattern, I’ve just finished crochetting my teddy and it has come out perfect.
Antonia
I’m glad you liked the pattern and the bear turned out good! That’s great to hear.
Have fun with him, best, Sonja.
I’m crocheting your bear in micro miniature, in Lila/pink, when finished ill post it on my website. I’ts a lovely bear.
If your really curious, my twitter has a picture already of it. (@Ubercute)
Although i have one question about the pattern. By the arm and legs it says: 5 sc, dec, 5sc. And the total stitches is 2 less then the round before. Does it miss a decrease?
Hello Babs, thanks for asking this, I wouldn’t have noticed this error if you hadn’t mentioned it! I forgot to write x2 after the s2tog’s/dec’s.
It should be sc in next 5, s2tog x2, sc in next 5. It’s the same for the legs, I changed it in the pattern now. I hope it didn’t give you too much trouble…sorry.
Your tiny mini bears looks adorable! It’s great to see a bear made with my pattern, and yours are really special too!
Succes met de rest, groetjes Sonja.
How funny, talking english to a dutch person. Toch wel grappig dat niemand het merkt. inmiddels is het beertje net af. Helaas wel ‘fout’ maar toch wel mooi geworden.
Op twitter staat een matige foto (met mobiel). Binnenkort op mijn website.
Wil hierna miss een jointed sock monkey maken, vind die zo leuk.
Groetjes,
Babs
Sooo a great pattern! An the bears are soo cute!! Thanks for the pattern!!!
And I love Aminekos too;)
Regards, Rita
PS sorry my english;)
Hey, thanks for your kind comment! I hope your bear turns out good.
And Amineko’s rock, I already made two but often feel the need to make another.
p.s. I completely understood you! And looked at your blog, very colourful, I liked it, and Switzerland!
i am having trouble understanding what s2tog means i cant find it anywhere!!! please help me
thanx natalie
Hi Natalie,
It’s a decrease stitch. What I do is put my hook trough the outside loops of the next two stitches and than make a single crochet. This way you make from two stitches one, with out a noticeable gap. Extra info about the outside loops: For a normal sc you go trough both loops of a stitch, when doing a s2tog, you only go trough the outside loops of the v shape from the stitch. I hope this clears it up.
Good luck, Sonja.
This is very cute! Have started making one for my new nephew. Surprisingly easy for a first crochet project, so far I have the head, muzzle, ears and body. However, I’m not sure on how to start joining the parts together… How did you do that on these lovely bears?
It’s very simple, just sew everything together. What I do first is finish the head. Pin the pieces on and than start sewing. For the muzzle I sew the bottom stitches of it to the head. The head I attach completely to the body by sewing the loops of the bottom and top stitches of the pieces together. The arms and legs I close by sewing the loops of the back and front together, so you have a flat end of for the leg 5 st and the arm 4 st wide. Than I pin them on the body and sew. That’s it.
Hope this clears it out, good luck.
Regards Sonja.
merci beaucoup c’est tres joli
Je ne parle pas bien le français, mais je comprends que. De rien!
I would love to make a MUCH bigger version of this, but I don’t know how.
I really enjoyed making this pattern. I would love to send you a photo! Where can I send it?
Thanks,
Theresa 🙂
I would love to see your Teddy! I’m very curious :). I email you where to send the pic.
Regards, Sonja.
love love love your teddy! and your yarn colors!! everyone here is thanking you for the pattern but ,i cannot find it here!! can you help me out?? i would love to make this handsome boy!! thanks denise
Nice to hear you love my teddy :). It’s right here. You can also order it directly from me if you don’t have a Craftsy account. The order form you can find at the pattern tab at the top of the blog.
Just found this pattern and I’m goiing to make one. I make bears for all the children who are baptised at our church. I’d been looking for a different pattern, and this one looks perfect.
Hi Christine, that is lovely to hear. Have fun making the bears. Kind regards, Sonja.