Face & expression, Tips & Tricks

Eyepatches

In this post I’ll give some tips about how to get the nicest and neatest eyepatches. Eyepatches can give your animal that bit of extra expression, but if they aren’t the right size and shape, they can ruin the face of the animal and make them look very silly.

The most important thing is the size. Especially too big a patch can give an idiotic result, like your doll is looking in the head lights of a car…aaaaargh, don’t want that. Always match the size of the eyepatch with the eye size.

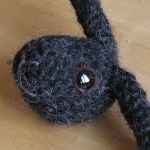
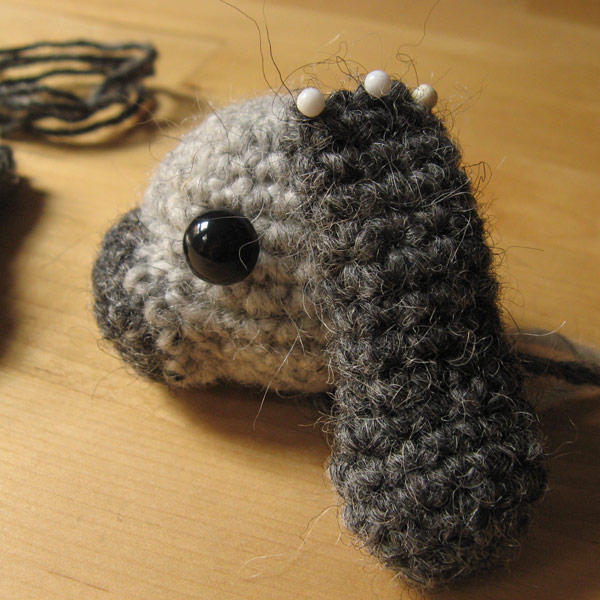
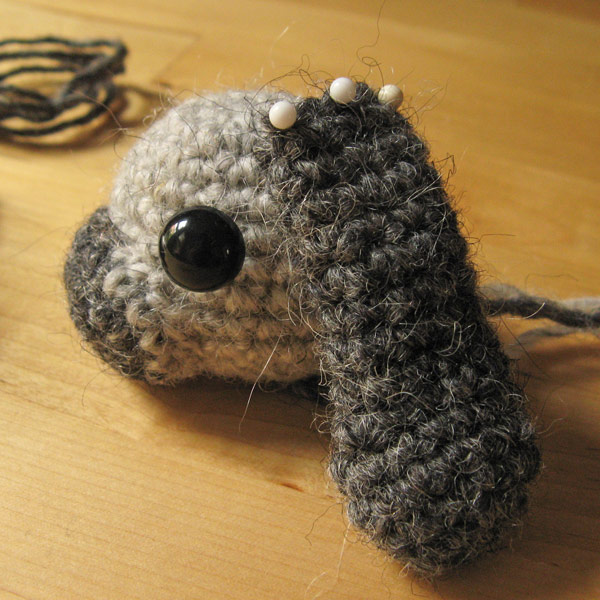
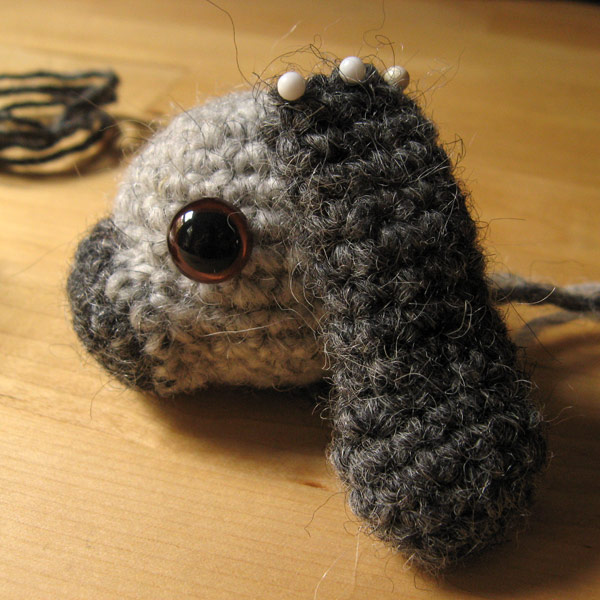
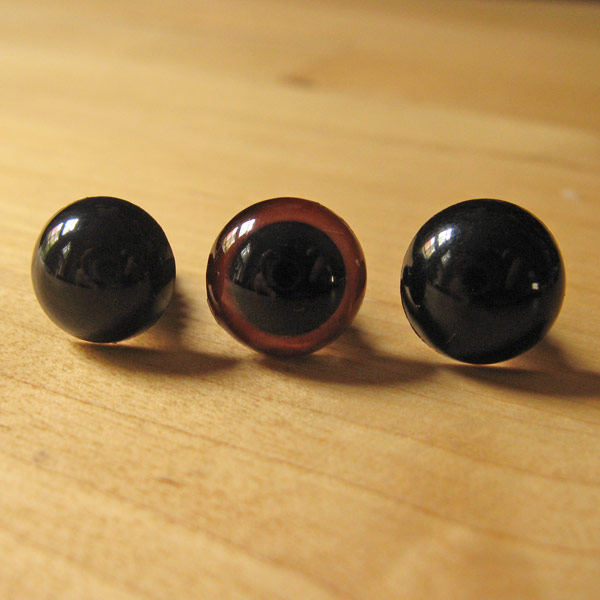
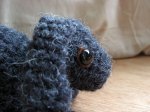
Usually it’s nicer if there is more eyepatch above the eye than below it. So make sure the eye is inserted at the bottom of the patch. If you use a brads as eyes, it’s easy, you can stick it where ever you like. But if you use animal safety eyes that can be a bit tricky because they have wide necks, but there is a way. Just crochet a magic ring or starting chain, insert the eye in it and crochet a few stitches till you get the right size and shape. You don’t have to go all around this way and can adjust the size to the eyes.

When attaching eyes with eyepatches, crochet ones or sewed lines, sew them tight to the head and not sticking out too much and always before you close/attach the eye caps. Otherwise you won’t be able to sew them.

A useful extra tool for making the patches even look better, is a needle felt needle. Especially if you use wool, needle felting the patches a tiny bit can make them look more neat.

Patches aren’t necessarily. If I’ve used them for a doll, you don’t have to use them too. If you like your animal better without them just leave the patches. It’s your doll!

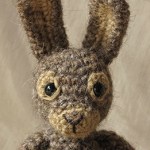
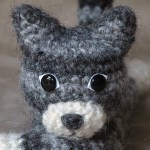
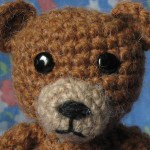
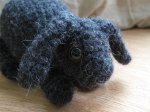
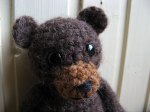
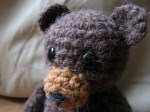
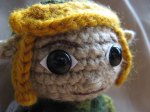
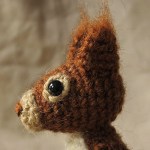
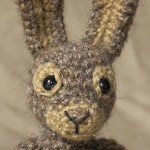
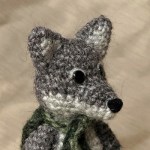
Here are some examples of  eyepatches that give the right result.

What else can I think of….just take your time and do it with care. Walk away when you’re not yet satisfied or let your doll look in the mirror, so your brain gets a fresh view of the result. With this in mind, your patches should become perfect!

Good luck.


Face & expression, Tips & Tricks

Expressions for amigurumi

This post is a renewed version of an older post of mine. Because I developed new skills and discovered more techniques, I found the old expression post to be a bit outdated. In this post I’ll explain how I design a crochet animal face.

One of the most challenging elements in making crochet dolls is giving them the right expression. That’s what finishes the doll and can make it either beautiful and striking or kind of ridiculous looking. Making the face is complicated and comes very closely, even though it seems quite simple, just a few stitches right? It usually takes me a while and I have to ‘take it out’ a few times before my doll has the right expression. Here are a few samples of faces I’ve made so far. Below the images I’ll explain how I get the right expression.

1. A patch behind the eyes makes him look more like a wild bunny. The starting chain forms his mouth.

2. A playful cat needs wide eyes, so a felt patch behind the eyes. He also has a perplexed little mouth, like real cats.

3. Wolfs have a brighter spot above their eyes. For this crochet wolf I decided to add a small thread to create that wolf expression.

4. Starfox really has a sturdy expression, he also has green eyes. So I made a felt patch, black lashes and big white eyebrows.

5. This is a very happy brown eyed bunny. Just the eyes looked a bit dull I decided. So he has felt patches behind his eyes and a cheerful embroidered mouth.

6. I wanted to give this crochet bear a funny looking face. To get that expression I made his mouth unsymmetrical.

To give my Popke the right expression, I play a little with the embroidery thread. A symmetric mouth for example gives a neat look, but maybe not the right one. The distance between the eyes is also very important. A description of how to set them, I don’t think will help much, you just have to experiment on each and every doll you make. There are some rules, like far apart is cute and close together not very smart looking, but I tend to ignore those rules and just see what looks best for a particular doll. The tip in this topic is therefore, don’t underestimate the importance of the expression. Take your time and experiment. If you’re not satisfied after trying many times, just stop and try again the next day or so, when you’re fresh again. That usually does the trick for me.

And another small tip, it’s very important to see for yourself and experiment on your version of a Popke. Maybe you don’t like the felt patch for your lop rabbit or the white eyebrow on your wolf. Just rock out and do what you like.


Face & expression, Tips & Tricks

Needle felted noses

Finding the right nose for crochet dolls and amigurumi sometimes can be a bit of a challenge. Needle felting is a great way to make the perfect nose.

You probably know the shape and size for the right nose, but getting it isn’t easy. For some projects an embroidered nose ‘ll do great. But some crochet dolls need a more specific nose, like a little ball for a bear or mouse, or a flat triangle shaped soft nose for a cat.

I’ve tried many things like flat felt noses to sew on, embroider with a thick yarn till it was round enough, or putting yarn around a safety eye to get the right nose. That all didn’t work out too well.

A good and quite easy way to make a perfect and soft nose, is to needle felt it. All you need is a thin needle felt needle and a piece of foam. To felt with, you can use the wool you crochet with. Just grab a thread and fluff the part of it you think you’ll need to get the right size nose. Don’t forget to leave a long tail for sewing. Roll it into a loose ball and start pricking it, till it is the desired shape and firm enough. It really works well, you can even needle felt it tighter or more in shape after you sewed it on your doll his head.

Here’s an example with what you need, two loosely felted nooses and the firm felted nose I made for my Forest Mouse.

crochet doll nose

Face & expression, Tips & Tricks

Animal safety eyes

When I tried different eyes for my lop bunny pattern, I noticed that if I used coloured eyes, they seemed smaller than the same size of black eyes. Because I hadn’t taken that into account, I ordered a bunch of eyes in black and brown and couldn’t use the brown ones because they looked much too small. I had to buy new eyes.

I decided to write a post about this in my ‘Tips & Trick’s’  section to give you a heads up.

I made some pictures to illustrate this topic. (The eyes are not attached completely but are just inserted loosely without the safety backs.)

From left to right: 11 mm/0,43 inch black safety eyes, 12 /0,47  black safety eyes, same size brown safety eyes, the eyes in 11 mm, 12 brown and 12 black. I’m going to use the 11 mm black eyes or the 12 mm brown ones. The 12 mm black ones look too big.

Actually it’s quite logical a coloured eye looks smaller, because it has a transparent ‘orb’ on top of the flat coloured circle, which reflects the light a bit. You can also look a bit through the eyes.

Conclusion. If you’re going to use coloured eyes, keep in mind that they look smaller and buy them one step bigger or buy a few sizes so you have the right size for sure.


Face & expression, Tips & Tricks

Alternative animal eyes

Animal safety eyes and other nice looking animal eyes can be hard to find. When I started making amigurumi, I couldn’t find stores where I could buy them, so I had to come up with an alternative.

I went to my local hobby store to see what they had to offer. There I found something very suitable, called brads. They come in all kind of sizes and shapes and the black round ones make perfect eyes. The one thing that wasn’t perfect, they aren’t shiny. I had to make them shiny myself then. The first thing I thought of was transparent nail polish and that actually did the job very well. A few layers of it and an afternoon of drying made the eyes perfectly shiny and smooth.

Here are some pictures of the brads and how they look as eyes on a crochet animal. There’s also a picture of another way to make particular eyes. Below the images I’ll explain how it works. (You can click on the image to get a larger version.)


The last image is of normal safety eyes with a felt patch behind it.

How does it work?

First, pin the brads to a pin cushion or something else you can put them into, so they stand up steady and you can nail polish them. Attach a layer of nail polish. If the first layer looks perfect, it’s good, if it’s not smooth enough yet, add another layer when the first layer is dry. When you’re satisfied, let your brads dry for a while, I let them dry for a night before using them.

Make sure the nail polish is completely dried out when you attach the eyes, otherwise you’ll damage them. At first only the upper layer is dry and not very steady. When it’s perfectly dry, it should stay undamaged even if you scratch it. If you like, you can paint various coloured eyes with nail polish, like a blue eye with a black pupil. And my advice, polish a bunch of eyes in advance and keep them safe till you need them.

When you use brads as eyes you need to make sure the paws won’t stick out of the crochet ‘skin’. If you crochet very tight it might not happen but you can also add a piece of paper(board) or felt between the paws and the inside of the piece, so when the paws are spread they only touch felt or paper.

To give more character to some eyes, you can add a piece of felt behind the eyes on the outside. In the crochet bunny picture you can see I used brown felt behind the eyes, and the Link amigurumi has white felt behind normal safety eyes.

Another tip:

If you use felt for characteristic eyes, you can dye it first with acrylic paint, to make it more strong. I did that with the Link amigurumi’s eyes. Because without the paint the felt fell apart when I cut it in the right shape. Whit the paint on it, it stayed felty but much stronger and easier to cut.

One last note:

I do NOT think the alternative eyes are safe for little kids toys, so use safety eyes if you make them for a little kid.

I hope this post comes in handy, good luck!