Patterns

Flunsie, relaxed and realistic crochet badger pattern

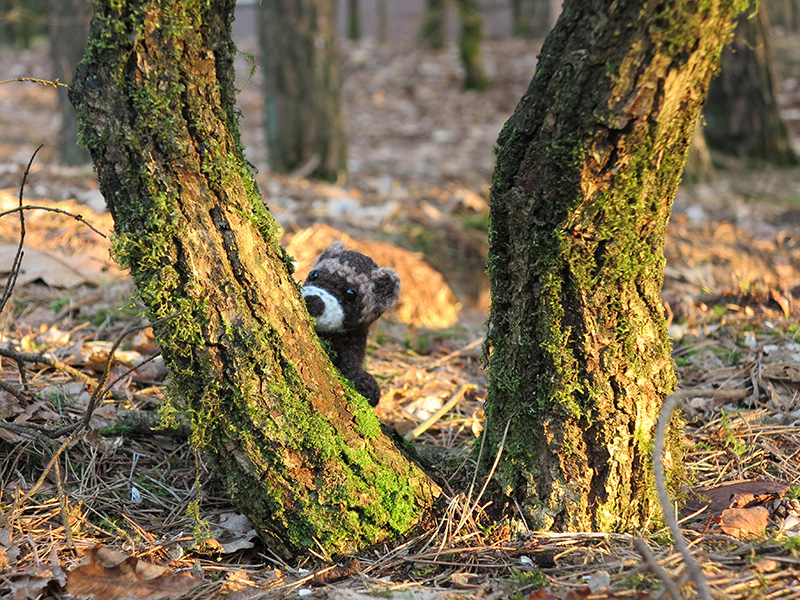
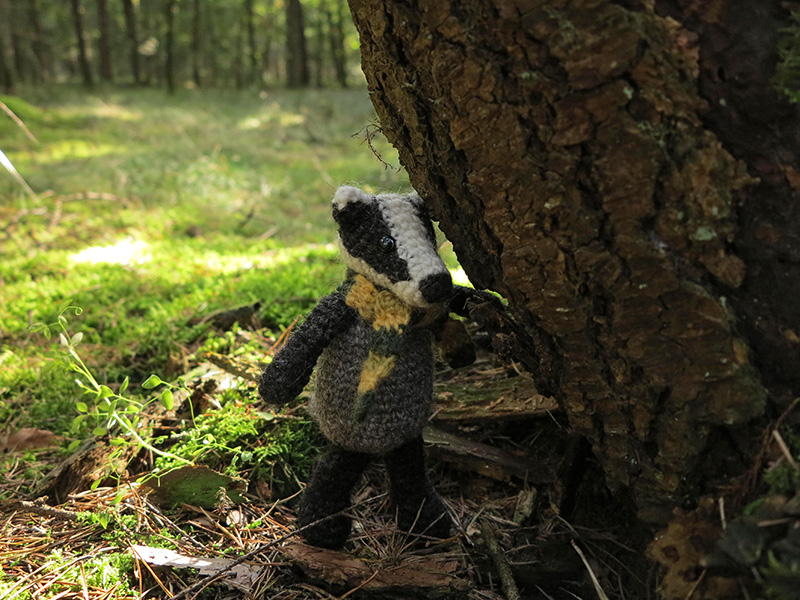
My experimental holiday project has turned into this utterly cute crochet badger! I proudly present to you this exciting new pattern for Flunsie, the realistic relaxing badger.

realsitic crochet badger

You’re right to think this took me a long time, because it really did! It started out as a summer project, to try out new techniques with a different yarn. It seemed like a fun idea to make myself a badger in this (un)charming pose that I often see when I watch videos of badgers taken with wildlife cameras. When they come out of their set at night, they’ll often sit in front of it for a while scratching and washing, and I just love that silly look. It seemed like the perfect pose to try out a new technique: short rows to make the head and body as one piece. But there was one thing I overlooked in my enthusiasm: my favourite animal has a striped head, and short rows combined with stripes aren’t the easiest combination when trying this for the first time. It was a disaster, and I gave up. It was only when I started working again that I grabbed my courage and decided to give it one more go. If it would work, how awesome would that be?! It had to become a pattern, too, not just a doll for me.

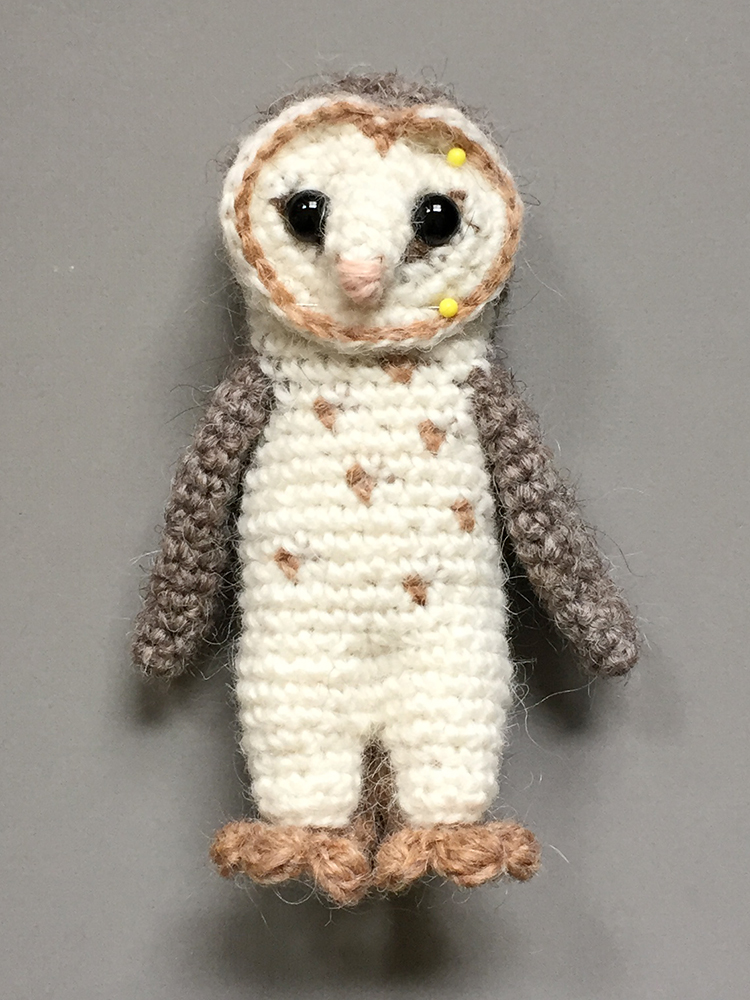
I decided to use my beloved Lopi yarn instead of the DK yarn I tried during my vacation, to have something familiar to work with. I also had the notes I had made, so I didn’t have to start from scratch. My idea was to go slow, one row at the time, because eventually the colours should line up. That approach worked well because I wasn’t feeling any pressure. I could undo rows as often as needed, and after many attempts, I finally had a head with a neck in the shape I desired and with perfect black and white badger stripes. I was so delighted!

Designing the body was easier because no short rows were needed there. I also made a drawing to scale, so I could lay the badger on top of it to check if the size and shape were good. Designing the paws was manageable, because I could use paws from other creatures have I designed and I only needed to adjust them. I also had the idea to make the feet extra special by adding ‘animal’ prints to them, and when I tried it out it looked amazing, very suitable it for this amigurumi badger.

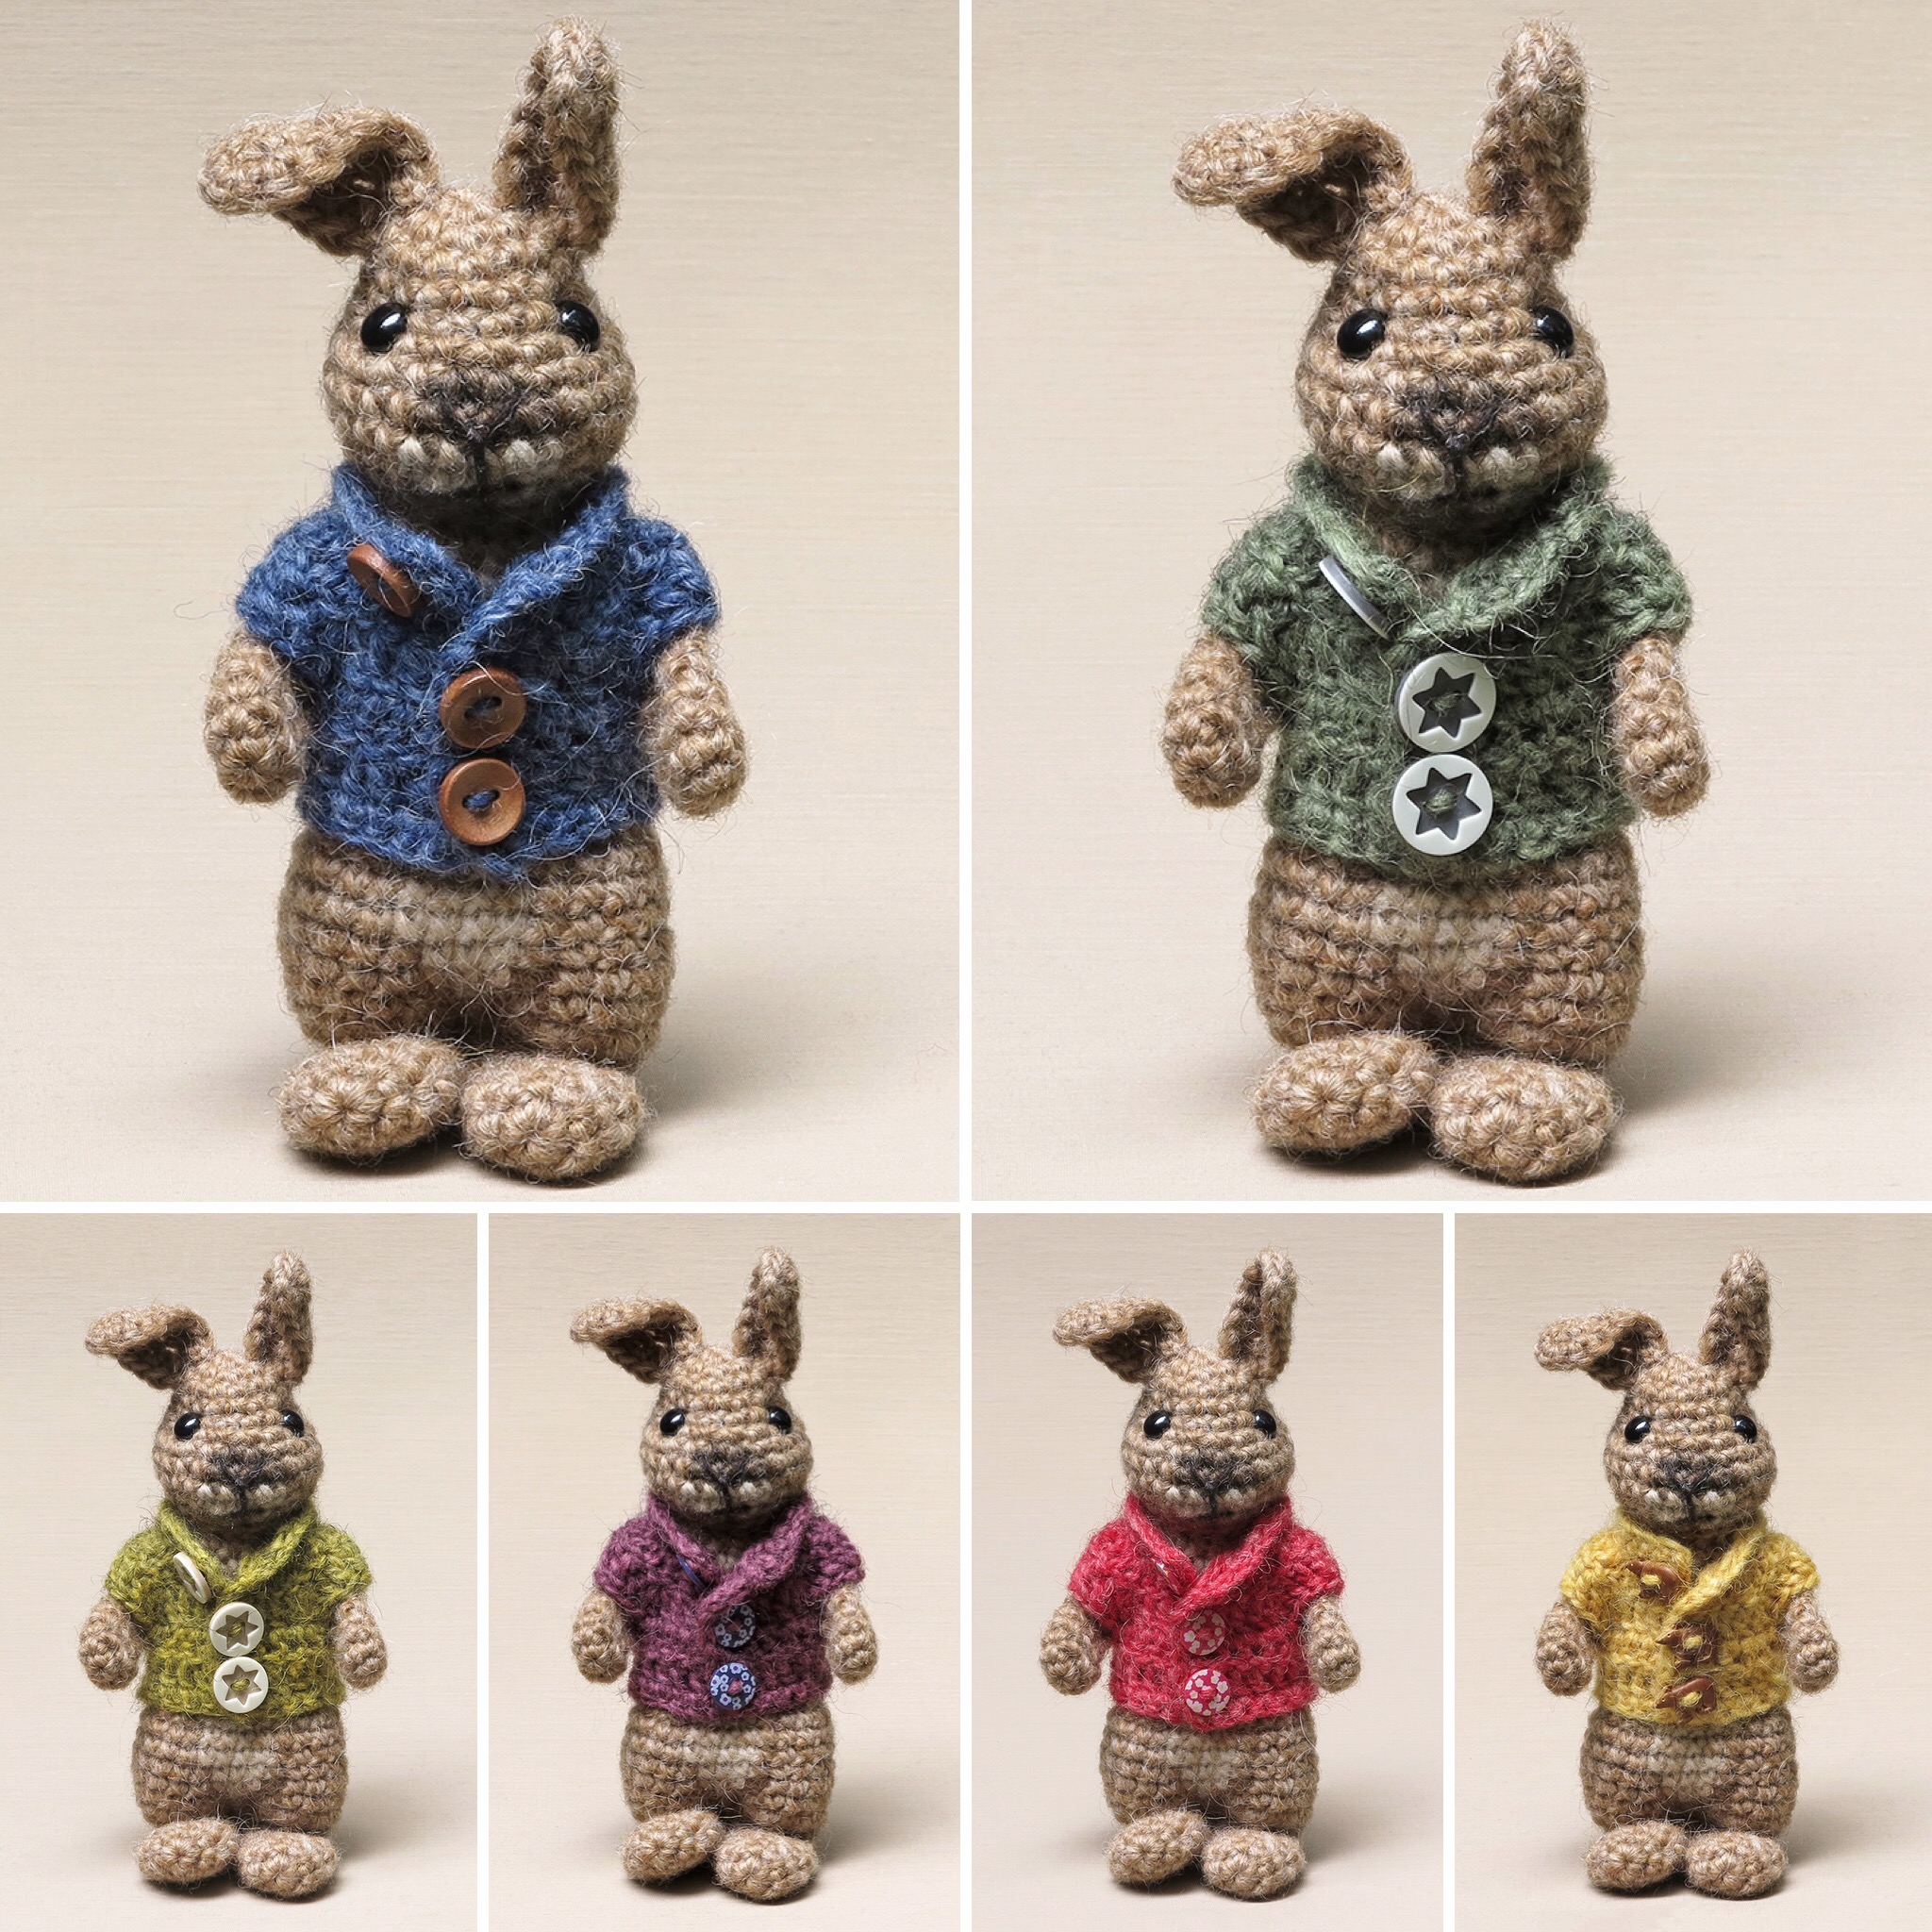
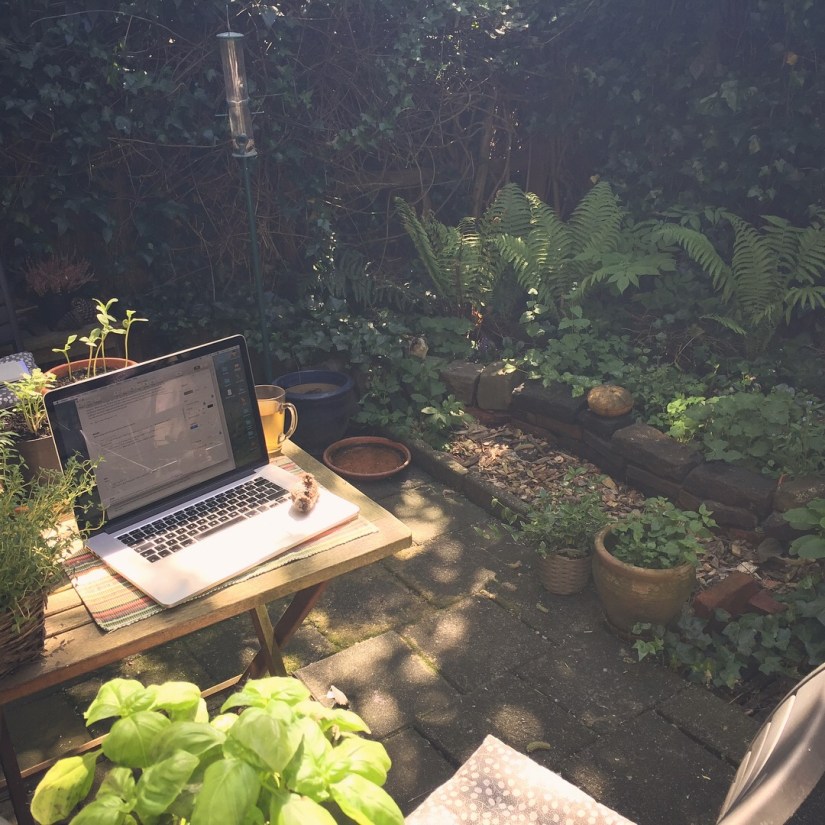
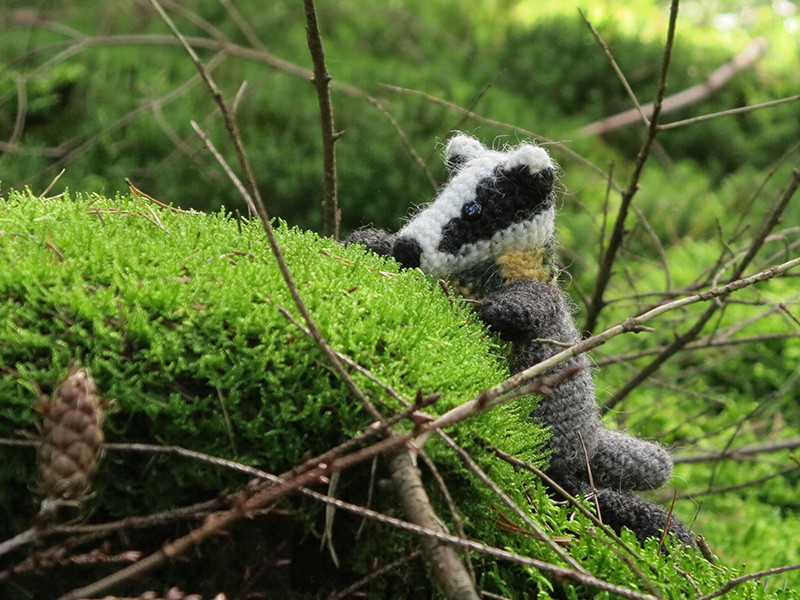
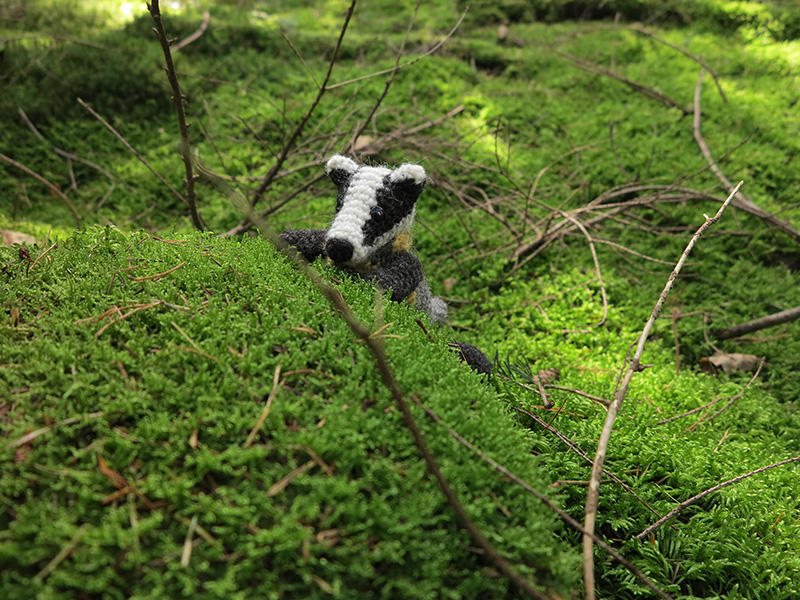
When I was working on the pattern, I got a funny image in my mind of a knitting badger. I remembered this tiny knitted hat I have, added some toothpicks as knitting needles, took a picture, and posted it on Instagram. Every time I look at it I smile, and everyone totally loved it. So if you feel like it, you could make a knitting badger yourself! Here are some more pictures of Flunsie, and below them you can find more info about the pattern and links to buy it, so read on!

Info about & links to buy the pattern

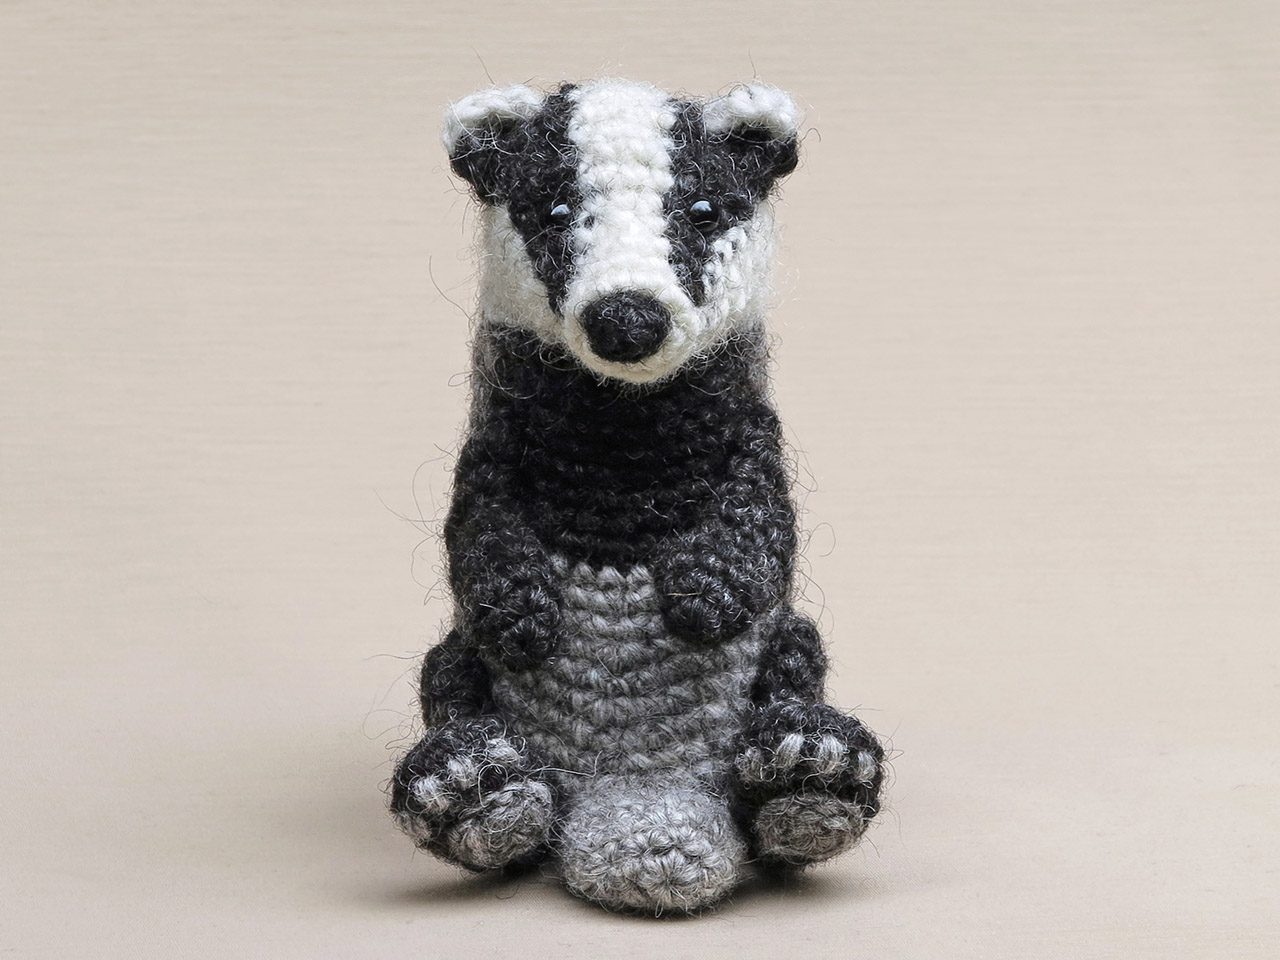
I’m rating this crochet badger pattern as ‘advanced’ in my shops, but hope I made it so easy to work with that less experienced crocheters can make it, too. The short rows may sound difficult, but you just go back and forth sometimes instead of working into a continuous spiral. I added lots of instruction photos so you can see how to do the short rows.

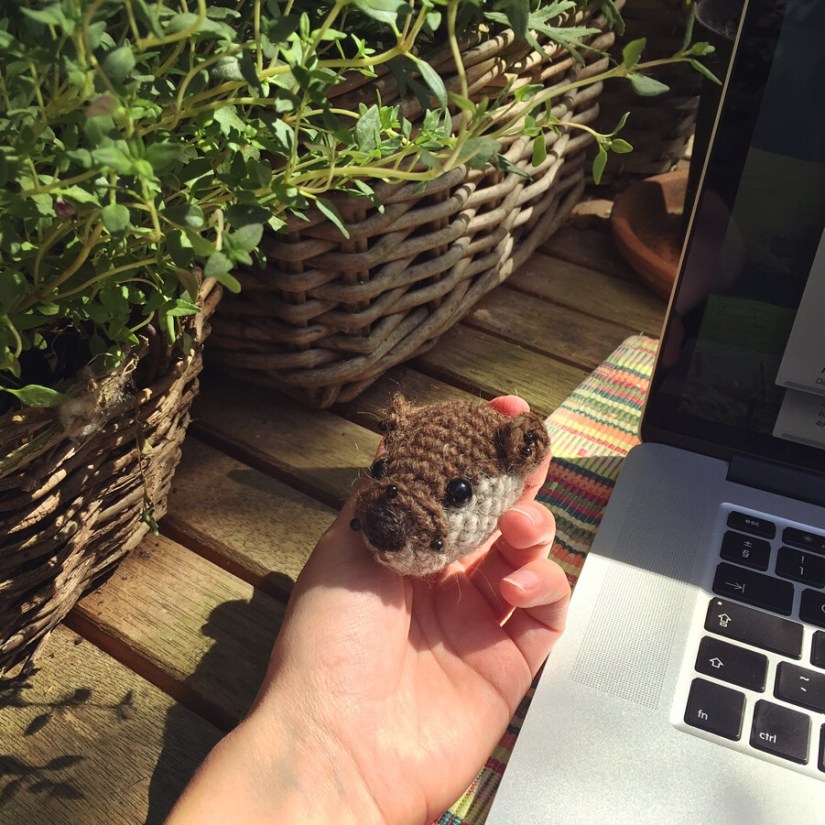
This badger is made with Istex Lett Lopi, a 100% wool with a lot of fuzziness. He’s 5.1 inch /13 cm high. The pattern contains a clear and colour-coded description of how to crochet and assemble the doll, with instruction images next to the text and example pictures at the bottom to help you get everything right. In the pattern you can also find what materials you need, the yarn colour numbers — in short, everything you need to know to make your own badger amigurumi. All the additional information you need to know about this pattern you can find in the shop listings. You can buy this pattern in my shop at Ravelry, Etsy or order it here.

And heads up! This pattern has a one dollar release discount till Thursday, the 8th of October!

Patterns

Flamsie & cubs, two realistic crochet fox patterns!

I am so happy I can finally show you my finished crochet foxes. Meet Flamsie and the little ones!

amigurumi fox

This adventure started with the idea of making a fox with cubs. I’m monitoring wildlife as a volunteer, and this time of the year we see a lot of young foxes on our camera traps. I really love seeing them and was lucky enough to spot one when we were checking a heather field for badger activity. Suddenly a cute fox cub was looking straight at us!

I started this project with the cubs. Shaping something much smaller is a whole new thing for me, and I really had to get used to it. Also, getting the light-coloured chin and chest symmetrical turned out to be quite a challenge. It took me a long time to create a cub that I adored, and I soon realised that this little fox was way too special to just add to the fox pattern. This had to be a separate pattern so everyone could make it.

After the little ones were finished I started working on the adult. And you know what was ever so silly? Each head I made I found huge! Now I had to re-adjust to my normal size. I ignored my feelings of finding everything enormous and patiently designed the right shapes and colouring for the adult fox amigurumi. I stumbled upon the same colouring difficulties as for the cub, but I stubbornly kept trying until I got it right. There was no way I was going to make this crochet fox with a sewn-on muzzle, the head had to be made in one piece, just like the wolf.

Making the fox’s body was much easier because I got familiar with this way of working when I made the wolf. The fox had to be smaller and more slender with a bigger tail. When the fox was finished, I placed the wolf and fox next to each other and I was satisfied. They are both such lovely doll versions of the real animals, the slender fox and the sturdy wolf.

When I was working on the cubs and realised how much extra work it was going to be, I decided I wasn’t going to do something like this again. Nevertheless cats and kittens are popping into my mind already, because the end result is so delightful. Every time I pass my adorable fox family I get a smile on my face, they are so cute together! The adult fox is a playful doll which you can place in different poses, and the cubs are even easier to play with.

For those of you who look forward to making a family, the fox and cubs are ‘a pack’ until one week after the pattern release. After that they will be separate patterns. So I get them soon if you want them all!

Here are some more pictures of these totally cute crochet foxes, and below them you can find all the info you need to know about how to get the patterns.

Info about & links to buy the pattern

These realistic foxes are made with Istex Lett Lopi, a 100% wool with a lot of fuzziness. Flamsie is 5.5 inch / 14 cm sitting, the cubs are 6 inch / 15 cm long when made with this yarn. They aren’t very difficult to crochet, even the seamless bits are quite easy to attach if you follow the instructions.

The patterns contain a clear and colour-coded description of how to crochet and assemble the animals, with extra illustrations and example pictures at the bottom to help you get everything right. In the patterns you can also find what materials you need, the yarn colour numbers, in short, everything you need to know to make your own fox  amigurumis. All the additional information you need to know about this pattern you can find in the shop listings.

You can buy the pattern for Flamsie by clicking this Ravelry or Etsy link. And the pattern for the cubs by clicking this Ravelry or Etsy link. You can also buy both patterns directly from me here.

And heads up! For one week from now Flamsie’s pattern includes the pattern for the cubs. So if you want both, get it before the 22nd of Juli.

Stories

A barn owl pattern in progress

Some of you know already I am working on a barn owl pattern. A while ago I posted a picture of the face I designed on Instagram and I’ve been busy working on the body. At the same time I’ve been working on other things and everything isn’t going as speedily as I had hoped for.

So here’s a little progress update. Last week I finished the barn owl’s body, thinking this would be the final version. But I am not completely satisfied just yet. I tried something new to attach the tail and wings seamlessly and it looks very neat, but new things take more time.

In the picture you see prototype 2. I want to use a lighter colour for the wings and back. Also, I don’t like how the spots on the belly are positioned, I tried to make them look random, but they’ve become quite geometrical on the right side (in this picture). And I think the chest needs to be a bit wider, the wings are too close to each other. I’m hoping to publish the barn owl pattern the first or second week of October and it looks like I am going to make that date!

I’ve also been working on a crazy little free pattern, a little creature many of us don’t like to have in high numbers in our gardens, but hedgehogs do. Yes, they will be cute! That pattern will be available here by the end of this week.

And what could it possibly be?

Uncategorized

Dapper Poochey, crochet rabbit pattern

Well, what happened here? I liked Poochey in his trendy cardigan so very much that I decided to add him as a “dapper rabbit pattern” to my shops. Would you’ve been able to resist it? Just look at this utterly adorable crochet rabbit in his fancy outfits!

I cannot give myself all the credit for this. After I released the little cardigan pattern, Jan made a delightful collection of lovely little cardi’s for her crochet bunnies. After seeing her ever-so-cheerful pictures, I decided I just had to make a separate pattern for Poochey in the cardigan. I made Poochey’s cardigan just for fun after seeing a knitted rabbit wearing a sweater on Instagram, but when I put the sweater on and took that picture of him a while back, I began to get the idea of making a separate pattern. But because it felt a bit strange to re-launch an existing pattern, I wasn’t sure if it was a good idea. Jan made me realise that it is! Not everyone who visits my blog would want this version, but I don’t want other crafters missing out on this.

And how much fun it is to make all those little cardigans! Not only that, but all the tiny cute buttons you can’t put on your own garments, you can use for little bunny cardigans. I had so much fun looking for buttons that matched my bright-coloured sweaters. I found buttons with flowers and stars, animal-shaped ones – oh, there are so many fabulous buttons to find! And I cannot help laughing at Poochey’s expression every time I see it. In every single picture he has that same look of utter confusion. Which cardigan is your favourite? Mine is the green one with the star buttons.

Here are few original pattern pictures of this dapper crochet rabbit; below them you can find info about and links to buy the pattern.

Info about & links to buy the pattern

Poochey and his cardigan are made with Istex Lett Lopi, a 100% wool with a lot of fuzziness. If you use the recommended yarn, he will be 7 inch / 17 cm high. I would strongly recommend a fuzzy yarn, because it hides the seams of the colour changes.

The pattern is written in US terms and contains a clear and colour-coded description of how to crochet and assemble the crochet rabbit amigurumi, with extra illustrations and example pictures at the bottom to help you get everything right. In the pattern you can also find what materials you need, the yarn colour numbers, in short, everything you need to know to make your own dapper rabbit(s). All the additional information you need to know about this pattern you can find in the shop listings. You can buy this pattern in my shop at Ravelry, on Etsy or order it here.

Heads up: it has a one-dollar release discount till Thursday the 11th of June. If you already have the pattern for Poochey and Fudge but want to make Poochey like this, you can find the free pattern for the cardigan here.

Uncategorized

In my garden

Hi there lovely crafters! I’m writing this from my garden office. The weather is so very lovely finally, how can I sit inside while it is nice and warm outside?

Yes, I am finally working on my new otter pattern. After all the updates, I was really looking forward to a new project but forgot my hard working boyfriend had a week off. Of course I wanted to do fun things together and go out into nature. The otter had to wait a bit. Despite all our outdoor activities, I did finish a lovely head and am now working on the rest of the otter and the pattern.

Most of you know I already made an otter pattern once, but I decided to make a completely new version, a much more mischievious looking one. This otter will have a younger and more whimsical appearance. Basil is a lovey otter, but he misses a bit of the characteristic funny otter looks.

There are two other patterns I almost can’t wait to start on. I already bought yarn for a giraffe pattern and after that I want to make an alpaca pattern, yes! I saw alpacas in a field and they are such silly looking creatures, I love them and all their fuzziness. I think I’m going to use an alpaca yarn to make one, how exciting!

See you soon with new and fun patterns!

Stories, Uncategorized

It’s time for something new

I’m so happy to announce that I have finished the updates. Last week I updated the last 14 patterns and now all my patterns are text edited for correct English and proofed a last time. The older patterns also have extra head shots of the animals so it’s easier the see where the eyes, ears, muzzles or bills go. And the patterns might even look more fancy than the most recent ones because of the decorative images of the animals on their backs. I will add those to the newest patterns too, but will do that ‘in between’ because it isn’t really necessary but just looking great. Adding those images made this experience more fun for sure, just look at them!

It was a huge endeavour and in the end I really got tired of it, but it was worth it. For most patterns that got a big make over, I’ve send a Craftsy and Ravelry update message. But I forgot for some and for the rest of them I skipped the messages. I didn’t want to bother you peeps with loads of emails. Here’s a list of the patterns I have updated in case you would like to have an updated version. Send me a message and your receipt and I’ll email or send the new version to your library.

There are a few patterns I made temporarily unavailable because I felt like making new and better versions of them. Basil the otter is the one I am starting with, Monty the marmot, the lop rabbit and Sjuffel the dog will follow, but I am not sure when because I also want to make a completely new pattern, a giraffe that is, after the new Basil. When I look at my work now, I am so proud. Thanks for all of your support, you crafters are fabulous!

Now we are updated. Hope to be here soon with a glimpse of a new otter.

Uncategorized

As seen on BBC Springwatch

Puffin_medium2

For the last three weeks, I have been watching one of my most favourite tv shows, BBC Springwatch. It is a fabulous series about wildlife’s life in spring (or autumn and winter) in the UK. It is a tv show that is such a delight to watch and I always learn so much from it. The show is divided in two parts, you first see a one hour episode on tv, and after that there is a half hour extra called Springwatch Unsprung you can watch online or on a certain red button if you live in the UK. Unsprung is a rather interactive bit, that evolves partly around the viewer.

For me, Springwatch is such an inspiring show and every year I try to crochet an animal that suits the Springwatch series. This time it was a Puffin, as I had seen one during my holiday to the UK and knew it would be featured in this years Springwatch series.

Just for the fun of it, I replied to a tweet to Springwatch, from a crafter who had knitted an adorable Springwatch inspired fish, by showing her the Puffin head I had just finished.

What happened next was amazing. I was watching Springwatch Unsprung when I saw to my utter surprise, the puffin head on my tv screen! I was totally flabbergasted. Wow, they actually picked out my puffin head to show in a bit about Springwatch inspired art made by the viewers. What a jolly surprise it was. I was feeling a bit euphoric after that as you can imagine.

It also made me rather enthusiastic to finish the puffin as soon as possible. I am working on the body and wings now and hope to have the puffin pattern finished within a few weeks!

Art, Chit and Chat

Kiekeboe

Bunz

Back, when I was in the holiday cottage, I tried to take some interesting pictures of Bunsie. I thought the result was not very exciting, but when looking through the pictures yesterday, this one caught my eye. Recurring visitors might recognize this bush as the bush in the drawing of the actual event. This is the bush the polecat ran past and I felt like sharing it.

Also, I wanted to give you a heads up about my upcoming pattern. A crochet tiger pattern. Some of you might think, ‘but that one wasn’t on your list’ and you are right dear reader. A while ago I joked to myself that if a certain person would see a tiger on his trip to India, I would make a crochet version. Later on I found it a rather silly idea, as tigers are more than just complicated to make in crochet. But the longer I thought about it and looked at pictures of this gorgeous animal, I decided it was not such a bad idea at all, and he did see a tiger. I definitely wanted to make a tiger, and a very good one! Now let’s hope I can succeed…