Patterns

Balthazar, realistic crochet cat pattern

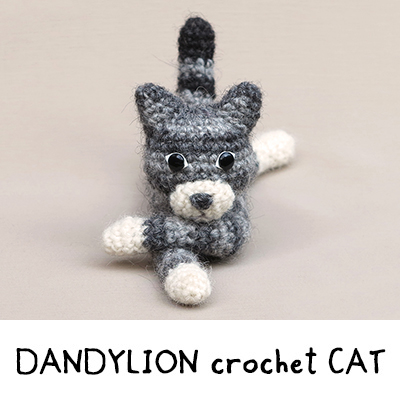
This must be the most mischievous-looking amigurumi cat you’ve ever come across! I proudly present to you my playful and realistic crochet cat pattern.

Realistic crochet cat

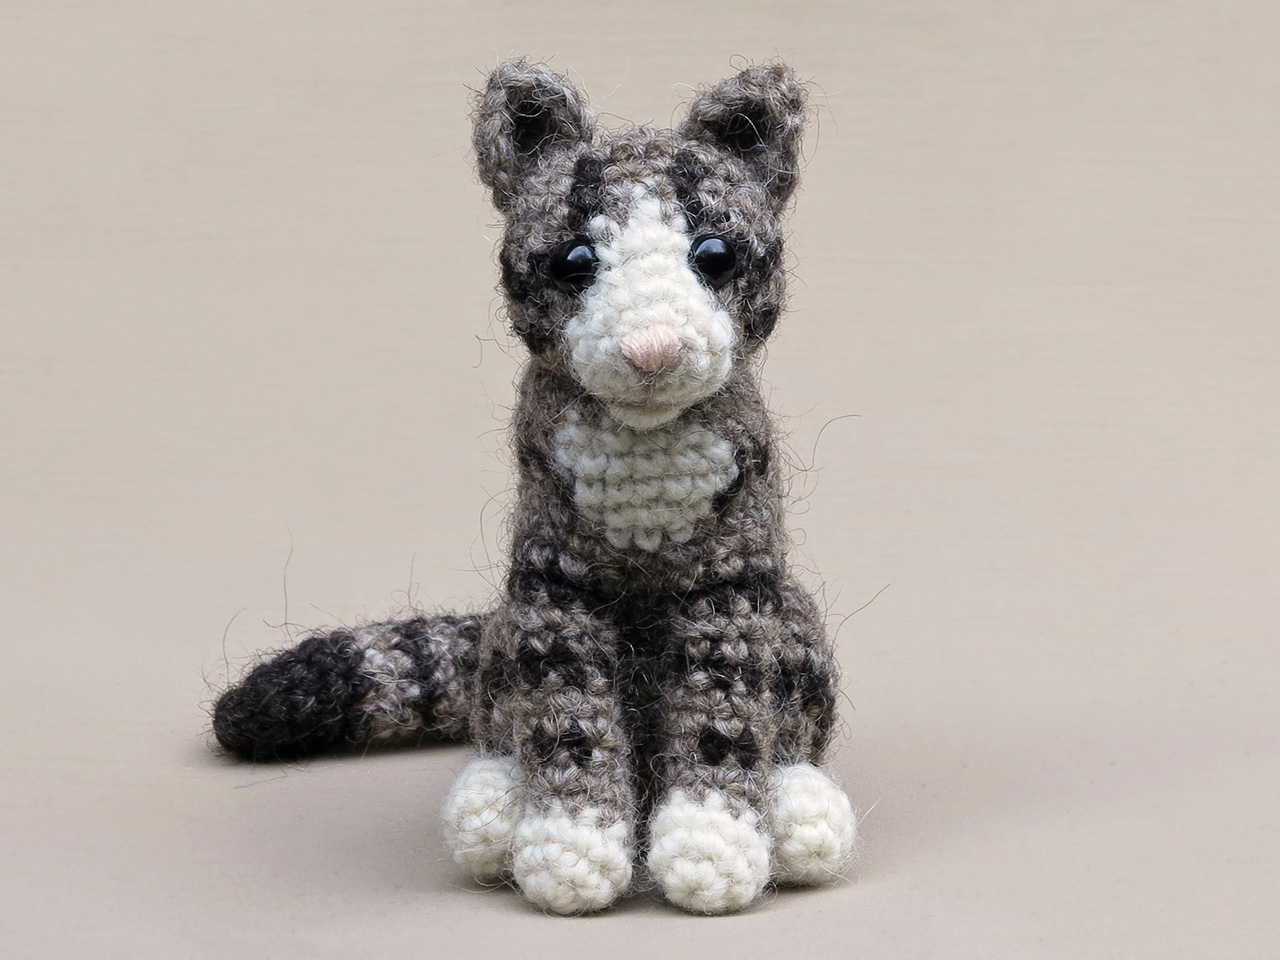
Whilst writing this blogpost, Balthazar is standing opposite me on my desk looking like he’s up to no good. I have no idea how I do it, give an animal an attitude like that. It seems like it just happens, or perhaps I unconsciously prefer the version that has that slightly imperfect feature and I decide that will be the final version. Anyway, this new and realistic crochet cat looks like an adolescent cat that is fun to play with.

And that was my goal to begin with. Cats are the most cuddly, soft and lovely pets one can wish for, but they also are the most silly housemates you can get. So I had to get that characteristic in both the face and the posture. When I started working on the head, I realised cats have a distinctive-looking snout, a small nose, an almost laughing mouth and that lovely chin I always loved to touch when we still had a cat. I had to figure out a way to create a little chin (without it being a sewn-on piece), which you can easily outline with a sewn-on mouth. At some point I got an idea that was both a super-easy thing to crochet and that worked perfectly.When you make this cat, you’ll find out the simple trick I used.

When I started working on a cat pattern, I wasn’t sure yet what type of cat I should make, so I tried out several different versions. It was a lot of fun, but it also created a dilemma: which one will I finish? And should I make separate patterns for each kind or add these to one pattern? For now, I decided to just publish one pattern, of the tabby cat. But I probably will make an add-on pattern later for different kinds of cats.

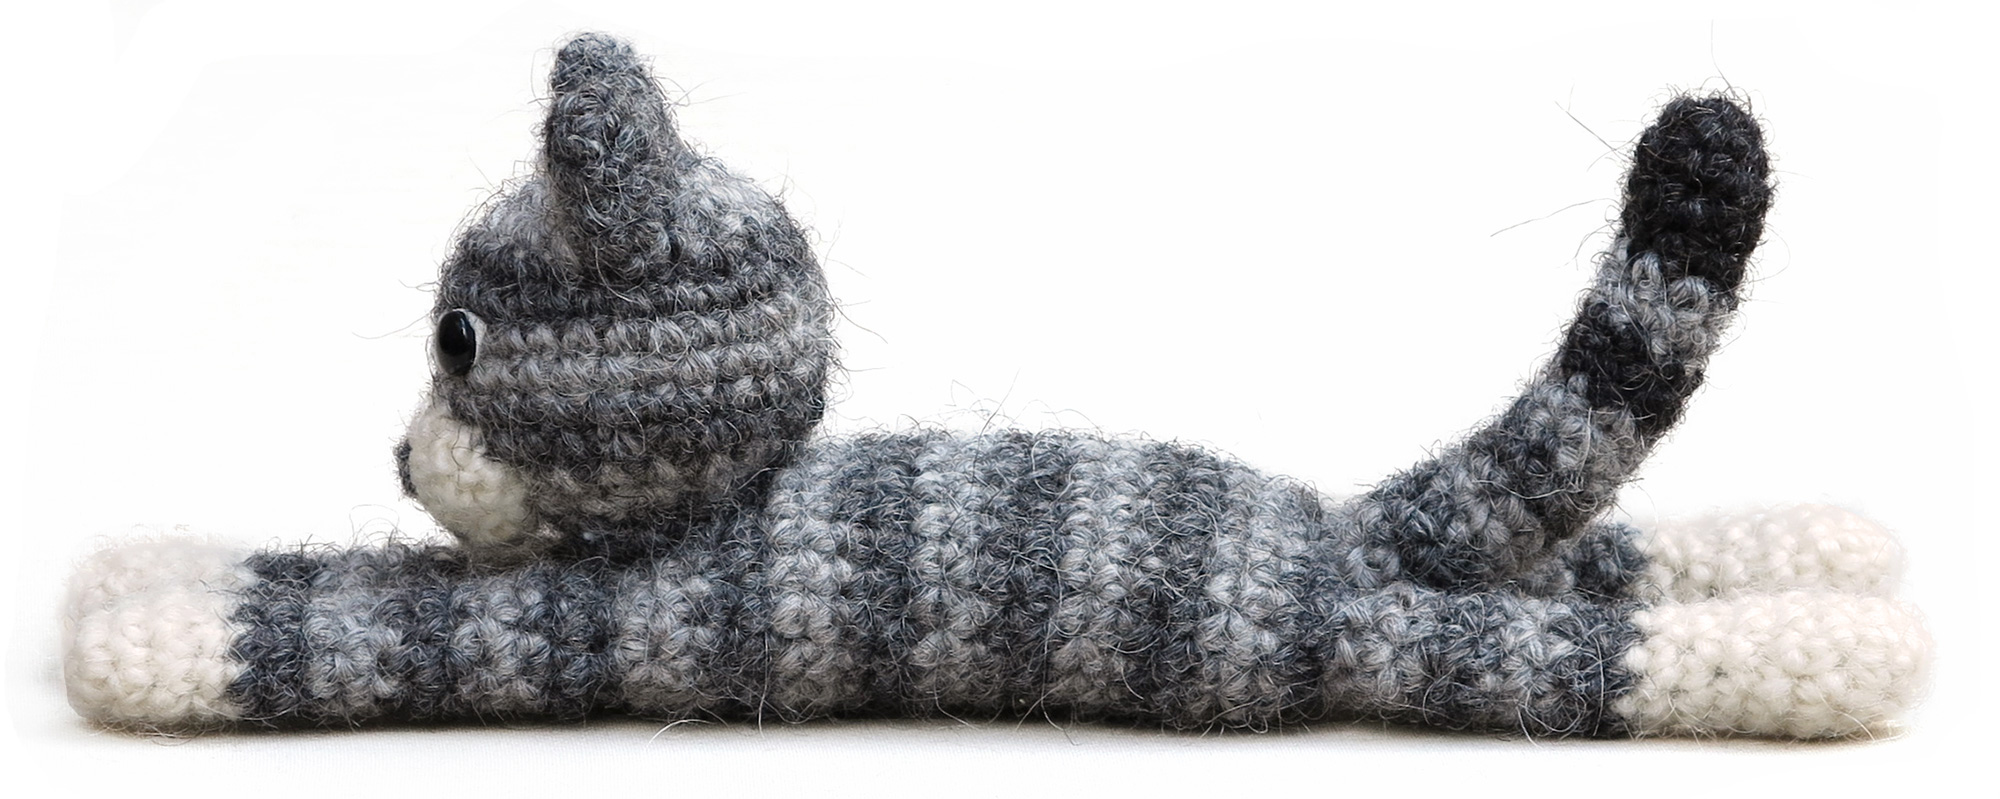
When I designed this pattern, I wanted a cat that could both sit down with a relaxed grin, but also would be a playful doll for children. So it had to be flexible, and that is why I chose loose hind legs, to make the cat just a bit more playful than a seamless cat would be. I had so much fun doing this photoshoot, at some point I started the ‘playful’ pictures, and they turned out so lively, I was delighted with the result.  Just take a look at this! Below these pictures you can find all the info you need about the pattern.

Info about & links to buy the pattern

This crochet tabby cat is not very difficult to make, except for the colouring of the head, which takes a lot of attention. For some rounds you change colour stitch after stitch, and one unspotted mistake ‘messes the whole thing up’. I added extra pictures for these complicated rounds, and it is just matter of recounting each round you’ve finished to be sure you’ve done it right. The rest of the pattern should be easy to do; attaching of the front paws needs some extra attention but I added extra images there, too.

This cat is made with Istex Lett Lopi, a 100% wool with a lot of fuzziness. He’s 5.1 inch /13 cm sitting. The pattern contains a clear and colour-coded description of how to crochet and assemble the doll, with instruction images next to the text and example pictures at the bottom to help you get everything right. In the pattern you can also find what materials you need, the yarn colour numbers — in short, everything you need to know to make your own realistic crochet cat. All the additional information you need to know about this pattern you can find in the shop listings. You can buy this pattern in my shop at Ravelry, Etsy or order it here.

And heads up! This pattern has a one dollar release discount till Thursday, the 11th of December!

Chit and Chat

An experiment

Hi dear crafters,

Just writing this short post to let you know I’m going to try something new. It might sound like a big thing, but not to worry, my style will never change. What I am going to do is trying a new type of body. For a long time I’ve been thinking about making more flexible crochet animals. The idea is that these dolls can lie on their bellies, but can also sit upwards. To make them more soft and flexible I’m thinking of using a different, thinner yarn, called Drops Alpaca.

I have no idea if this will work, and maybe I’m able to get the right result with Lett Lopi, but I need some time to work it out.

I also hope to create a type of body that needs less assembling in the end. Sno & Snoosle and Poochey & Fudge already are a start of that, but I want to take it a few steps further, where you create holes from where you later can crochet ahead for the arms and legs. I’m very curious myself how that will work out.

I’m very excited about this for a while now and finally decided to give it a go. I’m starting with a playful little fox. I can’t promise there will be a pattern soon, but I’ll try my best to create the fox pattern I have in mind.

Happy Easter for now!


Uncategorized

In my garden

Hi there lovely crafters! I’m writing this from my garden office. The weather is so very lovely finally, how can I sit inside while it is nice and warm outside?

Yes, I am finally working on my new otter pattern. After all the updates, I was really looking forward to a new project but forgot my hard working boyfriend had a week off. Of course I wanted to do fun things together and go out into nature. The otter had to wait a bit. Despite all our outdoor activities, I did finish a lovely head and am now working on the rest of the otter and the pattern.

Most of you know I already made an otter pattern once, but I decided to make a completely new version, a much more mischievious looking one. This otter will have a younger and more whimsical appearance. Basil is a lovey otter, but he misses a bit of the characteristic funny otter looks.

There are two other patterns I almost can’t wait to start on. I already bought yarn for a giraffe pattern and after that I want to make an alpaca pattern, yes! I saw alpacas in a field and they are such silly looking creatures, I love them and all their fuzziness. I think I’m going to use an alpaca yarn to make one, how exciting!

See you soon with new and fun patterns!

Patterns

New updates

Hi there, here’s an update on the progress of the updates. I am using the word ‘update’ so often these days I’m even dreaming it, lol. But I don’t mind doing it. The lovely thing about updating older patterns is, and I mean the big updates with new pictures and all, is that it reminds me of how beautiful some of the older animals are. Because their pictures looked less impressive and new crochet animals shift my attention, I seemed to have forgotten about them. But look at this!

When I added this picture to Dandylion’s pattern I thought ‘wow’! Despite his basic shape, Dandylion is the funniest and most mischievous looking crochet cat you can find. I really enjoyed updating his pattern.

I also updated Teddy’s and Balloo’s pattern. With the new pictures, they too look like I designed them recently and I love how they look now.

In short, these are the new updates:

Together with my editor, I’ve re-written the instructions for Dandylion’s head, which you don’t crochet in a spiral. With these new instructions you get an almost invisible colour change. It’s brilliant! And the pictures are new, but that’s obvious.


When I took new pictures of Balloo, I realised he looked much more like a lamb than a sheep! The pattern has new and improved pictures.


Teddy is the first original Son’s Popkes pattern. Now he finally shines bright in his new pictures. The former pictures had some pillows as background and a messy piece of fabric. Not very professional, but despite that people loved him.


Next week I’m doing an update on Chief and Rupert. Their bellies need to be replaced by the fancy neater bellies I design nowadays and they can use better pictures too.

Happy Easter dear crafters, I really need a little break.

Art

I wish you a crafty Christmas!

winter snow forest painting

It was a last minute activity to make a Son’s Popkes artwork Christmas card. I used to make one every year but last year I just did not feel like it. Crocheting gives me so much more pleasure and taking off a whole week from crocheting to paint a Christmas illustration was simply not going to happen. This year I did feel like making a Christmas illustration and I had a lovely idea, but still working on  something for a week…

I postponed and postponed till I had a few days before ‘sending time’. I decided to do a water colour illustration instead of acrylic paint on canvas. I had exactly two days to draw, colour, edit, print and write the cards. It was a bit hectic indeed. But also fun and exciting, one change only, could I do it?

I wish you all a merry Christmas dear crafty folks. And a very happy new year full of new crocheting, knitting and crafting endeavours!

Cheers 🦊🐢🦉 🐑🎉

Art, Stories

Badger update

Hi crafty folks, I just wanted to give you and update on the progress of the badger. Here is a little teaser image for you.

I have a first badger finished and it is already sitting on my bedside table. Now you probably are thinking ‘what am I supposed to do with that info?’ Well, when a doll is finished, I always bring it with me to the bedroom, because I want to have it close to me. You know, like when you were a kid and put your new shoes next to your bed. Or was that only me?

Anyway, now you probably will understand I love this badger plushy to bits. It wasn’t easy to create this more realistic shaped pattern and I got stuck many times. I will tell all about that when I publish the pattern. What I can say now is that this crochet badger means a lot to me. Badgers are me favourite animals and after seeing one in the wild this summer it is very special to now have a homemade miniature badger next to my bed. I think this badger radiates my love for the animal and will make a very special pattern for all animal and badger lovers out there.

And one more thing. This crochet badger is brushed and to be sure all the proportions are good before I could do the promo and pattern photoshoot, I had to finish a first badger. I also want pictures in the pattern of how you assemble the animal, so I needed an unfinished doll for that purpose. I am happy to say everything turned out good so that means I will have two almost identical badgers. Maybe I will sell one off them. I have to think about that.

See you next week 🦊

Uncategorized

An exciting new design

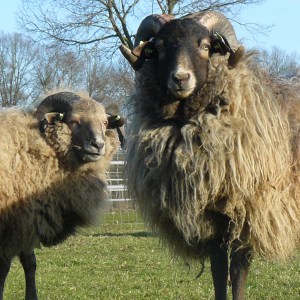
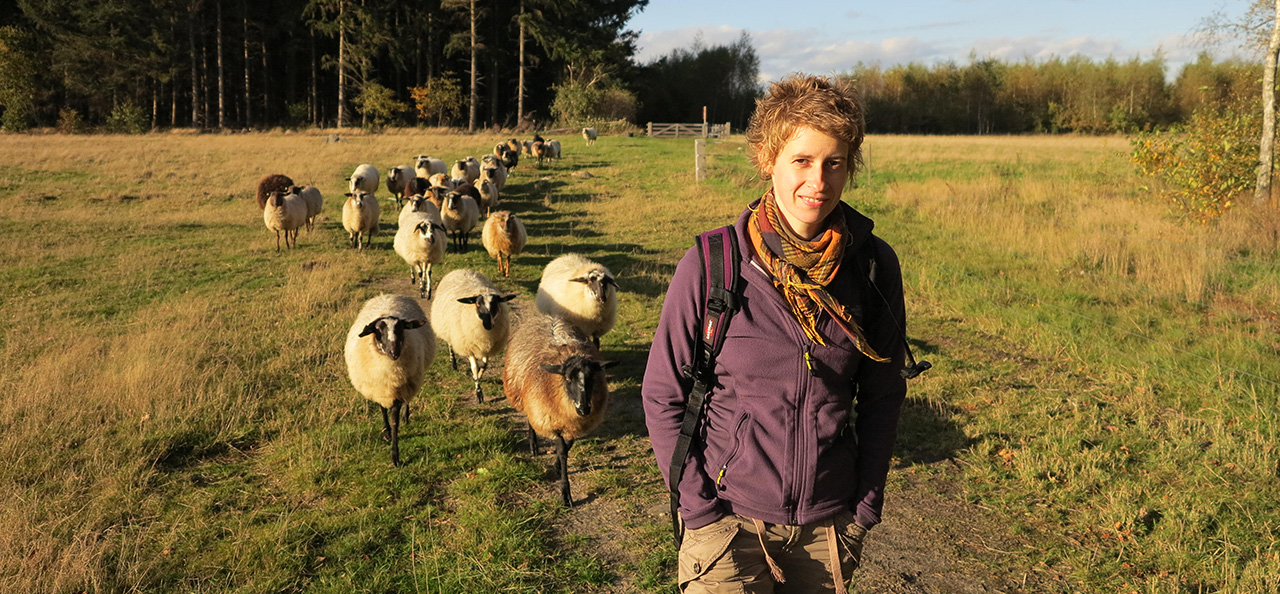
Sometimes a small coincidence can make all the difference. After I finished the piglet pattern, I started thinking about what animal to make next. Usually, I already know what to make next when I am working on another one but this time that wasn’t the case. That was until I saw this lovely crochet horned sheep on someone’s Instagram feed. It was not made in my style but it looked so nice and interesting that I could immediately visualise how I could make a fabulous sheep, it was instant inspiration. In fact, it made me so excited I wanted to start right away!

And I did. The sheep is already finished and looking spectacular. Now only the pattern needs to be written, edited and tested and I can hit publish.

I assume you are curious about the kind of sheep I made. I based my sheep on a local heather sheep called Drents heideschaap. It is a sheep I often see on our hikes through the countryside. The sheep are curious and friendly grazers with a slender build and long tails. The males have these gorgeous horns that grow in a lovely curl.

In my ‘about’ story I added a picture on which you see me walking with a tail of curious sheep, that is them indeed, but just the hornless females. In the last picture below (from the web) you see how the males look with their impressive horns.

Oh, I am so excited to show you the finished sheep and hope to be able to do so by the end of this week. Here are some glimpses and one funny pic of a curious young sheep I met this week.

See you at the end of the week!

Art, Stories

A very special project

This fresh new year, I am starting with a very special project. I am making the pattern for a fossilised monkey. And it is not even that simple, the monkey I am making is a prosimian or a lemur monkey. The researchers are not completely sure about it. This monkey, called Ida (based on Darwin’s name), died 47 million years ago and was found in Messel, Germany.

monkWhy am I making a fossilised monkey that lived 47 million years ago? To be honest, I’m not really a monkey fan. They just aren’t my kind of animals. I do love some lemurs and prosimians and please don’t get me wrong, I don’t dislike monkeys, but they aren’t on my list of cute and cuddly things that make me feel all happy like when I see a guinea pig, fox or squirrel.

But this Ida monkey does! This was the cutest and most beautiful monkey ever. A friend of mine, who is a wildlife and paleo artist, made the most fabulous illustrations for a book about Ida. Because Ida was so very well preserved, Esther could draw her exactly as she looked, except for the colours. They couldn’t see those from the fossil so she had to chose the most likely colours. And how she portraid Ida, I was in love with her from the start! She made the monkey look so gorgeous and exotic.

Ida is a lemur or prosimian monkey and has this specific type of body. I really like the shape of her head and flexible form. She is perfect for the monkey I like to make. The coloured illustration you see is one of the illustrations Esther made for the book. Ida is the baby monkey carried by the mother.

idaEsther has asked me before if I could make an Ida monkey, but I never wanted to because it doesn’t exist anymore and therefor crafters won’t recognise the crochet monkey. But lately I was thinking about making a hanging monkey and got stuck on which type. I asked Ether if she knew an extra cute one and of course she said I should make the Ida monkey. I wasn’t sure about it at first but the more I thought about it, the less unlikely it felt. Why wouldn’t I make a pattern for this type of monkey? Ida is absolutely gorgeous and If I design a hanging Ida monkey, I bet many crocheters would just love it. The colours can easily be replaced for colours of existing monkeys if one prefers so what’s the problem. It was done. I was making a fossilised monkey as first project of the year! Now to think of a suitable name…


Art, Patterns

Oakie, crochet armadillo pattern

Sitting as promised in my original Popke style, I proudly present to you Oakie the crochet armadillo.

armadillo crochet pattern

Wow, what a process this was. I never expected all the bumps on the road of designing this crochet armadillo pattern. In my previous post I explained about the challenge of making this interesting looking creature. Making an animal that would never, ever even think of sitting on its bottom, sit on its bottom was for starters a classical design issue. But the body armour was so utterly complicated to design that the sitting thing seemed nothing. I wrote about the smooth textured Linen stitch I was planning to use for the armour. When I started everything seemed so jolly well. What a perfect stitch for armadillo armour. But then some in- and decreasing had to be done and how on earth could I do that with this stitch? I googled for info and found nothing, who would have thought about that? People only seem to crochet scarfs and pillowcases with this stitch, not animals. So I had to find a way myself. After testing all sorts of solutions and almost writing a post here begging someone to help me, I found the solution to my problem. Decrease three stitches instead of two. How simple could it be. Not everything was rough on this road. From the start I knew how I was going to design the arms. The legs and feet just fell into place when I made them and the tail looks fabulous because it is worked flat.

I really like the almost reptile looking appearance of Oakie’s face. The smaller eyes, unworked back loops and chain stitches form a perfect whole to create that characteristic armour texture. The rugged Lopi yarn accentuates it even more. Oakie might be unable to roll himself into a ball, but you can easily imaging him to do so. Just look at him! This armadillo is the most special creature I have ever made a crochet pattern for. Below the pictures you can find info about this armadillo amigurumi and the links to buy the pattern.

armadillo-amigurumi

crochet-armadillo-amigurumi

Info about & links to buy the pattern

This very rugged but cuddly crochet armadillo is made with Istex Lett Lopi, a worsted weight wool. He is 14 cm / 5.5 inch when sitting. All the additional information you need to know about this pattern you can find in the shop listings. You can buy this pattern in my shop at Ravelry, Etsy or order it here. It contains a clear and colour coded description of how to crochet and assemble the armadillo with extra illustrations and example pictures at the bottom to help you get everything right. In the pattern you can also find what materials you need, the yarn colour numbers, in short, everything you need to know to make your own ancient looking friend.

And heads up, this pattern has a one dollar release discount till Wednesday the 28th.

Uncategorized

As seen on BBC Springwatch

Puffin_medium2

For the last three weeks, I have been watching one of my most favourite tv shows, BBC Springwatch. It is a fabulous series about wildlife’s life in spring (or autumn and winter) in the UK. It is a tv show that is such a delight to watch and I always learn so much from it. The show is divided in two parts, you first see a one hour episode on tv, and after that there is a half hour extra called Springwatch Unsprung you can watch online or on a certain red button if you live in the UK. Unsprung is a rather interactive bit, that evolves partly around the viewer.

For me, Springwatch is such an inspiring show and every year I try to crochet an animal that suits the Springwatch series. This time it was a Puffin, as I had seen one during my holiday to the UK and knew it would be featured in this years Springwatch series.

Just for the fun of it, I replied to a tweet to Springwatch, from a crafter who had knitted an adorable Springwatch inspired fish, by showing her the Puffin head I had just finished.

What happened next was amazing. I was watching Springwatch Unsprung when I saw to my utter surprise, the puffin head on my tv screen! I was totally flabbergasted. Wow, they actually picked out my puffin head to show in a bit about Springwatch inspired art made by the viewers. What a jolly surprise it was. I was feeling a bit euphoric after that as you can imagine.

It also made me rather enthusiastic to finish the puffin as soon as possible. I am working on the body and wings now and hope to have the puffin pattern finished within a few weeks!