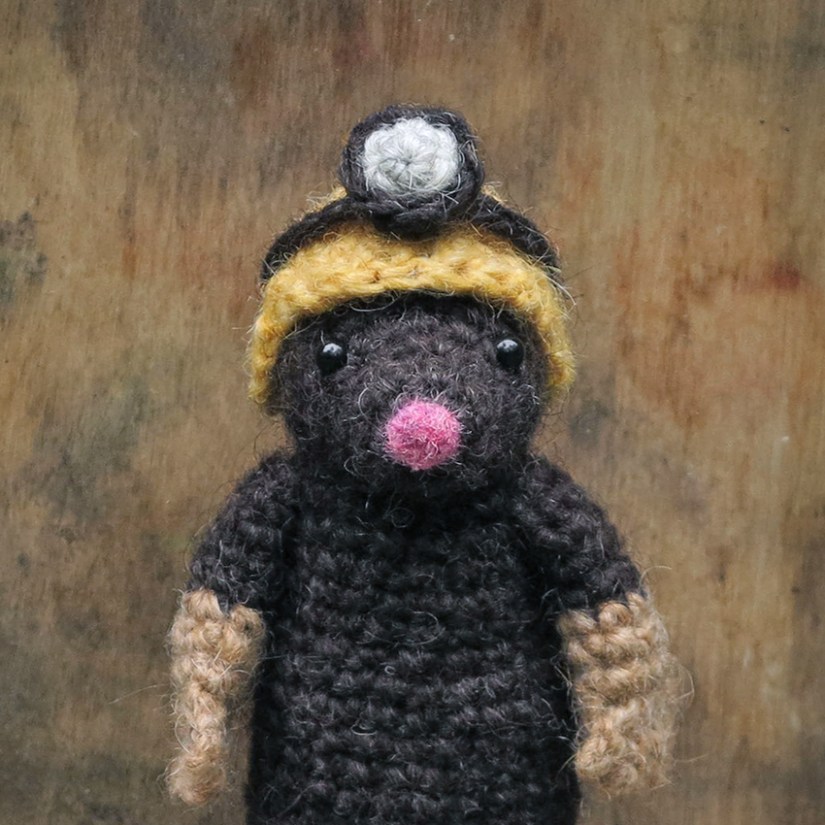
Just for the fun of it I made another free accessory pattern, a miners safety helmet for Moser the crochet mole. I really think these simple accessories make the animals look even more whimsical than they did. And with the holiday season coming, I already have a fun accessory in mind that will fit every animal, so keep an eye on the blog for these little free patterns.
Look at Moser, isn’t he an adorable little miner! Below the pictures you can find the free pattern for the miners safety helmet and links to buy the crochet mole pattern you can find here.

Miners safety helmet pattern
Helmet (yellow)
- magic ring of 6 = 6
- 2 sc in each around = 12
- (sc in next, 2 sc in next) x 6 = 18
- (sc in next 3, 2 sc in next, sc in next 4, 2 sc in next) x 2 = 22
- sc in each around = 22
Short rows to make the face opening
- sc in next 8, ch 1, turn
- in 2nd ch from hook sc in next 17 = 17, ch 1, turn
- in 2nd ch from hook sc in next 17 = 17, ch 1, turn
- in 2nd ch from hook sc in next 15, s2tog = 16, ch 1, turn
- in 2nd ch from hook sc in next 14, s2tog = 15, ch 1, turn
- in 2nd ch from hook s2tog, sc in next 2, s2tog, sc in next 3, s2tog, sc in next 2, *s2tog (*finish this last st as a sl st), weave in yarn end.
Helmet flap (yellow)
To make a little flap to protect Moser’s eyes better, you crochet a new row into the outside loops of the face opening edge. You are going to crochet 9 new stitches. If you look closely to the face opening of the helmet when it is facing you, you see 7 normal stitches around the opening (the part above the eyes).
Row 1
Work front loops only. To create the flap, you insert your hook from the outside in, into the 3rd st before the normal stitches and pull a loop. Now make an sc in the next 2 st, sc in next 7 normal stitches, sc in the next st of the side of the face opening. You should now see a new row of 9 st in the middle of the face opening. If not, start this row one stitch later. It is a bit hard to explain in which stitch to start, because the stitches at the side edges of the face opening look different and are harder to identify. As long as your flap is in the middle of the helmet, nicely placed above Moser’s eyes, everything is ok.
Row 2 (this row is worked in both loops like you normally do.)
ch 1, turn. In 2nd ch from hook s2tog, hdc in next, dc in next 3, hdc in next, *s2tog (*finish this last st as a sl st), weave in yarn end.
Lamp (dark brown and light grey)
Ouside in dark brown
- Magic ring of 4 = 4
- 2 sc in each around = 8
- sc in each around = 8, sl st and leave yarn end for sewing
Light in light grey
- Magic ring of 4 = 4
- (sc in next, 2 sc in next) x 2 = 6, sl st and leave yarn and for sewing
Strap
Make a ch of 25 with long ends for sewing at both sides.
Now assemble the lamp by placing the light into the lamp bulging out, but as deep into it as possible. Attach it with one stitch trough the back of the outside with the tail of the light. Use the tail of the lamp to secure the light better and weave in the end. Attach the strap to the middle of the lamp using both tails. You don’t join the strap but attach both sides next to the magic ring of the lamp. Like that the lamp isn’t placed completely on top of the chain which would make it stick out more, but runs over into it at both sides, giving a slightly flatter appearance.
Well look at that. You have made Moser a very sturdy helmet!


