Patterns

Finnly, crochet Border Collie pattern

After a long break, I’m delighted to publish this new dog pattern! Meet Finnly, the realistic Border Collie, a fabulous amigurumi of one of my favourite dogs!

realistic crochet dog pattern

When I started making dog patterns I really wanted to do a Border Collie, but the long-haired features of this Collie kept me from actually making one. I started with less hairy dogs, and then must have gone mad to make a bearded Schnauzer pattern. That actually was a lot of fun to do, and it gave me much inspiration for how to do the Border Collie and other dogs. For the Schnauzer I had used ‘reversed loop stitches’ to create the bearded face, and I knew those stitches would be very suitable for any kind of hairy dog.

So some time in May I started the Collie design. The head was finished pretty quickly, but then a lot of things happened in my life, good things! We finally could move to a new home, away from that noisy house we tried to make our home for so long. Moving means a lot of things to do, so I put the dog on hold until we had settled down in our new home and I had enough ‘space in my head’ to continue designing.

It felt so good to sit down at my improvised desk with a new view and peace and quiet. I worked my way through the body and back paws and spend a whole afternoon on making the fidgety hairy tail. And now I have this amazingly cute mini Border Collie sitting on my desk, waiting to be made by many other Border Collie fans out there.

This is not a very difficult dog to crochet, the reversed loop stitches take some getting used to, but when you get the hang of it they actually are fun to do.

Here are some more pictures of this adorable crochet dog amigurumi and below them you can find info about and links to buy the pattern.

Info about & links to buy the pattern

This is a moderate pattern to make. Most parts work up pretty easily, but the reversed loop stitches for the head, chest and tail take some extra effort. The Border Collie dog is made with Istex Lett Lopi, a 100% wool with a lot of fuzziness. It’s 5.1 inch /13 cm sitting. The pattern contains a clear and colour-coded description of how to crochet and assemble the Collie, with instruction images next to the text and example pictures at the bottom to help you get everything right. In the pattern you can also find out what materials you need, the yarn colour numbers — in short, everything you need to know to make your own adorably mini dog. All the additional information you need to know about this pattern you can find in the shop listings. You can purchase it in my shop at Ravelry, Etsy or order it here.

And heads up! This pattern has a one dollar release discount until October the 20th!

Because I had so much fun designing this hairy dog and because it looks a lot like the wolf I used as an example when I made Woolfie, my next pattern will be a ‘Woolfie advanced’. I think you can imagine how that’ll look! And after that… a realistic otter, I want to make a red cardinal bird, a skunk and a poodle. Oh, there are so many lovely animals to make next, see you soon!

Patterns

Free mini Easter bunny ears pattern

This is a must have pattern for all you Popke fans and amigurumi makers out there. With these fabulous bunny ears, you can turn each and every crochet animal into an Easter bunny. How exciting is that!?! It’s a super simple pattern and easy to adjust in size.

Just look at these two ‘new born’ Easter bunnies!

Instructions

For this pattern you need worsted weight yarn and hook E US/ 3,5 mm. I’ve used Lett Lopi yarn; colours barley 1419 and pale green 9421. You’ll also need sewing materials and a pipe-cleaner for the headband.

Ears

1. ch of 9, in 2nd ch from hook 2 sc, sc in next 6, 2 sc in last, turn, 2 sc in bottom loop of next, sc in next 7 = 19

2. ch 1 and go back, sc in 2nd ch from hook, sc in next 7, 2 sc in next 2, sc in next 8, sl st in last and leave yarn end for sewing. Weave in the other yarn end.

If the ears you made curl all different ways you don’t like, make them doubled. I didn’t do that because I like the playful effect. If you need bigger ears, repeat round 2 but do 8 sc’s before the increase and so on.

Headband

1. magic ring of 4 = 4

2-21. sc in each around = 4, sl st in 1st (keep going if you want it to be longer)

22. sc in each around = 4, sl st in 1st and leave yarn and for sewing.

Now stretch the tube and insert the pipe-cleaner. You can sew the band closed by putting the needle from the inside out through all the outside loops of the 4 st, clockwise. If you do it correctly, you can pull the yarn end and it will close the gap.

All you have to do now is attach the ears to the headband, about three rounds apart and a bit folded together at the bottom so they are a bit hollow.

There, now you can give all your Popkes an Easter bunny metamorphosis!

Here you can find the free pattern for Easter eggs and a little basket. You can easily turn the basket into the backpack you see in the pictures, by adding an extra strap to it.

Thank you Rafi Made It for giving me this lovely idea!

Patterns

Nims and Ermine, realistic crochet stoat pattern

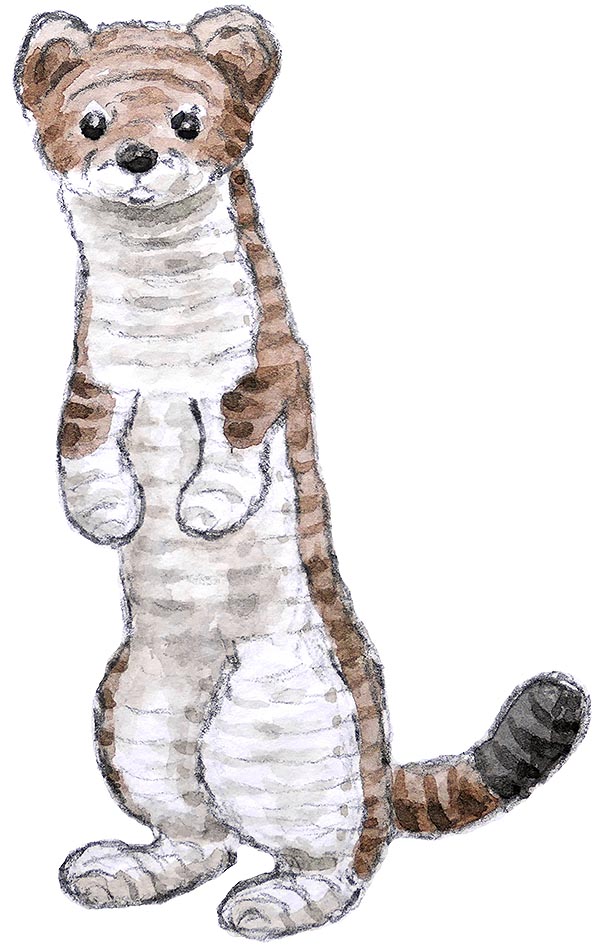
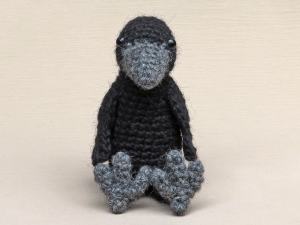
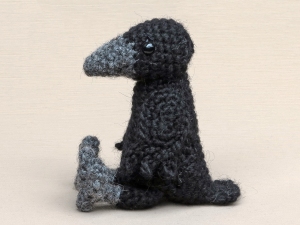
With much joy I present to you my first seamless amigurumi pattern, Nims and Ermine the stoats.

realistic amigurumi stoats

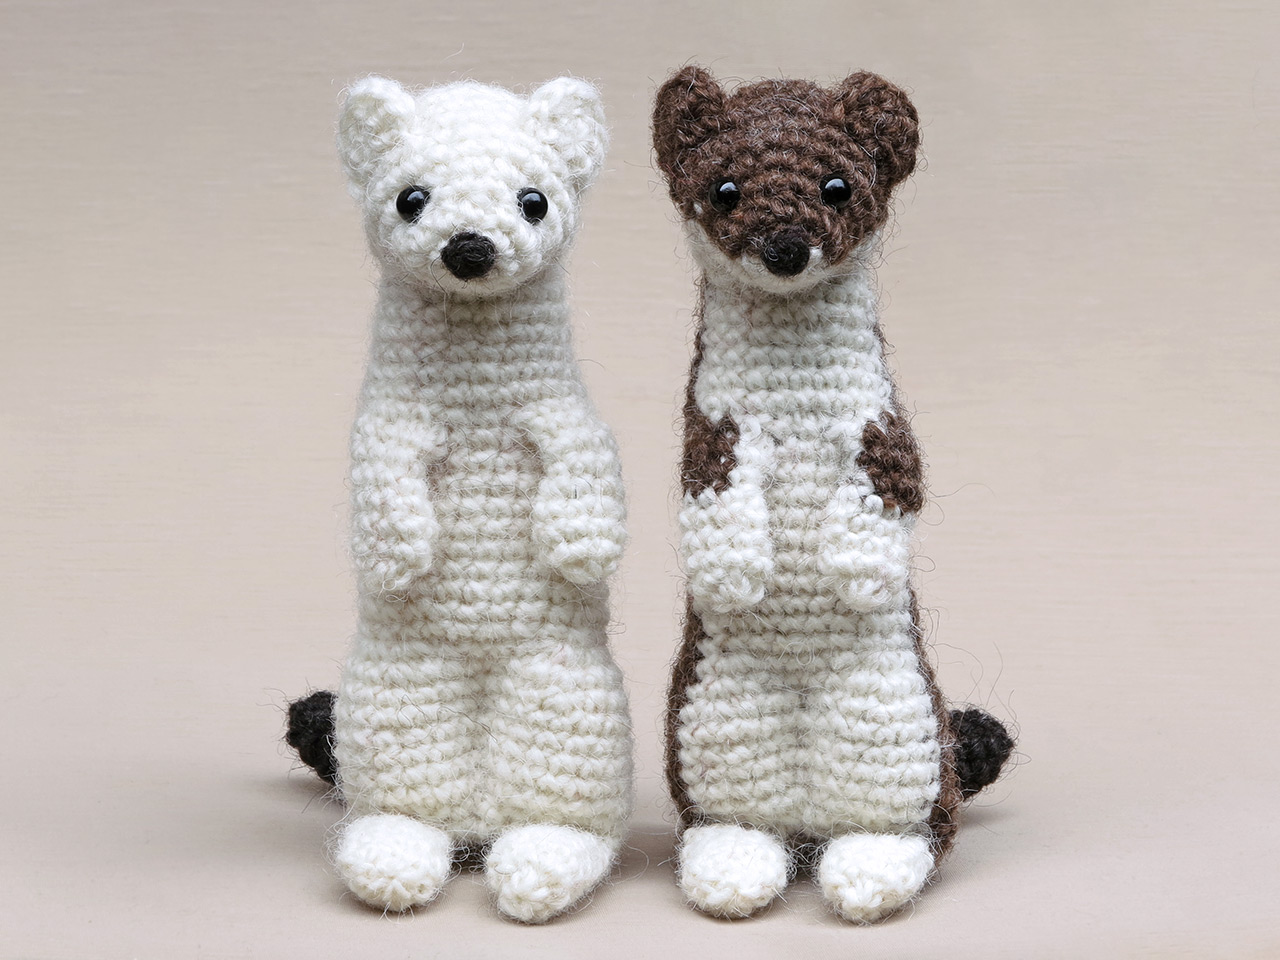
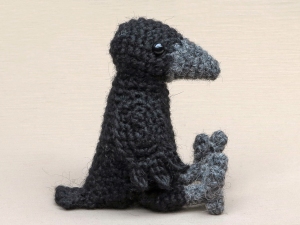
Ermine is the term used for animals that turn white in winter, hence the name for the white version. And with this pattern you can make a weasel too, they look quite similar except for their shorter tail without the black brush-tip. So if you skip that part you can make a weasel. Keep in mind, though, that in most parts of the world weasels don’t turn white in winter.

This animal took me the longest time ever to design, and I’ve learned so much much during the process. I stumbled upon many difficulties, and several times I almost gave up. But every time I decided to stop, I either got an idea of how to fix the difficulties, or I just realised it would be a waste to give up after all the time I had spent designing this already cute crochet animal. Now that Nims and Ermine are finished, I absolutely love the result, and I am glad that I didn’t give up.

Designing this pattern actually turned everything upside down, literally and figuratively speaking. Normally I design the head and then a body from the bottom up. But this time I designed the head and worked my way down, creating holes for the arms, designing hips, and continuing with the legs. Where I normally did increases, I now had to do decreases. I also used a different technique to create the bend for the neck. Early on I worked with short rows, but that results in a different texture of stitches. I discovered that there is another method where you crochet a chain to the first part of the head and continue working on the head and the chain, decreasing stitches to close the back of the head. When the head is finished, you attach a new strand of yarn to the other side of the chain and work downwards for the body, with not a seam to be seen.

This all works out perfectly well for a single-coloured doll, but a big challenge introduced itself when I started on the duo-coloured stoat. Now that technique with the chain became a difficulty, because the chain itself had to become duo-coloured. I had trouble with the tension, and the unused yarn was in the way; it just seemed undoable. It was only after I decided that this was an impossible pattern that I had the rather brilliant idea to carry the unused colour upwards on the chain. I don’t always carry the yarn with me in every stitch, but leave most of it resting against the inside of the work. The reason for that is partly because I find that easier, and also, when you work with sharply contrasting colours, you can see the yarn showing through the stitches. But for a chain it worked like a charm. The tension was good and you have both colours with you when you need them. I was delighted I had this fixed, and I finished the stoat in its Summer coat.

A seamless animal works up quickly and pleasantly when you have a pattern, but when you are designing the pattern, it takes much more time. Only when the stoat was finished was I able to see how it looked and what needed to be changed. Many times it wasn’t possible to just unravel a short bit, and I had to start all over again.
For the last version, I only had to change the colouring for the neck using the pattern I had made. But somehow for this version, the middle was off, and I couldn’t figure out why. I did it again, exactly the same as before, took it apart, tried again but still it looked crooked! It was so frustrating!

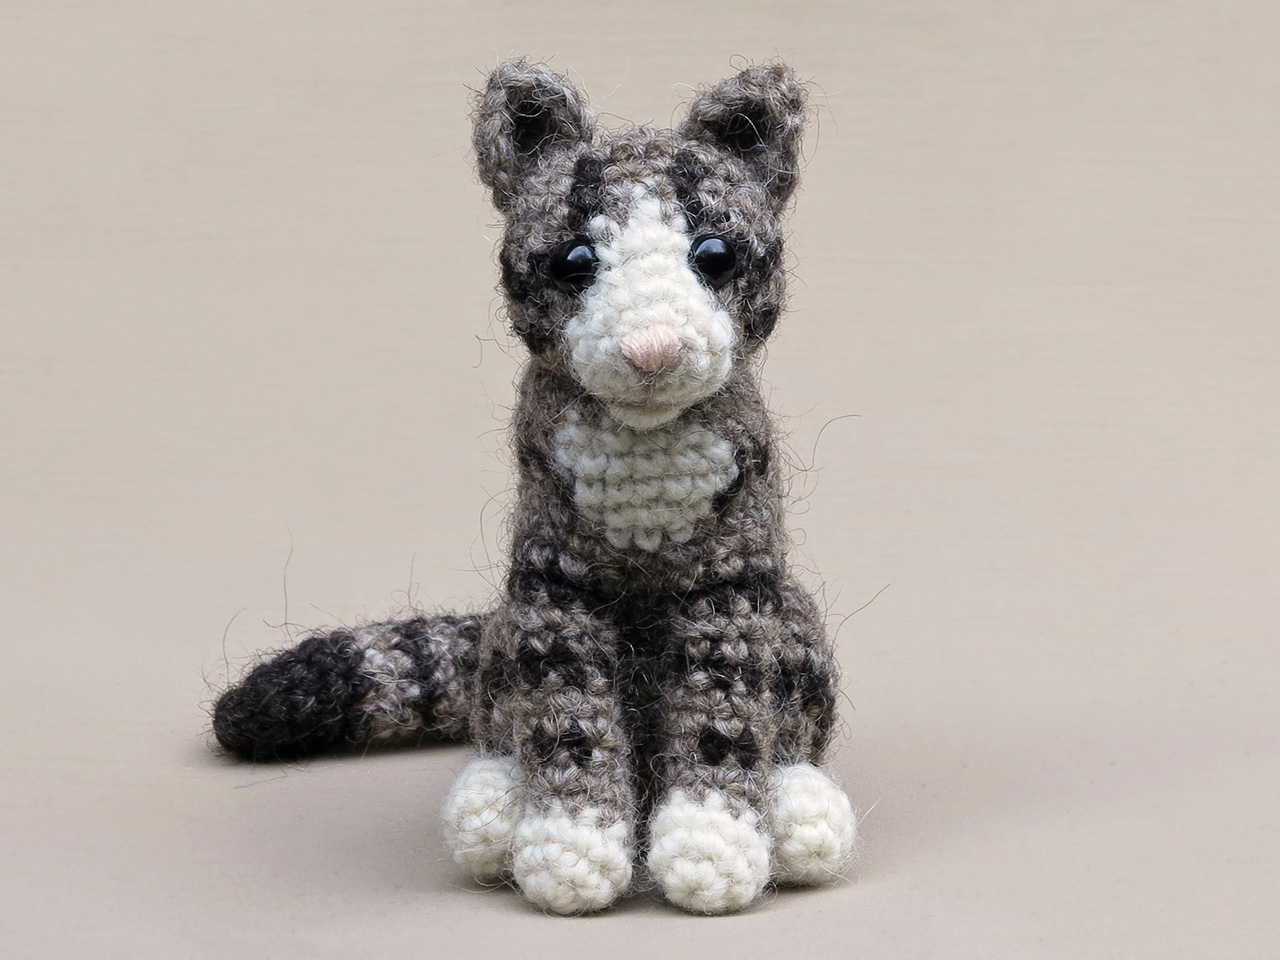
Sometimes what seems a big problem has a solution so simple, you never think of it. At some point I started fumbling around with the body, and I realised that it wasn’t crooked at all but just rotated too much. I just had to twist it to get it straight! The reason that this can occur must lie in the length of the body: when you work in a spiral in one direction and pull the piece in that direction all the time, it starts to look crooked. After I twisted the body, it now looks the same as the other versions, and that’s the stoat you see in the pictures.

To sum things up, this was the most challenging pattern I have made so far, and I almost lost my mind at one point, but it was totally worth it! I have mastered many new skills, and you will too! The stoats look realistic and cute at the same time!
Here are some more pictures of the seamless stoat amigurumi, and below them you can find all the info you need about the pattern.

Info about & links to buy the pattern

The pattern for the seamless, realistic crochet stoat is a bit more challenging to crochet than my other patterns. Working seamlessly requires different techniques that can be difficult for beginners; making the white version first could help you learn and master these skills. This animal is made with Istex Lett Lopi, a 100% wool with a lot of fuzziness. It’s 6.3 inch / 16 cm standing. The pattern contains a clear and colour-coded description of how to crochet and assemble the doll, with instruction images next to the text and example pictures at the bottom to help you get everything right. In the pattern you can also find out what materials you need, the yarn colour numbers — in short, everything you need to know to make your own lovable stoat. All the additional information you need to know about this pattern you can find in the shop listings. You can purchase it in my shop at Ravelry, Etsy or order it here.

And heads up! This pattern has a one dollar release discount until February the 21st.

Patterns

Bolthus, realistic ferret aka polecat pattern

I’m so delighted I can finally present to you my new and realistic ferret or polecat pattern. This is Bolthus, a crochet animal on all fours!

realistic ferret crochet pattern

When I started designing crochet animals I wanted to make playful, comic-looking dolls that looked realistic enough to resemble the real animal but are dolls. As I continued designing patterns, the realistic look became more and more important. I started making realistic sitting animals like the wolf and cat, and occasionally I designed an animal on all fours like the guinea pig, realistic hedgehog and badger. I’ve always found it extra challenging to design an animal on all fours, mostly because playfulness is important for my designs and a standing animal might look too stiff and statue-like.

So designing this very realistic ferret amigurumi was a big step. I wanted to keep it as simple and seamless as possible. I started designing the head and quickly realised that it would look very realistic if I made the head and neck in one piece. But that created difficulties: how could it be attached to a body? I’d already decided I was going to crochet the front paws and chest as one piece bottom-up, so now I had a head and neck crocheted top-down that I had to attach to a chest that was crocheted bottom-up. Sewing together two openings like that is very illogical, so I had to figure out a method to crochet the chest and front paws top-down continuing from the neck.

Normally I would crochet the paws first, crochet them together and work ahead for the body. Now I had to do it the other way around. Continuing from the neck, I crocheted the chest, and when it was long enough I split it in half to crochet the paws seamlessly to it. It worked like a charm!

So now I had a finished front piece that needed a back. Designing the back of the body was pretty straightforward, I just needed to figure out the right size and shaping. After a few attempts and a bit of help from my Instagram followers, I had the perfect long ferret body. Now all that needed to be done were the back paws and the tail. The back paws were a bit challenging because they needed a particular shape, but with some practising I managed to get them right. The tail was easy peasy!

The most exciting part came when all the pieces were finished: assembling the crochet ferret. For me this always takes a lot of effort, to get everything in the right place and write it down understandably for you. Sewing the back to the front piece needs to be done very precisely, and I think it is the most challenging part of this pattern. But if you do it with patience he’ll turn out fabulous.

My worries that an animal on all fours would become stiff didn’t turn out to be justified. I absolutely love this crochet ferret and find him very mischievous and playful-looking. I hope you like him as much as I do!

Here are some more pictures of this ferret or polecat amigurumi, and below them you can find all the info you need about the pattern.

Info about & links to buy the pattern

The pattern for this realistic crochet ferret/ polecat is pretty straight forward. The colour changes and assembling require some extra concentration. This animal is made with Istex Lett Lopi, a 100% wool with a lot of fuzziness. It’s 9.5 inch / 24 cm from nose to tail end. The pattern contains a clear and colour-coded description of how to crochet and assemble the doll, with instruction images next to the text and example pictures at the bottom to help you get everything right. In the pattern you can also find out what materials you need, the yarn colour numbers — in short, everything you need to know to make your own ferret. All the additional information you need to know about this pattern you can find in the shop listings. You can purchase it in my shop at Ravelry, Etsy or order it here.

And heads up! This pattern has a one dollar release discount until Thursday, the 12rd of August!

Patterns

Balthazar, realistic crochet cat pattern

This must be the most mischievous-looking amigurumi cat you’ve ever come across! I proudly present to you my playful and realistic crochet cat pattern.

Realistic crochet cat

Whilst writing this blogpost, Balthazar is standing opposite me on my desk looking like he’s up to no good. I have no idea how I do it, give an animal an attitude like that. It seems like it just happens, or perhaps I unconsciously prefer the version that has that slightly imperfect feature and I decide that will be the final version. Anyway, this new and realistic crochet cat looks like an adolescent cat that is fun to play with.

And that was my goal to begin with. Cats are the most cuddly, soft and lovely pets one can wish for, but they also are the most silly housemates you can get. So I had to get that characteristic in both the face and the posture. When I started working on the head, I realised cats have a distinctive-looking snout, a small nose, an almost laughing mouth and that lovely chin I always loved to touch when we still had a cat. I had to figure out a way to create a little chin (without it being a sewn-on piece), which you can easily outline with a sewn-on mouth. At some point I got an idea that was both a super-easy thing to crochet and that worked perfectly.When you make this cat, you’ll find out the simple trick I used.

When I started working on a cat pattern, I wasn’t sure yet what type of cat I should make, so I tried out several different versions. It was a lot of fun, but it also created a dilemma: which one will I finish? And should I make separate patterns for each kind or add these to one pattern? For now, I decided to just publish one pattern, of the tabby cat. But I probably will make an add-on pattern later for different kinds of cats.

When I designed this pattern, I wanted a cat that could both sit down with a relaxed grin, but also would be a playful doll for children. So it had to be flexible, and that is why I chose loose hind legs, to make the cat just a bit more playful than a seamless cat would be. I had so much fun doing this photoshoot, at some point I started the ‘playful’ pictures, and they turned out so lively, I was delighted with the result.  Just take a look at this! Below these pictures you can find all the info you need about the pattern.

Info about & links to buy the pattern

This crochet tabby cat is not very difficult to make, except for the colouring of the head, which takes a lot of attention. For some rounds you change colour stitch after stitch, and one unspotted mistake ‘messes the whole thing up’. I added extra pictures for these complicated rounds, and it is just matter of recounting each round you’ve finished to be sure you’ve done it right. The rest of the pattern should be easy to do; attaching of the front paws needs some extra attention but I added extra images there, too.

This cat is made with Istex Lett Lopi, a 100% wool with a lot of fuzziness. He’s 5.1 inch /13 cm sitting. The pattern contains a clear and colour-coded description of how to crochet and assemble the doll, with instruction images next to the text and example pictures at the bottom to help you get everything right. In the pattern you can also find what materials you need, the yarn colour numbers — in short, everything you need to know to make your own realistic crochet cat. All the additional information you need to know about this pattern you can find in the shop listings. You can buy this pattern in my shop at Ravelry, Etsy or order it here.

And heads up! This pattern has a one dollar release discount till Thursday, the 11th of December!

Patterns

Crowly, crochet raven pattern

I hereby present to you yet another dark and mysterious creature: meet Crowly the crochet raven, or crow, that’s up to you!

amigurumi crow

I’ve wanted to make a raven or crow for a long time, but until now I hadn’t gotten into it. Crows aren’t cuddly cute creatures, but they are very intelligent and compassionate. I’m fascinated by them, and I especially love ravens. For a few years now we’ve seen ravens in the areas we hike. Well, most of the time we just hear their ‘krok krok krok’ call.

Now why have I called my raven amigurumi ‘Crowly’? To be honest, I wasn’t sure wether to make a crow or a raven. I assumed crows would be more loved and popular than ravens, so when I first started I was thinking Crowly should be a crow. But because ravens are my personal favourite, I wasn’t sure what to choose. 

I think this pattern offers the option for the crafter to decide what it is. Ravens and crows both belong to the corvids (corvidea) species. There are differences between the animals, especially the size and the shape of the wings, but this pattern isn’t realistic enough to show them. The details I added for the wings will work perfectly for either a crochet crow or raven, or even a rook if you make the top of the beak black.

Here are some more pictures of this adorable crochet raven/ crow, and below them you can find info about and links to buy the pattern.

Info about & links to buy the pattern

Crowly is made with Istex Lett Lopi, a 100% wool with a lot of fuzziness. If you use the recommended yarn, your bird will be 5 inch / 13 cm standing.

The pattern is written in US terms and contains a clear and colour-coded description of how to crochet and assemble the animal, with extra illustrations and example pictures at the bottom to help you get everything right. In the pattern you can also find what materials you need, the yarn colour numbers – in short, everything you need to know to make your own cuddly corvid. All the additional information you need to know about this pattern you can find in the shop listings. You can buy this pattern in my shop at RavelryEtsy or order it here.

This pattern has a one dollar release discount till Thursday, the 25th of December, Christmas day! If you like to see quick updates about my work, please follow my Instagram page.

Patterns

Mr. Batty, crochet bat pattern

realistic crochet bat

I proudly present to you Mr. Batty, a common pipistrelle bat. The pipistrelle bats in my courtyard inspired me to make this realistic crochet bat pattern. For some years they seemed to have gone, but this year I started seeing them again at dawn. Fast and swift I saw them fly between the houses and when I got lucky, I could see their perfect shape very clearly, such gorgeous little creatures they are!

This small and realistic bat is a bit bigger than the palm of your hand when you hold it with the wings spread. I’ve decided to keep everything pretty basic but strikingly realistic. You only need two colours of yarn to make this bat amigurumi, and you can decide for yourself if you want to use pipe cleaners. I’ve used them to keep the wings in shape, but if you make Mr. Batty for a little child, pipe cleaners aren’t an option, so you can stuff the tiny arms and legs to make them more steady. If you’re experienced, you can make this bat in an afternoon, although the tiny arms and legs are a bit fiddly to crochet. I tried working with i-cords instead of 4-stitches-wide tubes, but the i-cords weren’t steady enough to balance the wings.

Info about & links to buy the pattern

Mr. Batty the crochet pipistrelle bat is made with Istex Lett Lopi, a 100% wool with a lot of fuzziness. If you use the recommended yarn, he will have a span width of 18.5 inch/ 22 cm. I would strongly recommend a fuzzy yarn, because it hides the seams of the colour changes.

The pattern is written in US terms and contains a clear and colour-coded description of how to crochet and assemble the crochet bat amigurumi, with extra illustrations and example pictures at the bottom to help you get everything right. In the pattern you can also find what materials you need, the yarn colour numbers, in short, everything you need to know to make your own wondrous crochet bat. All the additional information you need to know about this pattern you can find in the shop listings. You can buy this pattern in my shop at Ravelry, Etsy or order it here.

Heads up: it has a one-dollar release discount till Thursday the 21st of November.

Uncategorized

Dapper Poochey, crochet rabbit pattern

Well, what happened here? I liked Poochey in his trendy cardigan so very much that I decided to add him as a “dapper rabbit pattern” to my shops. Would you’ve been able to resist it? Just look at this utterly adorable crochet rabbit in his fancy outfits!

I cannot give myself all the credit for this. After I released the little cardigan pattern, Jan made a delightful collection of lovely little cardi’s for her crochet bunnies. After seeing her ever-so-cheerful pictures, I decided I just had to make a separate pattern for Poochey in the cardigan. I made Poochey’s cardigan just for fun after seeing a knitted rabbit wearing a sweater on Instagram, but when I put the sweater on and took that picture of him a while back, I began to get the idea of making a separate pattern. But because it felt a bit strange to re-launch an existing pattern, I wasn’t sure if it was a good idea. Jan made me realise that it is! Not everyone who visits my blog would want this version, but I don’t want other crafters missing out on this.

And how much fun it is to make all those little cardigans! Not only that, but all the tiny cute buttons you can’t put on your own garments, you can use for little bunny cardigans. I had so much fun looking for buttons that matched my bright-coloured sweaters. I found buttons with flowers and stars, animal-shaped ones – oh, there are so many fabulous buttons to find! And I cannot help laughing at Poochey’s expression every time I see it. In every single picture he has that same look of utter confusion. Which cardigan is your favourite? Mine is the green one with the star buttons.

Here are few original pattern pictures of this dapper crochet rabbit; below them you can find info about and links to buy the pattern.

Info about & links to buy the pattern

Poochey and his cardigan are made with Istex Lett Lopi, a 100% wool with a lot of fuzziness. If you use the recommended yarn, he will be 7 inch / 17 cm high. I would strongly recommend a fuzzy yarn, because it hides the seams of the colour changes.

The pattern is written in US terms and contains a clear and colour-coded description of how to crochet and assemble the crochet rabbit amigurumi, with extra illustrations and example pictures at the bottom to help you get everything right. In the pattern you can also find what materials you need, the yarn colour numbers, in short, everything you need to know to make your own dapper rabbit(s). All the additional information you need to know about this pattern you can find in the shop listings. You can buy this pattern in my shop at Ravelry, on Etsy or order it here.

Heads up: it has a one-dollar release discount till Thursday the 11th of June. If you already have the pattern for Poochey and Fudge but want to make Poochey like this, you can find the free pattern for the cardigan here.

Patterns

Floof, crochet squirrel pattern

Now look what I’ve made this time, a new and improved crochet squirrel pattern! This is Floof, a cheeky little grey squirrel.

realistic amigurumi squirrel

Some of you might be thinking, ‘A squirrel amigurumi? I thought you were making a fox?’ And erm, yes, I did write that I was working on a fox. But I just couldn’t resist using the new skills I learned when I made the rabbit pattern for a more realistic squirrel pattern. Because in short, that is how designing works sometimes. You learn something from making one animal and a process starts in your head where that new skill is enhanced for another animal. When I was working on the fox, an idea began evolving around a squirrel. ‘What if I made the rabbit’s body more curved with smaller feet and a bigger belly patch, wouldn’t that be perfect for a crochet squirrel if I combined it with a tail similar to the look of the hedgehog spines?’ I asked myself. And when something so exciting like that starts to take shape in my mind, I can barely wait to start making it!

It sounded easier than it was. Creating the characteristic curved back of a squirrel was rather difficult to design, especially when there also had to be a white belly patch. I couldn’t just decrease a few stitches here and there at the back and increase them on the front, because that made the belly look way too wide. So I had to find the right balance between a curved back and a good looking belly. The squirrel turned out a little bit less bent forward than I had imagined, but I like this better. Because Floof is standing up a bit, he looks much more cheeky, like real grey squirrels look after they’ve come into your garden and stolen the bird food. I’m very satisfied with this look – and the tail … the tail is magnificent! The loop stitches take a bit more time to make, but after they are cut and brushed a bit, they absolutely make a very realistic, fluffy squirrel tail. For this grey squirrel amigurumi, I’ve used two contrasting colours of a thinner yarn to create a double coloured effect, but you can of course choose one colour as well. I think I’m totally in love with this fellow. And because I like red squirrels even more, I think I’ll have to make another squirrel very soon! Here are some more pictures of this scrumptious looking crochet squirrel, and below them you can find info about and links to buy the pattern.

Info about & links to buy the pattern

Floof is made with Istex Lett Lopi, a 100% wool with a lot of fuzziness, and the tail is made with two strands of Lopi Einband held together. If you use the recommended yarn, your squirrel will be 5.5 inch / 14 cm standing.

The pattern is written in US terms and contains a clear and colour-coded description of how to crochet and assemble the crochet squirrel and acorn, with extra illustrations and example pictures at the bottom to help you get everything right. In the pattern you can also find what materials you need, the yarn colour numbers – in short, everything you need to know to make your own realistic fluffy squirrel. All the additional information you need to know about this pattern you can find in the shop listings. You can buy this pattern in my shop at RavelryEtsy or order it here.

This pattern has a one dollar release discount till Thursday the 20th of June.

Chit and Chat

An experiment

Hi dear crafters,

Just writing this short post to let you know I’m going to try something new. It might sound like a big thing, but not to worry, my style will never change. What I am going to do is trying a new type of body. For a long time I’ve been thinking about making more flexible crochet animals. The idea is that these dolls can lie on their bellies, but can also sit upwards. To make them more soft and flexible I’m thinking of using a different, thinner yarn, called Drops Alpaca.

I have no idea if this will work, and maybe I’m able to get the right result with Lett Lopi, but I need some time to work it out.

I also hope to create a type of body that needs less assembling in the end. Sno & Snoosle and Poochey & Fudge already are a start of that, but I want to take it a few steps further, where you create holes from where you later can crochet ahead for the arms and legs. I’m very curious myself how that will work out.

I’m very excited about this for a while now and finally decided to give it a go. I’m starting with a playful little fox. I can’t promise there will be a pattern soon, but I’ll try my best to create the fox pattern I have in mind.

Happy Easter for now!