Patterns

Balthazar, realistic crochet cat pattern

This must be the most mischievous-looking amigurumi cat you’ve ever come across! I proudly present to you my playful and realistic crochet cat pattern.

Realistic crochet cat

Whilst writing this blogpost, Balthazar is standing opposite me on my desk looking like he’s up to no good. I have no idea how I do it, give an animal an attitude like that. It seems like it just happens, or perhaps I unconsciously prefer the version that has that slightly imperfect feature and I decide that will be the final version. Anyway, this new and realistic crochet cat looks like an adolescent cat that is fun to play with.

And that was my goal to begin with. Cats are the most cuddly, soft and lovely pets one can wish for, but they also are the most silly housemates you can get. So I had to get that characteristic in both the face and the posture. When I started working on the head, I realised cats have a distinctive-looking snout, a small nose, an almost laughing mouth and that lovely chin I always loved to touch when we still had a cat. I had to figure out a way to create a little chin (without it being a sewn-on piece), which you can easily outline with a sewn-on mouth. At some point I got an idea that was both a super-easy thing to crochet and that worked perfectly.When you make this cat, you’ll find out the simple trick I used.

When I started working on a cat pattern, I wasn’t sure yet what type of cat I should make, so I tried out several different versions. It was a lot of fun, but it also created a dilemma: which one will I finish? And should I make separate patterns for each kind or add these to one pattern? For now, I decided to just publish one pattern, of the tabby cat. But I probably will make an add-on pattern later for different kinds of cats.

When I designed this pattern, I wanted a cat that could both sit down with a relaxed grin, but also would be a playful doll for children. So it had to be flexible, and that is why I chose loose hind legs, to make the cat just a bit more playful than a seamless cat would be. I had so much fun doing this photoshoot, at some point I started the ‘playful’ pictures, and they turned out so lively, I was delighted with the result.  Just take a look at this! Below these pictures you can find all the info you need about the pattern.

Info about & links to buy the pattern

This crochet tabby cat is not very difficult to make, except for the colouring of the head, which takes a lot of attention. For some rounds you change colour stitch after stitch, and one unspotted mistake ‘messes the whole thing up’. I added extra pictures for these complicated rounds, and it is just matter of recounting each round you’ve finished to be sure you’ve done it right. The rest of the pattern should be easy to do; attaching of the front paws needs some extra attention but I added extra images there, too.

This cat is made with Istex Lett Lopi, a 100% wool with a lot of fuzziness. He’s 5.1 inch /13 cm sitting. The pattern contains a clear and colour-coded description of how to crochet and assemble the doll, with instruction images next to the text and example pictures at the bottom to help you get everything right. In the pattern you can also find what materials you need, the yarn colour numbers — in short, everything you need to know to make your own realistic crochet cat. All the additional information you need to know about this pattern you can find in the shop listings. You can buy this pattern in my shop at Ravelry, Etsy or order it here.

And heads up! This pattern has a one dollar release discount till Thursday, the 11th of December!

Patterns

Boeloe, crochet koala bear pattern

Many crafters are making koalas at the moment to give attention to this vulnerable animal that has suffered so much from the fires in Australia. I decided to join them and have designed a beautiful koala amigurumi pattern. This is Boeloe, a super-sweet and vulnerable-looking crochet koala.

realistic crochet koala bear

It really breaks my heart to read and see what has happened to animals in Australia. Not only koalas and other mammals but so many birds, reptiles and insects have suffered and died in the fires. It’s devastating! I really hope designers like myself can help rescue wildlife and restore habitats a little bit by designing patterns so people can make and sell the dolls to collect money to donate to Australian wildlife organisations. I will donate the earnings from the first six patterns I sell to Wires, an Australian wildlife rescue organisation. I know it is not a huge amount, but even small donations help.

When designing this animal, there were so many pictures of burned and suffering animals that it was hard to find example pictures. But I tried my best to create a cute and realistic-looking crochet koala. Very important to me was to capture its vulnerability, which was difficult. I figured that as long as I tried to make the face look as realistic as possible, it should work. When I posted a teaser picture on Instagram, someone commented “so sweet and vulnerable-looking.” I was really glad it showed! Despite all the devastating pictures, it was interesting to design this pattern. To me, koalas are kind of silly-looking animals, with their big heads and lack of tails. But they are incredibly cute and they have absolutely gorgeous, almost teddy-like fur. It was a fun challenge to design a pattern that matched that cuteness. I had thought about brushing the animal all over, but I decided not to. The texture of the Lopi yarn adds enough fuzziness, and I like it when you can clearly see that it is a crochet animal. Here are some more pictures of this adorable koala amigurumi and below them you can find info about and links to buy the pattern.

Info about & links to buy the pattern

Boeloe is made with Istex Lett Lopi, a 100% wool with a lot of fuzziness. If you use the recommended yarn, your koala will be 4.7 inch / 12 cm sitting.

The pattern is written in US terms and contains a clear and colour-coded description of how to crochet and assemble the animal, with extra illustrations and example pictures at the bottom to help you get everything right. In the pattern you can also find what materials you need, the yarn colour numbers – in short, everything you need to know to make your own vulnerable friend. All the additional information you need to know about this pattern you can find in the shop listings. You can buy this pattern in my shop at RavelryEtsy or order it here.

This pattern has a one dollar release discount till Thursday, the 19th of February. I hope many of you will make this pattern, just for yourself or to sell, so that together we can help Australian wildlife! If you like to see quick updates about my work, please follow my Instagram page.

Patterns

Toadsies, free crochet toadstool patterns

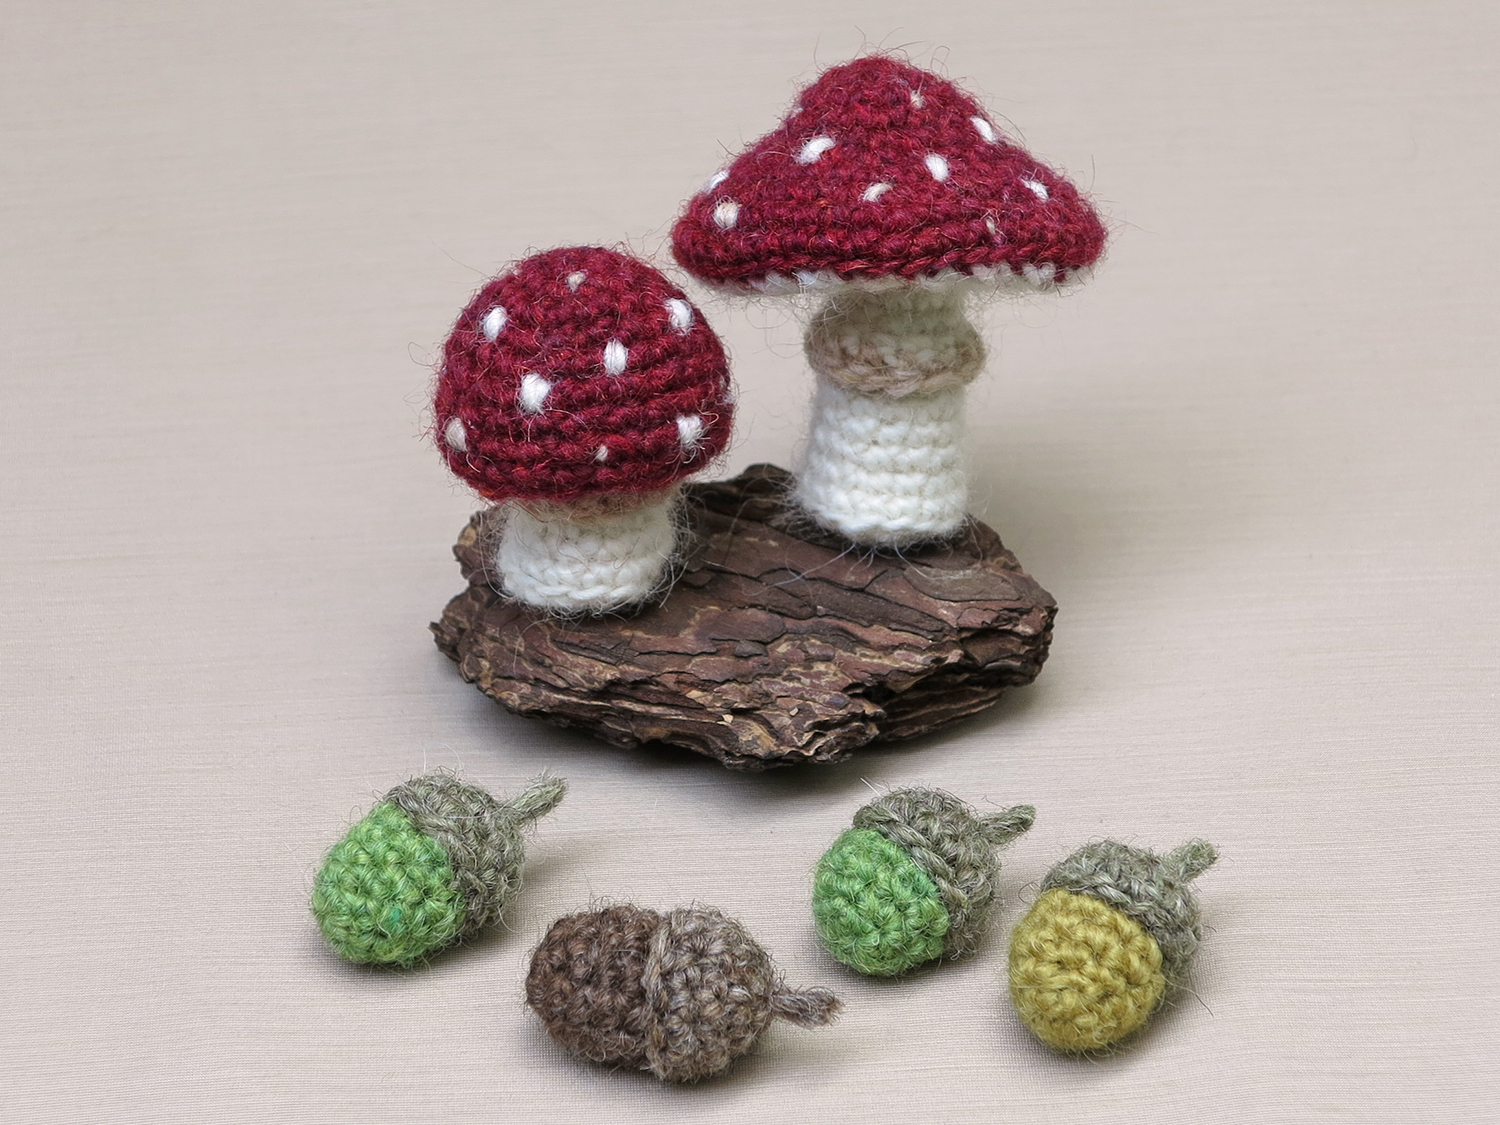
Hi there crafty folks, is it Autunm yet? I have another colourful treat for you! These are the Toadsies, two lovely free toadstool patterns.

toadstool amigurumi

During one of those heat waves in this crazy hot Summer, I decided to distract myself by making Autumnal items, as a reminder good times are coming. Occasionally my hands got so sweaty even this lovely distraction wasn’t working all that well, but nonetheless I enjoyed my endeavours and they resulted in some very cool toadstools. And what could be more rewarding than to share the lovely toadsies for free with you lot, my biggest supporters? Scroll all the way down to find the marvelous pattern, and if you prefer having an even more fabulous looking PDF of this pattern, make me a small donation and I’ll email you the pattern.

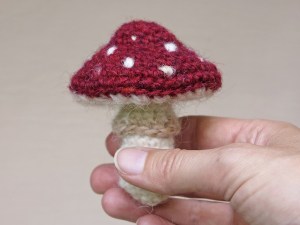
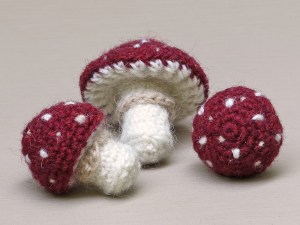
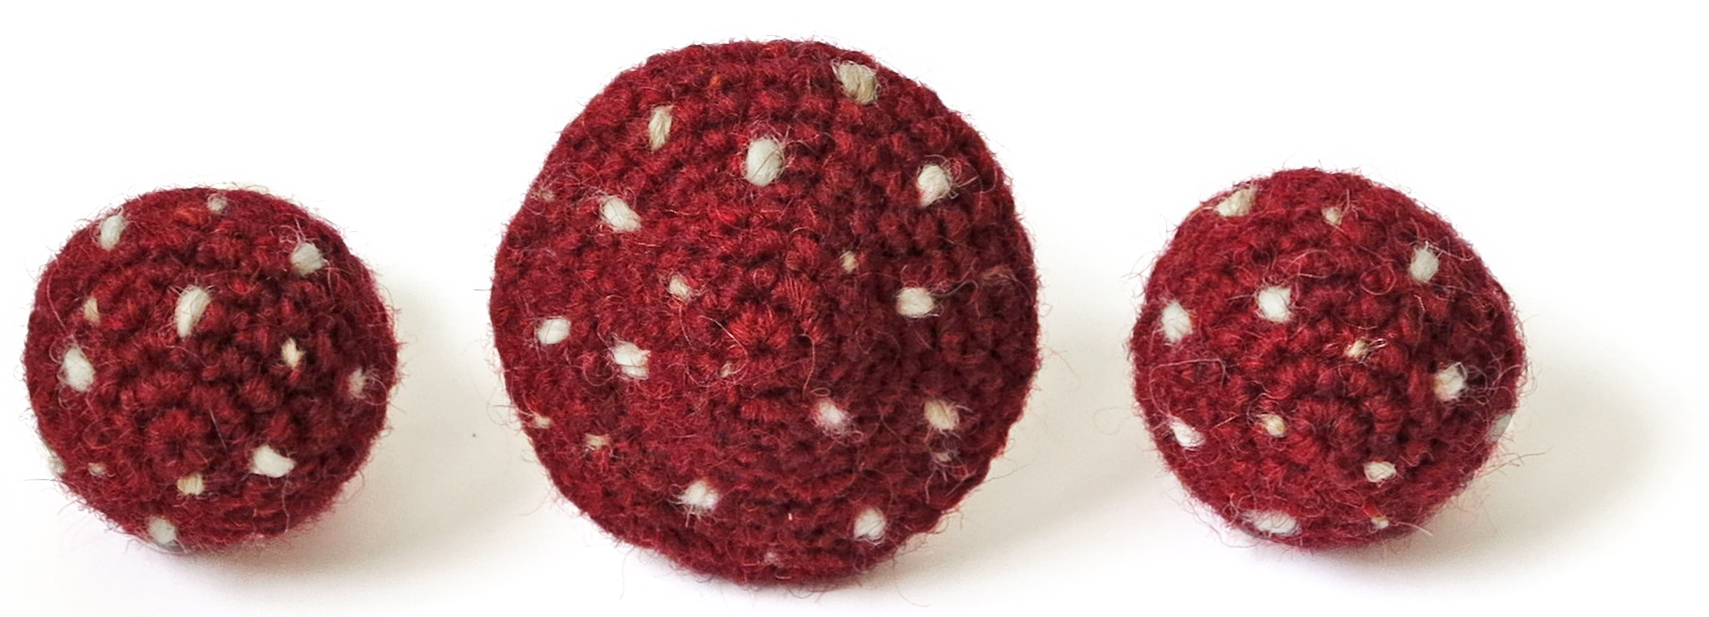
But first a bit more about how I came up with these. As you can see, I made almost-true-size fly agarics. A young one, and a more fully grown version. We often come across these fungus when walking through our local nature, and I always love the moment I can take the first pictures of them with my phone. You know, from below to get that immense statue of a mushroom effect. In these cool pictures, you can get a good view of the spores and so I had to create them in my toadsies. Also very important to me was to create different sizes of little spots, to get a realistic appearance.

Making these was fun, I figured out pretty soon I could create the spores with treble crochet stitches, and the spots look totally “spot on” and even help to keep the toadsies in shape. And maybe the best thing about these I saved for last, you can make these crochet toadstools in one go. So go for it, I say!

Toadsies, crochet toadstool patterns

This pattern is written in standard American crochet terms. It’s useful to read it before you start. If you use the recommended yarn, your toadstools will be 9 cm / 3.5 inch high (wide version) and 7 cm / 2.8 inch high (small round version).

For these toadstools you’ll need worsted weight yarn and an E US/3.5 mm crochet hook. You’ll need three colours of (Lètt Lopi) yarn: red (1409), sheep white (0051) and barley (1419). A small amount of each colour will do. You will also need fibrefill to stuff the toadstools.

Abbreviations: ch = chain, sc = single crochet, st = stitch, sl st = slip stitch, hdc = half double crochet stitch, BLO = work in back (inside) loops only, s2tog = invisible decrease

The toadstools are worked in the round/ spirals. You can use a stitch marker to mark the beginning of a round. Move it up each time you start a new round. About changing colour: always change colour in the last loop of a stitch, so the loop on the hook you end with is the new colour. That means the next stitch is in the new colour, not the one you changed in.

Instructions

These toadstools are made in one piece. You start with the red colour to create the top. The first round of the white inside of the toadstool you will work in the back loops (BLO) only to create a nice folding line. In this round you decrease the number of stitches by half to create a flat inside; the dc’s & trebles will create the spores. After these rounds you will make a new folding line by working in BLO again, and then you work your way down to create the stems.

Round toadstool

Start in red, change colour to white and straw when indicated. 

1. magic ring of 6 = 6

2. 2 sc in each around = 12

3. (sc in next 3, 2 sc in next) x 3 = 15

4. (sc in next 4, 2 sc in next) x 3 = 18

5. (sc in next 5, 2 sc in next) x 3 = 21

6-8. sc in each around = 21

9. (sc in next 6, 2 sc in next) x 2, sc in next 6, sc in next, sl st in white in BLO in same = 24, cut red and continue in white.

You have made that white sl st in the back loop to create the neatest colour change possible. Count the sl st as a st. I experimented and this little trick creates an almost straight red edge with as small a bump as possible.

Stuff the first part of the toadstool. Stuff flexibly, leaving a little hole in the middle. Don’t just put the stuffing in but push it against the sides and mould the outside. The hole that is left in the middle you can use to shape the toadstool.

Special stitch instruction for dc dec, this is worked in BLO: yarn over (yo) and insert your hook into next st, (yo) and draw the yarn through the st, insert the hook into next st, yo and draw the yarn through the st, yo and draw the yarn through 3 loops on the hook, yo and draw the yarn through the remaining 2  loops on hook.

10. in BLO:  ch 2, dc dec x 12 = 12 (the ch 2 you only do in this round)

11. in 3rd ch from hook in BLO: sc in each around = 12

12. in BLO: sc in each around = 12

13-14.  sc in each around = 12

15.   (sc in next 3, 2 sc in next) x 3 = 15

16.   in BLO: (sc in next 3, s2tog) = 12 

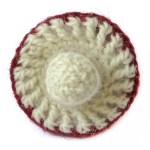
Now you can stuff the rest of the toadstool. It is important to stuff it flexibly and to shape the cap correctly by pushing the spores (dc stitches) inwards with both thumbs as you can see in the image below. When you stuff the stem, keep that shape in mind.

17.   s2tog x 6 = 6, sl st and leave a very long yarn end for sewing and embroidering the little white dots.

Sew the hole closed by putting the needle from the inside out through all the outside loops of the 6 st, clockwise. If you do it correctly, you can now pull the end and it will close the gap. Weave in the end so you’ll have a nice flat bottom. Don’t cut the remaining the yarn end but leave it long for now. After you’ve created the straw-coloured skirt around the stem, you will use the white yarn end to shape the toadstool and create the white dots. 

The little skirt in straw

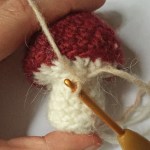
Find the first front loop of round 11 (the front loops closest to the stem) and attach your yarn to it with a sl st; sc in same, ch 1 & dc in next, sc in next, ch 1 & dc in next, dc in next, sc in next, ch 1 & dc in next, sc in next 2, ch 1 & dc in next, dc in next, sc in next, sl st in 1st st and leave a long yarn end to add some straw coloured spots to the cap.

Finishing

To finish this lovely toadstool, use the white yarn end to secure the bottom of the cap that was pushed inwards while at the same time embroidering the spots:  

Step 1. First sew a stitch into the bottom of the cap between the front loop of rounds 10 and 11 and let the yarn enter above it somewhere in the red cap. Pull the yarn as tight as necessary and sew a stitch into the cap. Now make the dot as big as you like. 

Step 2. When the dot is the size you like, sew the yarn back to the white bottom of the cap without tension on the strand and take one stitch to secure the yarn. 

Repeat steps1 & 2 all the way around so the bottom of the caps stays shaped a bit inwards and there are plenty of white dots. If you like you can also add a few straw-coloured dots, that’s up to you.

Wide toadstool

Start in red, change colour to white and straw when indicated. 

1. magic ring of 6 = 6

2. 2 sc in each around = 12

3. (sc in next 3, 2 sc in next) x 3 = 15

4. (sc in next 4, 2 sc in next) x 3 = 18

5.   sc in each around = 18

6. (sc in next 2, 2 sc in next) x 6 = 24

7.   (sc in next 3, 2 sc in next) x 6 = 30

8. (sc in next 4, 2 sc in next) x 6 = 36

9. (sc in next 5, 2 sc in next) x 5, sc in next 5, sc in next, sl st in  white in BLO in same = 42, cut red and continue in white,  like you did for the round toadstool.

Special stitch instruction for treble dec, worked in BLO: yarn over (yo) 2 times and insert your hook into next st, (yo) and draw the yarn through the st, insert the hook into next st, yo and draw the yarn through the st, yo and draw the yarn through 3 loops on the hook, yo and draw the yarn through the remaining 3 loops on the hook.

For the hdc tog: yarn over (yo) and insert your hook into next st, (yo) and draw the yarn through the st, insert hook into next st, yo and draw the yarn through the st, yo and draw the yarn through the 4 loops on hook.

10.   in BLO:  ch 3, treble dec x 21 = 21 (the ch 3 you only do in this round)

11.   in 4th ch from hook: (hdc in next 5, hdc tog) x 3 = 18


Stuff the first part of the toadstool like you stuffed the round version.

12.     (sc in next, s2tog) x 6 = 12

13.   in BLO: sc in each around = 12

14-15. sc in each around = 12 

16.   in BLO: sc in each around = 12

17-20. sc in each around = 12

21.   (sc in next 3, 2 sc in next) x 3 = 15

22.   sc in each around = 15

23.   in BLO: (sc in next 3, s2tog) x 3 = 12

Now you can stuff the rest of the toadstool, like you did for the round version. For this toadstool it’s also important to push the spores inwards as much as possible.

24.   s2tog x 6 = 6, sl st and weave in yarn end.

The little skirt in white and straw

Hold your toadstool upside down and attach the yarn as in the round version to the last front loop of round 11. (It’s the last because you are holding the toadstool upside down.) 

1. sc in each front loop around, change colour to straw in last st.

2. sc in next, dc in next, 2 dc in next, sc in next 2, ch 1 & dc in next, dc in next, hdc in next, sc in next 2, hdc in next, sc in next, sl st in 1st and weave in yarn ends.

Finishing

Finish this toadstool like the small round one, but attach a new, long strand of white yarn close to the stem and use that to shape the toadstool and add the dots. In the image below you can see how I arranged my toadstool’s little dots.

You can make as many of these as you like; try making one in orange or browns. Enjoy Autumn!

Copyright © 2018 by Sonja van der Wijk. Please do not reproduce this pattern in any way.

Patterns

Matisse, crochet giraffe pattern

Very proud and happy I present to you my jolly new pattern, Matisse the giraffe.

giraffe amigurumi pattern

When I started designing this crochet giraffe amigurumi I loved the challenge and was excited by the idea of creating a realistic and cute giraffe doll. And I have to admit, I even surprised myself with the result. I think my giraffe looks absolutely fabulous! When the head was pinned to the first prototype body, I was stunned with how it looked, somehow I managed to get the spots in excactly the right place to get a perfect giraffe skin, it was amazing. A a few little adjustments would make everthing look ‘spot on’, but the main shape was just right.

As for all my crochet animal patterns, my giraffe had to have a realistic appearance. The spots are very important to achieve that. Real giraffes have many spots, the further down their body the bigger and there is some sort of pattern in them, like water puddles on the beach when it is low tide. I knew that with my limited number of spots, most important was to resemble that look.

Another special thing about this giraffe are his long ‘arms’. Giraffes are special looking creatures with their long necks and diagonal backs and because I wanted to make a doll shaped giraffe, it is a bit hard to reproduce that look. I think the longer arms do suggest that shape and also make this doll able to sit in different positions. I just love it when Matisse sits forward with his front paws between his legs and like that he even gets that unique giraffe shape. I hope you crafters are just as surprised and happy with this doll as I am!

Info about & links to buy the pattern

Matisse is made with Istex Lett Lopi, a 100% wool with a lot of fuzziness. He is 6.5 inch/ 16,5 cm when sitting. The pattern is written in standard American crochet terms and contains a clear and colour coded description of how to crochet and assemble this animal, with extra illustrations and example pictures at the bottom to help you get everything right. In the pattern you can also find what materials you need, the yarn colour numbers, in short, everything you need to know to make your own realistic and playful crochet giraffe amigurumi. All the additional information you need to know about this pattern you can find in the shop listings, like the yarn you need etc. You can buy this pattern in my shop at Ravelry, Etsy or order it here.

This pattern has a one dollar release discount till Tuesday the 3rd of July!

Uncategorized

In my garden

Hi there lovely crafters! I’m writing this from my garden office. The weather is so very lovely finally, how can I sit inside while it is nice and warm outside?

Yes, I am finally working on my new otter pattern. After all the updates, I was really looking forward to a new project but forgot my hard working boyfriend had a week off. Of course I wanted to do fun things together and go out into nature. The otter had to wait a bit. Despite all our outdoor activities, I did finish a lovely head and am now working on the rest of the otter and the pattern.

Most of you know I already made an otter pattern once, but I decided to make a completely new version, a much more mischievious looking one. This otter will have a younger and more whimsical appearance. Basil is a lovey otter, but he misses a bit of the characteristic funny otter looks.

There are two other patterns I almost can’t wait to start on. I already bought yarn for a giraffe pattern and after that I want to make an alpaca pattern, yes! I saw alpacas in a field and they are such silly looking creatures, I love them and all their fuzziness. I think I’m going to use an alpaca yarn to make one, how exciting!

See you soon with new and fun patterns!

Stories, Uncategorized

It’s time for something new

I’m so happy to announce that I have finished the updates. Last week I updated the last 14 patterns and now all my patterns are text edited for correct English and proofed a last time. The older patterns also have extra head shots of the animals so it’s easier the see where the eyes, ears, muzzles or bills go. And the patterns might even look more fancy than the most recent ones because of the decorative images of the animals on their backs. I will add those to the newest patterns too, but will do that ‘in between’ because it isn’t really necessary but just looking great. Adding those images made this experience more fun for sure, just look at them!

It was a huge endeavour and in the end I really got tired of it, but it was worth it. For most patterns that got a big make over, I’ve send a Craftsy and Ravelry update message. But I forgot for some and for the rest of them I skipped the messages. I didn’t want to bother you peeps with loads of emails. Here’s a list of the patterns I have updated in case you would like to have an updated version. Send me a message and your receipt and I’ll email or send the new version to your library.

There are a few patterns I made temporarily unavailable because I felt like making new and better versions of them. Basil the otter is the one I am starting with, Monty the marmot, the lop rabbit and Sjuffel the dog will follow, but I am not sure when because I also want to make a completely new pattern, a giraffe that is, after the new Basil. When I look at my work now, I am so proud. Thanks for all of your support, you crafters are fabulous!

Now we are updated. Hope to be here soon with a glimpse of a new otter.

Patterns

New updates

Hi there, here’s an update on the progress of the updates. I am using the word ‘update’ so often these days I’m even dreaming it, lol. But I don’t mind doing it. The lovely thing about updating older patterns is, and I mean the big updates with new pictures and all, is that it reminds me of how beautiful some of the older animals are. Because their pictures looked less impressive and new crochet animals shift my attention, I seemed to have forgotten about them. But look at this!

When I added this picture to Dandylion’s pattern I thought ‘wow’! Despite his basic shape, Dandylion is the funniest and most mischievous looking crochet cat you can find. I really enjoyed updating his pattern.

I also updated Teddy’s and Balloo’s pattern. With the new pictures, they too look like I designed them recently and I love how they look now.

In short, these are the new updates:

Together with my editor, I’ve re-written the instructions for Dandylion’s head, which you don’t crochet in a spiral. With these new instructions you get an almost invisible colour change. It’s brilliant! And the pictures are new, but that’s obvious.


When I took new pictures of Balloo, I realised he looked much more like a lamb than a sheep! The pattern has new and improved pictures.


Teddy is the first original Son’s Popkes pattern. Now he finally shines bright in his new pictures. The former pictures had some pillows as background and a messy piece of fabric. Not very professional, but despite that people loved him.


Next week I’m doing an update on Chief and Rupert. Their bellies need to be replaced by the fancy neater bellies I design nowadays and they can use better pictures too.

Happy Easter dear crafters, I really need a little break.

Stories

I’m in update mode

Some of you know I am currently updating my older patterns. Why is that? It is not because I’m still in that phase. And it is not because the patterns aren’t good enough either.

There are two things that bother me. The first is, some of the older patterns are not text edited by my amazing editor and therefor contain silly mistakes. Just typos and weird sentences she has helped me with over the past few years. The second thing is, I am not satisfied anymore with the pictures some of them contain. When I started designing these crochet animals, I didn’t pay that much attention to the backgrounds of the pictures. Along the way the backgrounds have become cleaner and nowadays they basically just are a sandy warm colour. I have thought of shooting against a white background, but found that a bit too clean.

Because I’ve already designed so many animal patterns, I’m not going to do new photoshoots for all of them. Even though the older pictures aren’t as neat as the new ones, they do their job as instruction photos. The pictures I am replacing are the promotion pictures you see in my pattern page and the shop listings. The reason for that is, I want my shops to have a clean and professional look.

It is a bit overwhelming I have to admit, it’s a lot of work. But also addicting, because when I start something like this, I’m looking so much forward to the end result, I want to go fast. Check out my progress so far, you can clearly see the updated images. And ever so frustrating, despite my hard work some of them still have a slightly different coloured background…

These patterns have received an update lately:

Flam the fox. The doll itself only got a neater body, the pattern received a complete update with new and shiny pictures. This one needed it the most! Click image to view the new post.


Flims the hedgehog. No changes to the doll, only a pattern update. Hopefully no more silly mistakes and better images. My editor commented ‘you cannot call a hedgehog a hog’. Oops, no more hog then! Click the image to view the new post.


Wasby the raccoon, like Flims, no changes to the doll, only a pattern update with more and better pictures. Click the image to view the new post.


Currently I am working on an update for Jonesy the duckling and Moser the mole. More will follow, oh dear…

Patterns

Floro, crochet red squirrel pattern

This one looks familiar! Meet Floro 2, the new version of my crochet squirrel amigurumi.

amigurumi squirrel animal

Floro the crochet squirrel has always been one my personal best-liked patterns. Together with badgers, red squirrels are my favourite animals. I’ve had the jolly pleasure to seeing them very often and they are such graceful little characters. I love how they wave their tail when seeing other squirrels and their sneaky attitude when it comes to hiding food. They are ever so entertaining to watch.

Because Floro was one of the first animal patterns I designed, he did not meet up to my recents standards. When I looked at him lately, I only saw what could look better. I decided he needed a makeover.

What has changed with Floro?

First of all, I wanted his head to be easier to make. There is nothing wrong with sewn on muzzles, but with heads shaped like Floro’s there is no need to anymore now I have improved my skills for that. I am able to crochet the muzzle and head in one piece and still have a muzzle shaped little snout. Also, the big eye patches did not seem to work for everyone. I had made Floro’s as small as possible, but it still looked a bit as if he was staring in utter surprise. The eye patches have been replaced by much more subtle lines around the eyes you can easily embroider in four stitches. I also replaced the ears for flat folded ears.

The body has also changed. It has an improved shape and a rounder white belly. The last thing I changed is the tail. I wanted it to look curved by itself, without the need of inserting pipe cleaners to bend it. It now consists of two pieces that make a lovely curved tail.

I am so happy with the result. Floro still is the same, but looks much better! And the good thing is, anyone who has bought the previous pattern, will receive a message about this update with a download link to download the new version for free.

Here are some more pictures of my lovely crochet squirrel and below them you can find info about and links to buy the pattern if you do not have it yet.

Info about & links to buy the pattern

This crochet red squirrel is made with Istex Lett Lopi, a 100% wool with a lot of fuzziness that works very well with brushing. Floro is sitting 6 inch / 15 cm, when made with worsted weight yarn.

The pattern contains a clear and colour coded description of how to crochet and assemble this animal, with extra illustrations and example pictures at the bottom to help you get everything right. In the pattern you can also find what materials you need, the yarn colour numbers, in short, everything you need to know to make your own graceful squirrel amigurumi. All the additional information you need to know about this pattern you can find in the shop listings. You can buy this pattern in my shop at Ravelry, Etsy or order it here.

Despite this being an update, the new pattern has a one dollar release discount till Monday the 26th of February.

Note: Floro’s original post will stay on my blog until google has indexed this one.

Art, Chit and Chat, Uncategorized

A phase

When I look at all the patterns I have made so far, I am quite proud of each and every one of them. Look at them, so many (and I even forgot a few), that is about three years of designing in that picture!

amigurumi patterns

But lately I’ve been so critical about my designs that I am having a hard time finishing them. This must be something every designer goes through every once and a while. Maybe it is just the soggy weather and the grey of winter that makes me judge my work differently.

It started when I was working on my tortoise pattern. I made this gorgeous looking shell, that would be a bit difficult to assemble. And because I couldn’t write it down perfectly scientifically, I had to re-think it so I fooled around with it for a while and did not enjoy it. Then I saw this picture of a gorgeous looking American red squirrel and decided I was going to set aside the tortoise and make a new squirrel that made me all excited. I started all enthusiastic but soon afterwards doubted every part I made. I guess designing the realistic animals got me into this phase. Because now, when I’m designing a doll, I’m not sure anymore how realistic it should look. These crochet animals must look like the real animal for sure, but they also should be a bit more whimsical and playful looking, well you’ve just seen my Popkes. When I look at my sweet little squirrel face, I’m thinking ‘isn’t this looking too complicated?’ or ‘isn’t this head too small, should I make a more round and basic head?’. It’s annoying, I’m doubting my every move, while I can clearly see what I came up with isn’t looking bad at all.

The best thing to do is to just keep working on it. Today I made a very smart looking tail, which doesn’t need pipe cleaners in it to make it look bended. And the body I made has a very formidable looking light belly, so I suppose I am just being a bit too hard on myself. I will just continue working on this sweetie and assemble a prototype. When that is finished I can decide if I find this squirrel whimsical and characteristic enough and if anything needs to be changed.

Yes, that is a good plan. See you when it is finished dear crafters!