Patterns

Broebel, realistic crochet badger pattern

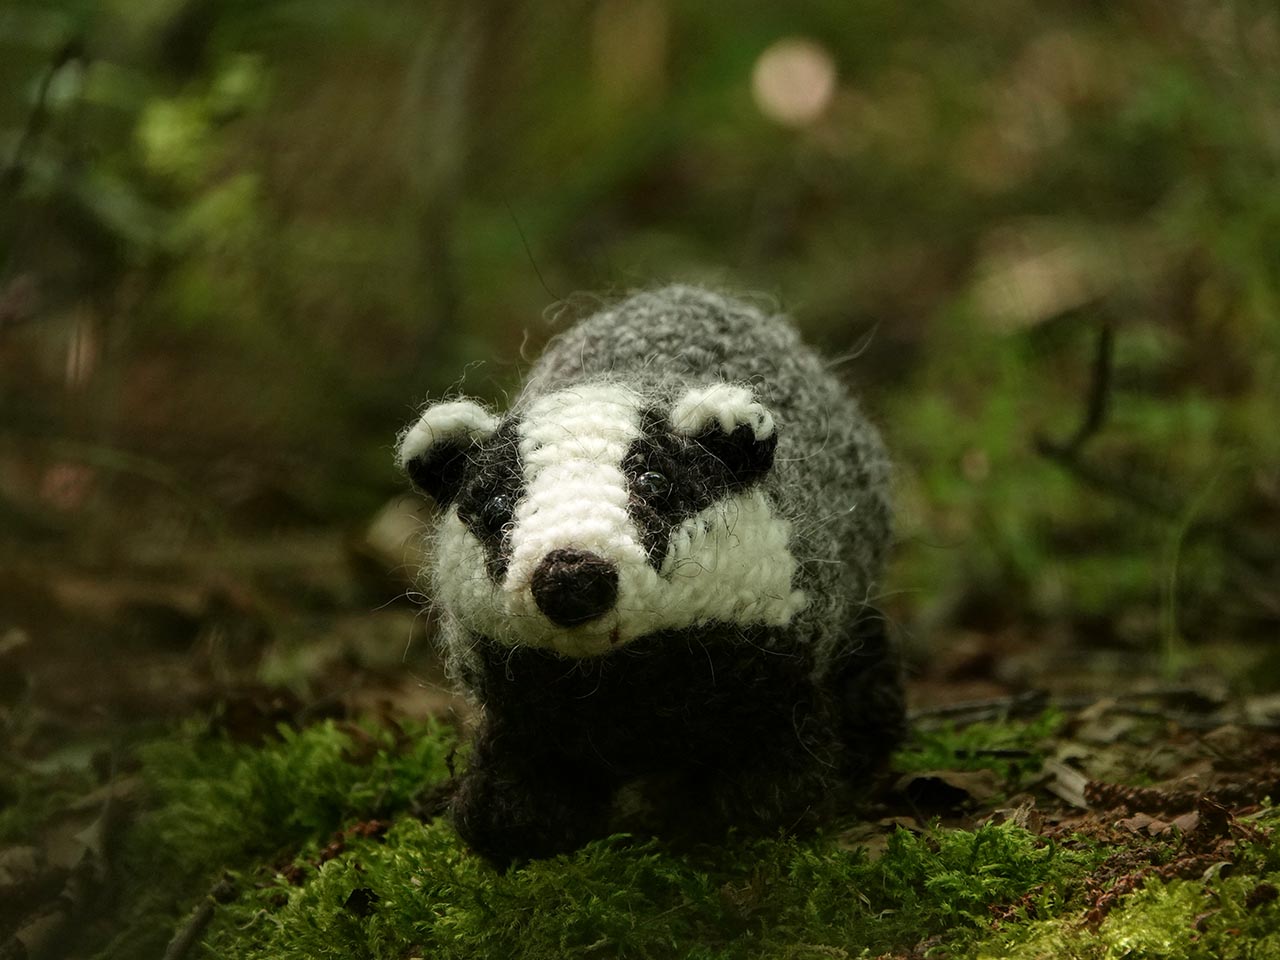
For a long time I have wanted to design a seamless badger, and I finally did! This is Broebel, a new and improved badger amigurumi.

You might be wondering why it took me so long. The answer is simple: I didn’t know how to make round legs for this kind of seamless body. When you create a cylinder-shaped body by crocheting forward from the head, you get vertical rounds when you look at your project from the side. To create a hole, you skip some stitches and add a chain, but that makes a hole of only one round, which isn’t enough if you want realistic-looking paws. Maybe I’ve missed an ingenious method (if you know one, please let me know in the comments!), but that was my conclusion.

Then some pieces of the puzzle fell into place. When I designed some of my other seamless animals, the ones where you connect the paws with chains and then continue the body, I used a trick to heighten the body and get a shorter neck. I realised I could use that same trick to create bigger holes. That’s what I did for Broebel, and as you can see, it worked perfectly! It’s rather simple too. I’m not going to reveal my little trick (like magicians don’t), but believe me, it doesn’t make crocheting the badger more difficult.

Because I was also finalising the drawings for a lovely book about badgers that will be published this winter, I wanted a pattern that didn’t take too long to create. For the overall shape I could use both Flunsie and the realistic badger patterns. This badger will replace the realistic badger.

I’m so pleased with how Broebel turned out and how easy it is to crochet! The only slightly tricky part at the start are the colour changes, but most crocheters can manage those. The rest is a piece of cake. The only parts you need to attach afterwards are the nose and ears. This badger slowly takes shape as you make it!
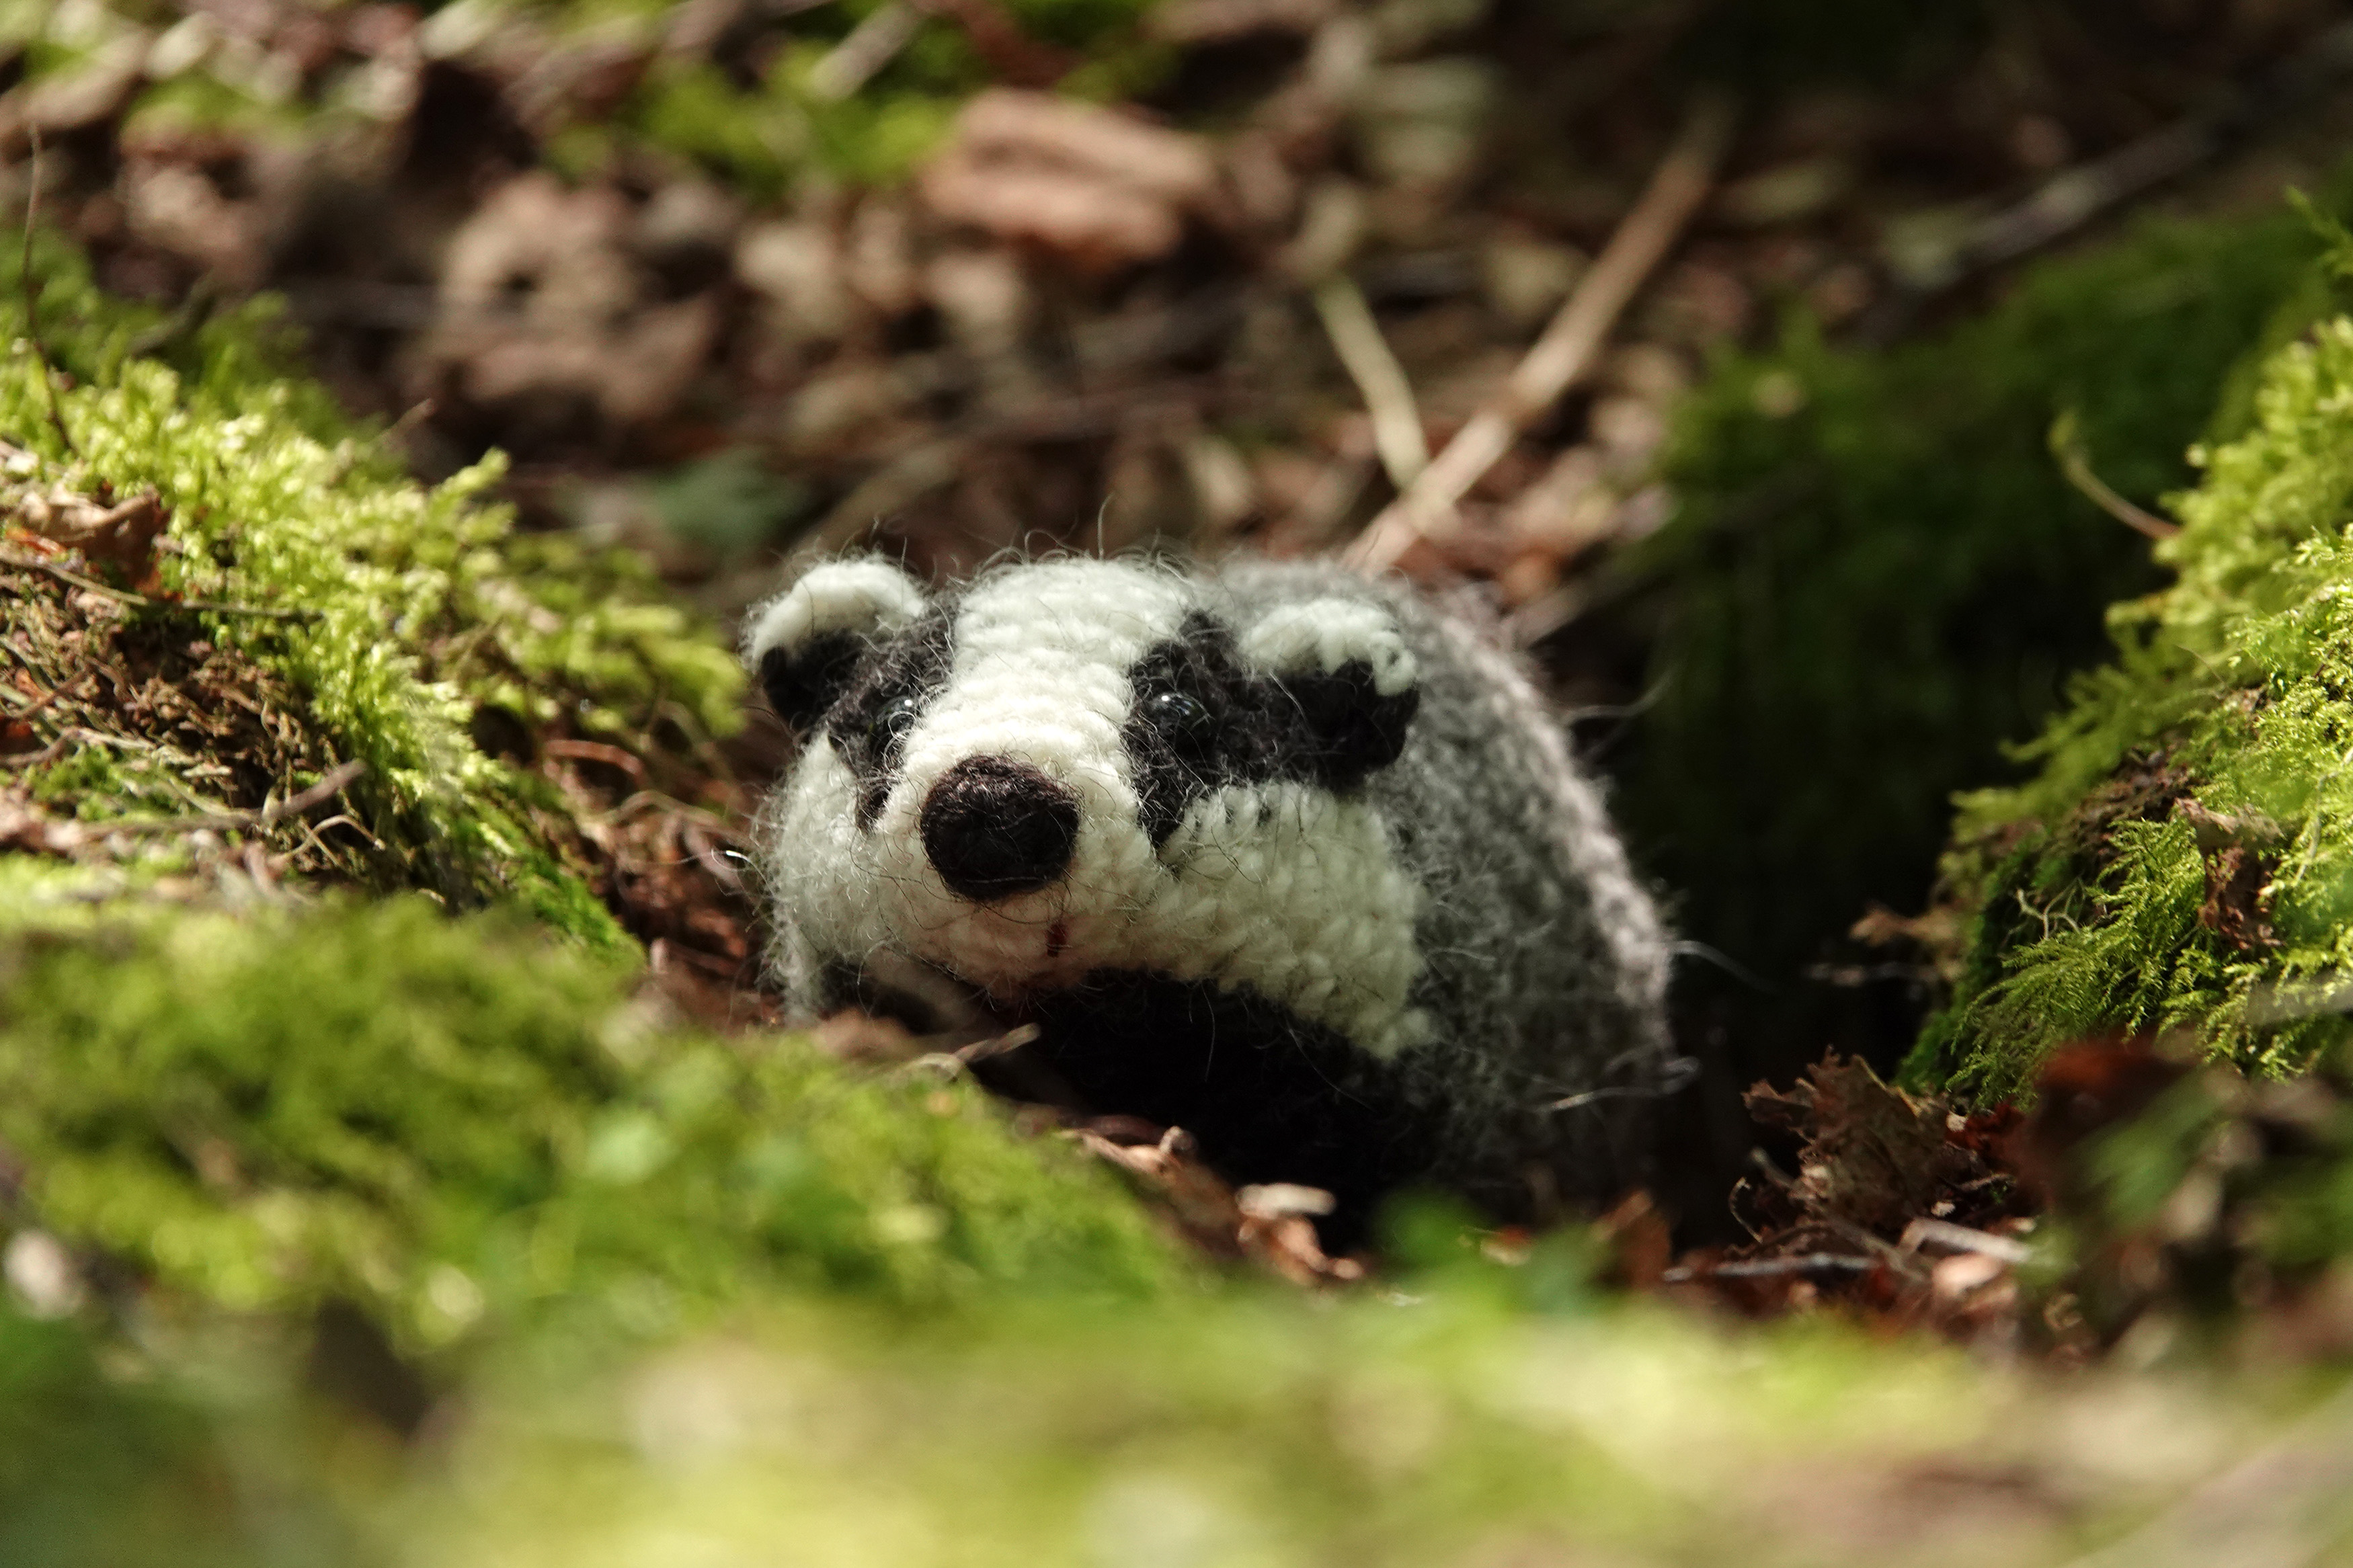
I always take my finished crochet animals outside for a photo in their “natural habitat,” and I did the same with Broebel. Our first trip didn’t go well: I was annoyed after failing to get a decent photograph of a rare bird, so I wasn’t in the mood to photograph Broebel. On the second trip I found a hole that looked like a badger’s burrow and made a fabulous picture of Broebel sitting in it. It may not be ideal for promoting the pattern because you only see the head, but I’m delighted to share it here

So yes, I’m really excited about this badger amigurumi. This opens doors for other animals that need this kind of body, like a bison, a beaver or a new guinea pig.

Below are more pictures of Broebel the realistic crochet badger, followed by information about the pattern and links to buy it. You can also buy it directly from me using this link; I’ll then email the pattern manually.

This is an easy pattern made with basic stitches, with each step explained in detail to ensure that even beginners can create this realistic badger amigurumi. My pattern format includes instructions like ‘sc in next, 2 sc in next, invdec,’ etc. I chose this format because it works better for creating realistic amigurumi.

This crochet badger is made with Istex Lett Lopi (a 100% wool yarn known for its fuzziness) and measures 6.6 inch / 17 cm measured from nose to tail. The pattern includes clear and colour-coded instructions on how to crochet and assemble the doll, along with instructional images with extra notes. You’ll also find pictures of the finished doll at the end. In the pattern, you’ll discover what materials you need as well as the yarn colour numbers, in short, everything necessary to create your own realistic owl amigurumi! All the additional information you need to know about this pattern you can find in the shop listings. You can purchase it in my shop at Ravelry or Etsy.

And heads up! This pattern has a permanent discount if you use this link. I will have to email the pattern manually so it can take a bit longer, but I promise, you’ll have it in a day. If not, check your spam and if it is not there either, message me to wake me up, as I might have fallen asleep or something…
Patterns

Young Flamsie, a new realistic fox pattern

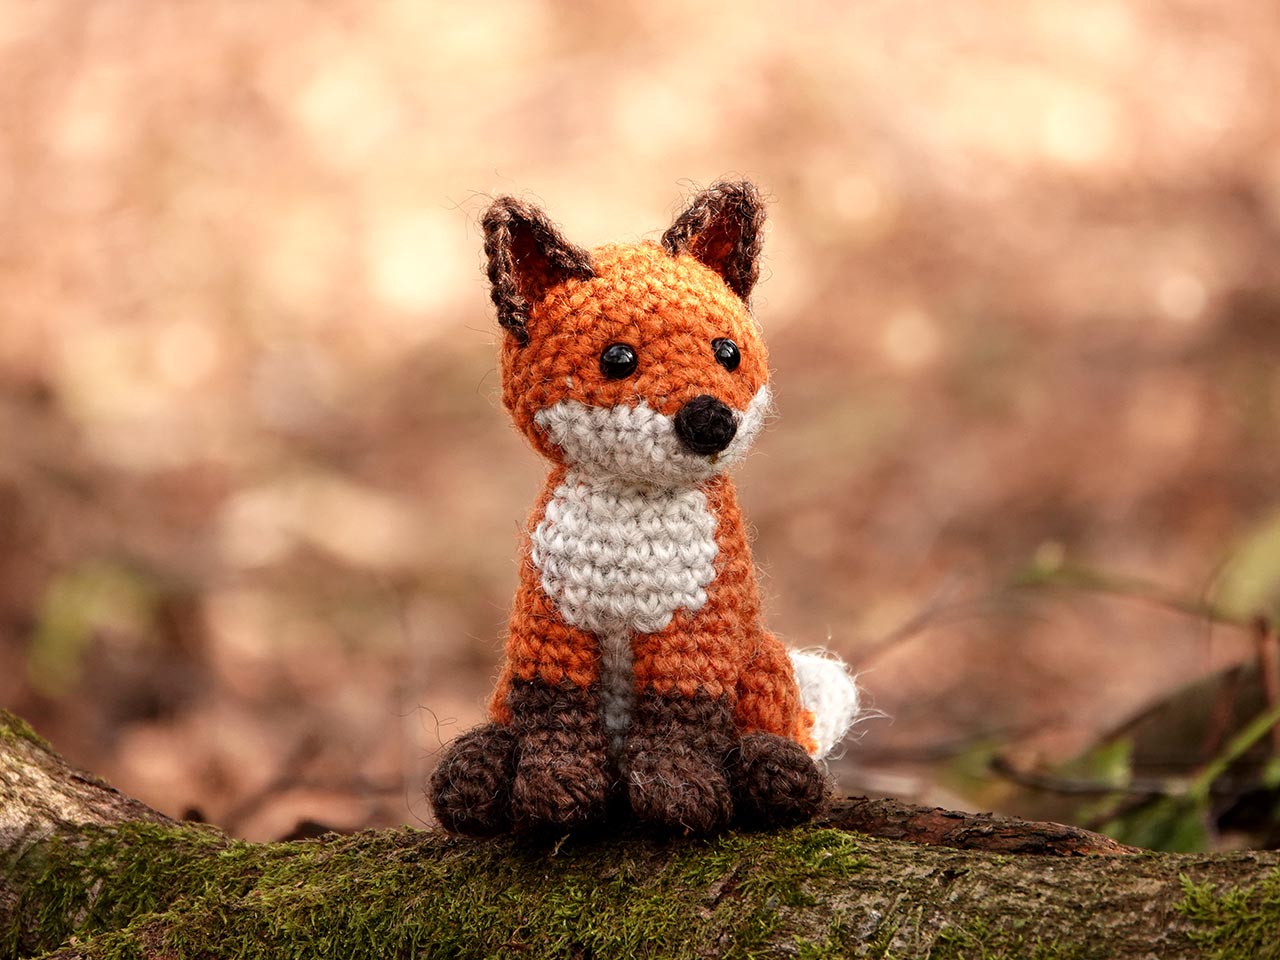
I’m delighted to introduce you to my new little fox amigurumi, sitting in a fairy tale world. Meet Young Flamsie!

After finishing my last pattern, I originally planned to design something entirely different. However, Tippy’s face-shaping technique intrigued me, I wondered how it would translate to a fox head. When creating Flamsie, I struggled to balance those foxy cheeks with symmetrical colour lining. Without overthinking, I experimented with a new fox face design. To my surprise, everything clicked! The revised shaping widened the cheeks beautifully, and after a few tweaks, the light-coloured chin and cheek placement worked perfectly. Now that I’d reached this point, I decided to create a new crochet fox pattern.

The message from an Etsy crafter came to mind; she’d shared an image of an AI wolf and asked if I could craft something similar. We both loved the idea of that non-existent doll, and while I agreed to try, I wasn’t sure when. With this adorable fox head on my desk, I realized I could adapt the concept using a fox instead of a wolf. I couldn’t simply recreate the AI design, I’m too critical for that, and I had my own ideas about blending styles. So I set to work, crafting a version similar to Flamsie but stockier and more youthful.

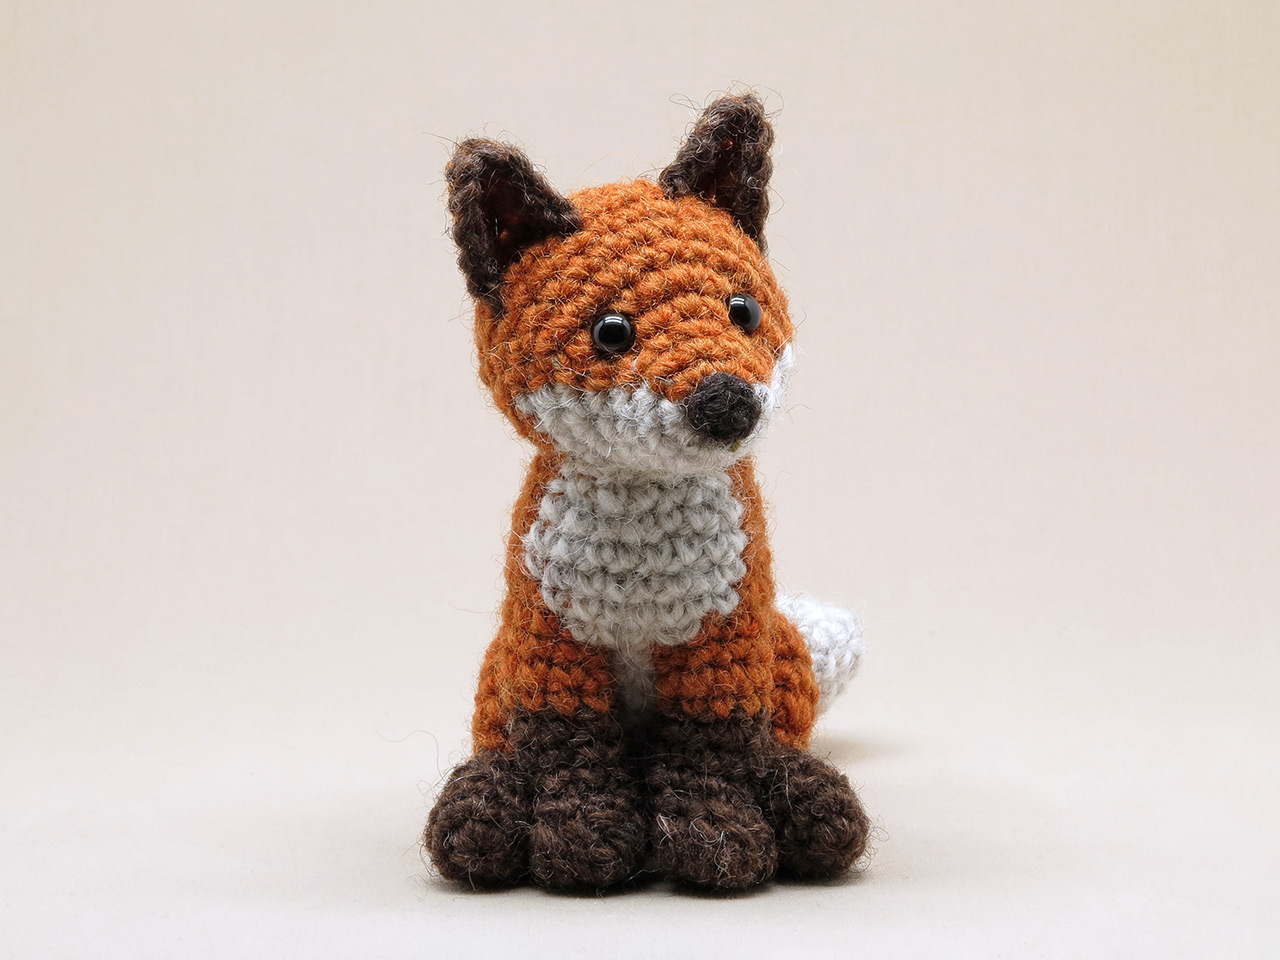
This fox amigurumi features a slightly larger head, shorter body, and front paws, giving it a cub-like appearance. I also simplified a few elements to make this version even easier than Flamsie. Some crafters found attaching the front legs tricky, so I added extra photos to clarify that step.

Though I considered replacing Flamsie with this version, rest assured, Flamsie remains too popular to retire! Instead, I named this one Young Flamsie, letting you choose which design to make.

Here are some more pictures of Young Flamsie the crochet fox, and below them, you can find all the information you need.

This crochet fox is made with Istex Lett Lopi— a 100% wool yarn known for its fuzziness. The fox is 5.5 inch /14 cm high sitting. The pattern includes clear and colour-coded instructions on how to crochet and assemble the doll, along with instructional images and notes next to the text. You’ll also find pictures of the finished doll at the end. In the pattern, you’ll discover what materials you need as well as the yarn colour numbers—in short, everything necessary to create your own realistic fox amigurumi! All the additional information you need to know about this pattern you can find in the shop listings. You can purchase it in my shop at Ravelry or Etsy.

And heads up! This pattern has a one-dollar release discount until March the 13th. Feel free to let me know if you need any additional information!

Stories, Uncategorized

It’s time for something new

I’m so happy to announce that I have finished the updates. Last week I updated the last 14 patterns and now all my patterns are text edited for correct English and proofed a last time. The older patterns also have extra head shots of the animals so it’s easier the see where the eyes, ears, muzzles or bills go. And the patterns might even look more fancy than the most recent ones because of the decorative images of the animals on their backs. I will add those to the newest patterns too, but will do that ‘in between’ because it isn’t really necessary but just looking great. Adding those images made this experience more fun for sure, just look at them!

It was a huge endeavour and in the end I really got tired of it, but it was worth it. For most patterns that got a big make over, I’ve send a Craftsy and Ravelry update message. But I forgot for some and for the rest of them I skipped the messages. I didn’t want to bother you peeps with loads of emails. Here’s a list of the patterns I have updated in case you would like to have an updated version. Send me a message and your receipt and I’ll email or send the new version to your library.

There are a few patterns I made temporarily unavailable because I felt like making new and better versions of them. Basil the otter is the one I am starting with, Monty the marmot, the lop rabbit and Sjuffel the dog will follow, but I am not sure when because I also want to make a completely new pattern, a giraffe that is, after the new Basil. When I look at my work now, I am so proud. Thanks for all of your support, you crafters are fabulous!

Now we are updated. Hope to be here soon with a glimpse of a new otter.

Patterns

My dapper crochet badger pattern

Dapper crochet badger

Doesn’t he look dapper, this cute crochet badger amigurumi? Almost a year ago I found in a local bookshop, this utterly amusing postcard with the portrait of a rather realistic badger wearing a striped sweater. It inspired me to make a little sweater pattern for Falun and of course I made a portrait of him wearing it. Some of you may even remember seeing it on my Instagram.

It was my intention to add the pattern for that sweater to Falun’s pattern, but somehow it never really came to it. Because of the lovely reactions I got after posting another picture on IG where Falun was wearing the sweater, I decided to update the pattern as soon as possible.

What has changed and what do you need to do if you already purchased the pattern?

The pattern is completely updated. Falun’s original body was on the chubby side, so I rewrote that part and made a better looking version. There is also an instruction for an even slimmer body, which will fit the dapper sweater. And last but not least, the instruction for the cute sweater is included in the pattern.

Good news for those of you who already have the pattern, you’ll receive an automatic update about this and can download the new version (for free) anytime you like, how about that!

If you don’t have the pattern yet, you can buy it in my shop at Ravelry, Etsy or order it from me here.

Now go and make yourselves a bunch of dapper creatures. Have a lovely end of summer dear crafters!

Uncategorized

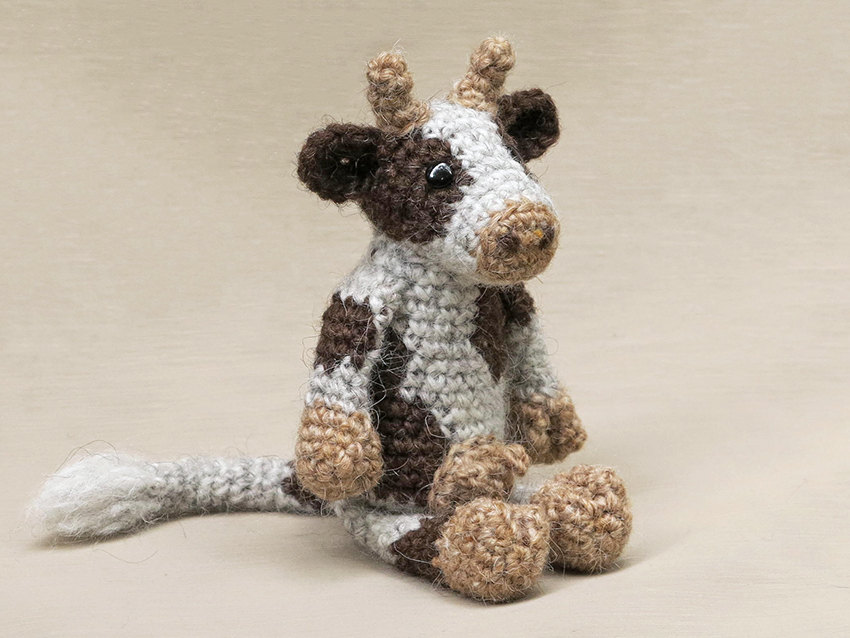
Noof, crochet cow pattern

Meet my newest creation, Noof the crochet cow amigurumi.

realistic crochet cow pattern

To some of you this may come as a surprise. I didn’t announce the cow pattern here with a sketch. At Instagram I did post some sneak previews, but skipped the blogpost this time. No worries, there is a little drawing in the pattern.

I seem to be into farm animals lately I suppose. After I made the pig and ram, my boyfriend suggested I had to make a cow now too. That sounded quite tempting so I started thinking about what kind of cow I should design. Most important, it had to look like a real cow, even if it would be made without spots. Secondly, I wanted it to have a rustic feel, so no bright white and black, but more textured colours. My crochet cow also needed little horns and an udder of course, how much fun would that be to crochet! Last but not least important, it needed to have the famous new hooves. So, I set down at my desk for many hours and came up with this rustic and realistic looking doll shaped cow and called her Noof.

Just look at this slide of Noof’s sides, you can clearly see how all the spots are matched up to create a neat and  realistic cow appearance.

Noof is quite spotty isn’t she? I decided to place her spots delicately over her body to create the crochet pattern for a more complex looking cow. But, you can of course make a different sort of cow. A single coloured one or just place the spots somewhere else. Or you could make my pattern but rotate the body and limbs for a different look. It is completely up to you!

Info about & links to buy the pattern

Noof is made with Istex Lett Lopi, a 100% wool with a lot of fuzziness. She is sitting 6 inch/ 15 cm tall.

This crochet cow pattern contains a clear and colour coded description of how to crochet and assemble the cow, with extra illustrations and example pictures at the bottom to help you get everything right. In the pattern you can also find what materials you need, the yarn colour numbers, in short, everything you need to know to make your own realistic looking cow doll. All the additional information you need to know about this pattern you can find in the shop listings. You can buy this pattern in my shop at Ravelry, Etsy or order it here.

This pattern has a one dollar release discount till Thursday the 19th!

Patterns

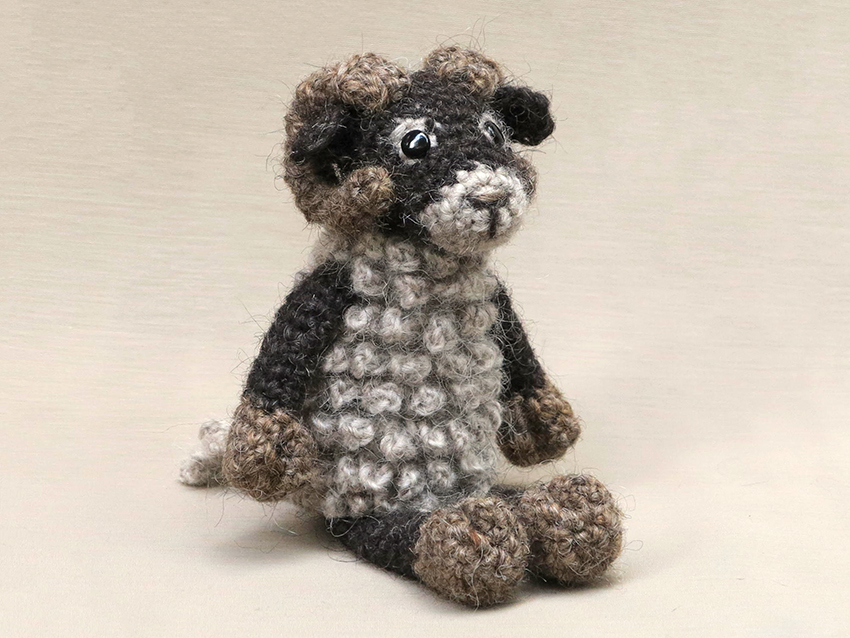
Staruman, crochet sheep pattern

With pride and delight, I present to you, Staruman the crochet sheep pattern.

crochet sheep pattern

Staruman is a sheep, but of course a ram too. It is always hard to say which of the amigurumi’s I made is my favourite and it changes occasionally, but this one is very special for sure. The majestic horns and wooly texture of the loop chain stitches of the body make him unique and stunning looking. I had no experience at all with the chain loop stitch (twisted loop stitch) but it is so easy to do and worth the effort.

When I started working on this crochet animal, I had a clear image in my mind of how I wanted him to look. I knew the horns had to be partly worked in the back loops to create the lined structure and the body needed a special stitch too, something that would exaggerate the wooly coat. I started practicing with the loop stitch but didn’t like the result. The loops where thin and when cut the body looked like a pompom. I needed a bulkier, textured sort of loop. That is when I discovered the chain loop stitch. It is easier to make than a loop stitch, just takes more time because of the chains you make before each single crochet stitch. But the result is fabulous.

And about the light spots behind the eyes. For a while now I’m trying to create a more subtile looking eye patch. For this sheep I found a very simple and effective solution and nothing needs to be sewed on, so it always looks the same.

Staruman might look a bit more complicated than most of my patterns, but don’t let it fool you because he is just as easy to make. Crocheting the body and horns only takes a bit more time, that’s all.

Here are a few more pictures of Staruman the crochet sheep and below them you can find info about and links to buy the pattern.

Info about & links to buy the pattern

This impressive, cute and curly sheep is made with Istex Lett Lopi, a 100% wool. He is sitting 14 cm / 5.5 inch tall. Despite his looks, he is quite easy to make and you can finish your sheep in a day or so. I strongly recommend using a fuzzy yarn because it gives the best result for both the eye patches and chain loop stitches.

This crochet sheep pattern contains a clear and colour coded description of how to crochet and assemble the sheep, with extra illustrations and example pictures at the bottom to help you get everything right. In the pattern you can also find what materials you need, the yarn colour numbers, in short, everything you need to know to make your own loopy friend. All the additional information you need to know about this pattern you can find in the shop listings. You can buy this pattern in my shop at Ravelry, Etsy or order it here.

This pattern has a one dollar release discount till Friday the 16th!