Patterns

Flamsie & cubs, two realistic crochet fox patterns!

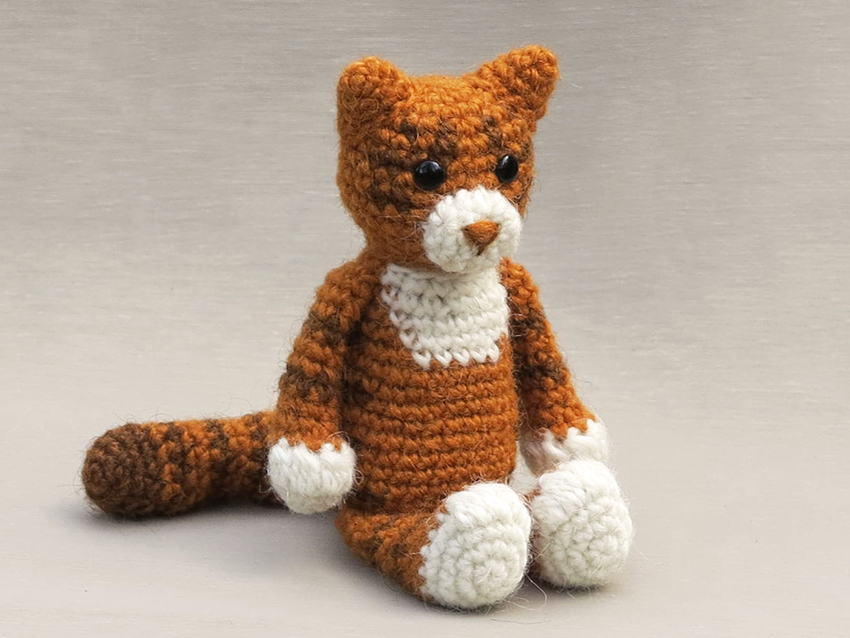
I am so happy I can finally show you my finished crochet foxes. Meet Flamsie and the little ones!

amigurumi fox

This adventure started with the idea of making a fox with cubs. I’m monitoring wildlife as a volunteer, and this time of the year we see a lot of young foxes on our camera traps. I really love seeing them and was lucky enough to spot one when we were checking a heather field for badger activity. Suddenly a cute fox cub was looking straight at us!

I started this project with the cubs. Shaping something much smaller is a whole new thing for me, and I really had to get used to it. Also, getting the light-coloured chin and chest symmetrical turned out to be quite a challenge. It took me a long time to create a cub that I adored, and I soon realised that this little fox was way too special to just add to the fox pattern. This had to be a separate pattern so everyone could make it.

After the little ones were finished I started working on the adult. And you know what was ever so silly? Each head I made I found huge! Now I had to re-adjust to my normal size. I ignored my feelings of finding everything enormous and patiently designed the right shapes and colouring for the adult fox amigurumi. I stumbled upon the same colouring difficulties as for the cub, but I stubbornly kept trying until I got it right. There was no way I was going to make this crochet fox with a sewn-on muzzle, the head had to be made in one piece, just like the wolf.

Making the fox’s body was much easier because I got familiar with this way of working when I made the wolf. The fox had to be smaller and more slender with a bigger tail. When the fox was finished, I placed the wolf and fox next to each other and I was satisfied. They are both such lovely doll versions of the real animals, the slender fox and the sturdy wolf.

When I was working on the cubs and realised how much extra work it was going to be, I decided I wasn’t going to do something like this again. Nevertheless cats and kittens are popping into my mind already, because the end result is so delightful. Every time I pass my adorable fox family I get a smile on my face, they are so cute together! The adult fox is a playful doll which you can place in different poses, and the cubs are even easier to play with.

For those of you who look forward to making a family, the fox and cubs are ‘a pack’ until one week after the pattern release. After that they will be separate patterns. So I get them soon if you want them all!

Here are some more pictures of these totally cute crochet foxes, and below them you can find all the info you need to know about how to get the patterns.

Info about & links to buy the pattern

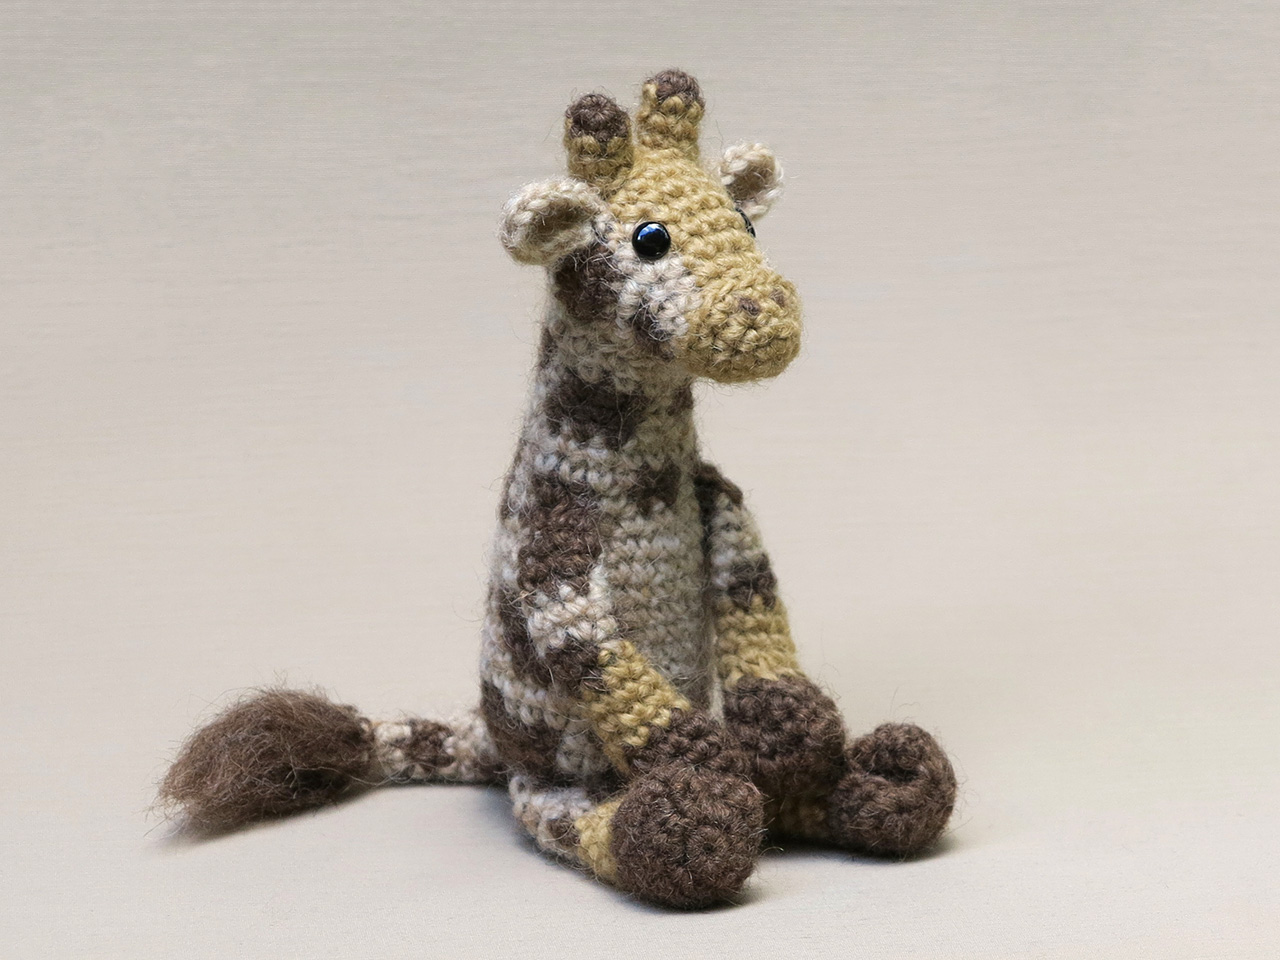
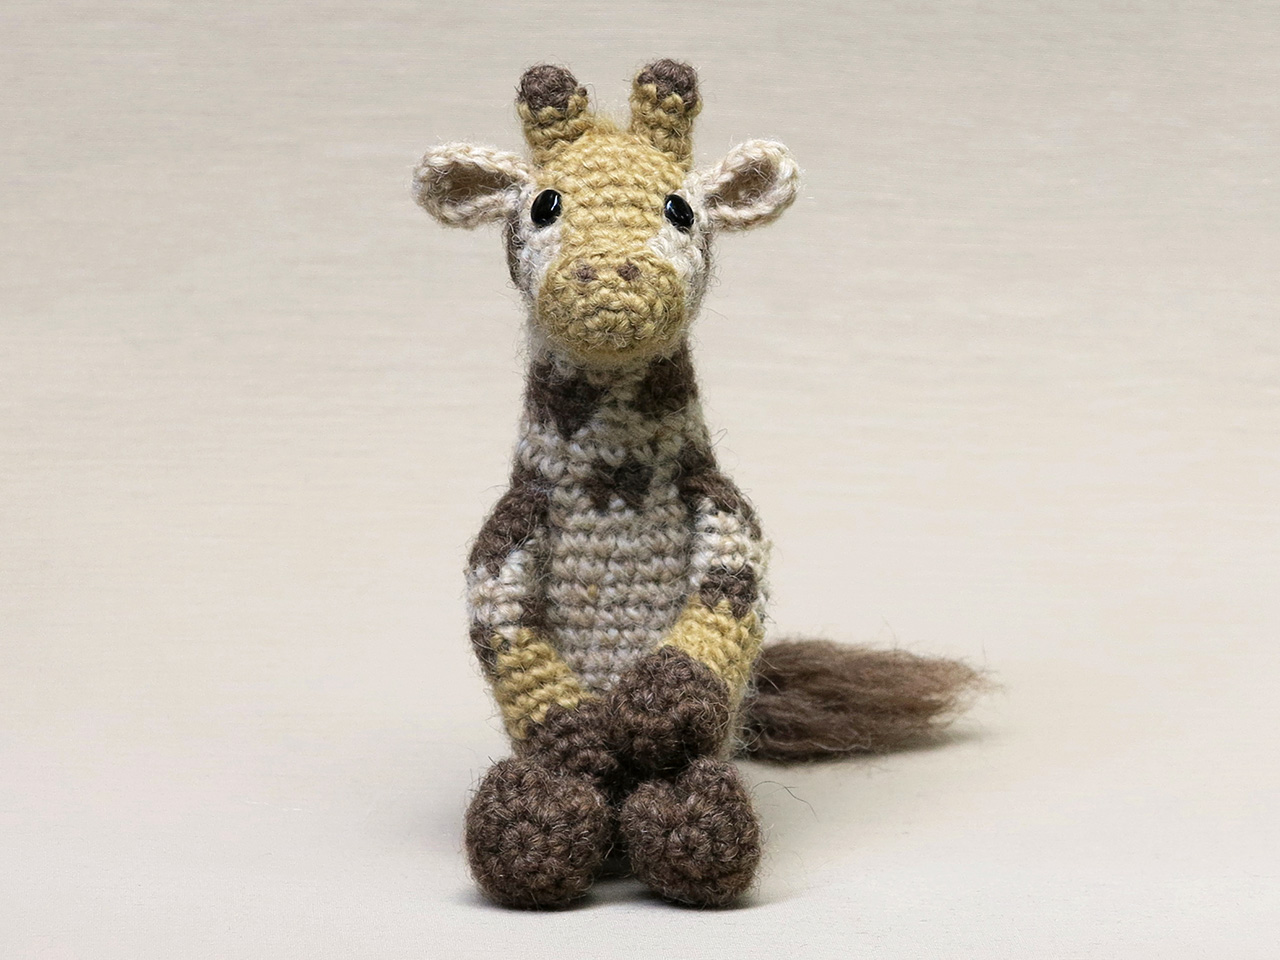
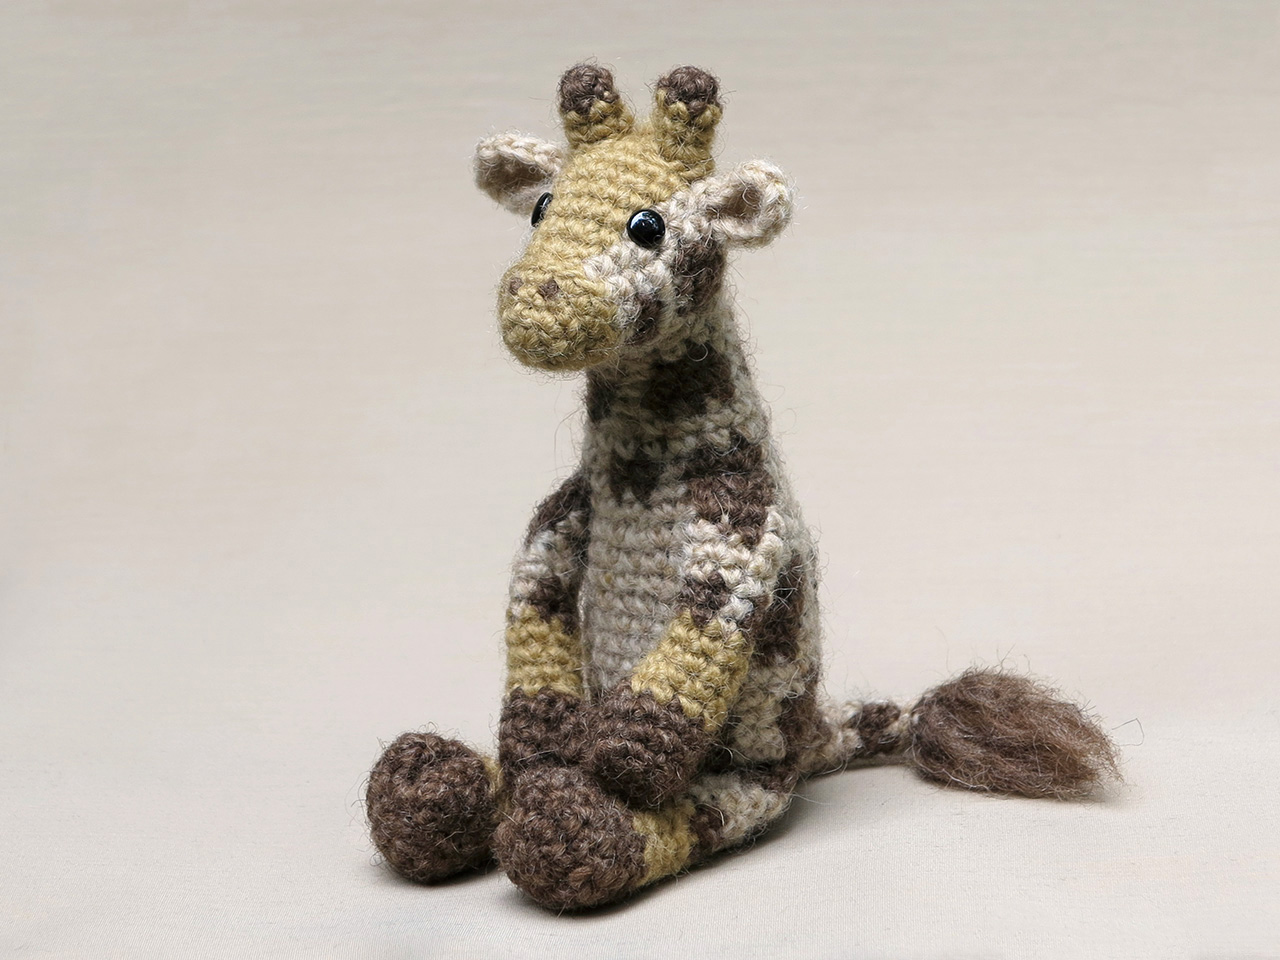
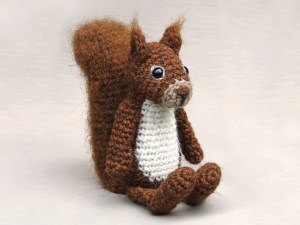
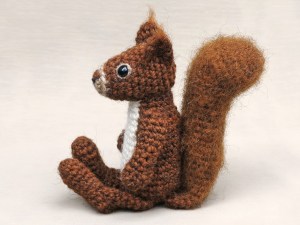
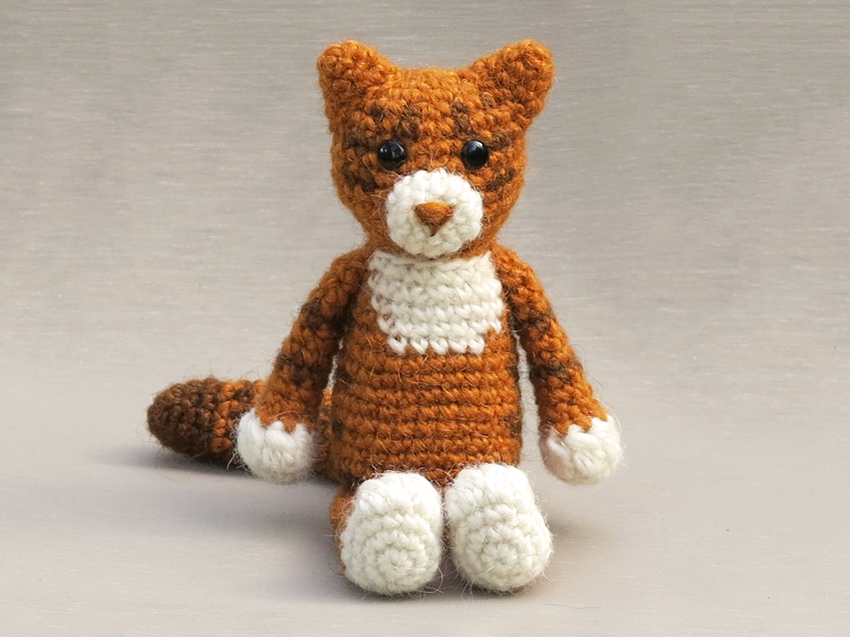
These realistic foxes are made with Istex Lett Lopi, a 100% wool with a lot of fuzziness. Flamsie is 5.5 inch / 14 cm sitting, the cubs are 6 inch / 15 cm long when made with this yarn. They aren’t very difficult to crochet, even the seamless bits are quite easy to attach if you follow the instructions.

The patterns contain a clear and colour-coded description of how to crochet and assemble the animals, with extra illustrations and example pictures at the bottom to help you get everything right. In the patterns you can also find what materials you need, the yarn colour numbers, in short, everything you need to know to make your own fox  amigurumis. All the additional information you need to know about this pattern you can find in the shop listings.

You can buy the pattern for Flamsie by clicking this Ravelry or Etsy link. And the pattern for the cubs by clicking this Ravelry or Etsy link. You can also buy both patterns directly from me here.

And heads up! For one week from now Flamsie’s pattern includes the pattern for the cubs. So if you want both, get it before the 22nd of Juli.

Patterns

Matisse, crochet giraffe pattern

Very proud and happy I present to you my jolly new pattern, Matisse the giraffe.

giraffe amigurumi pattern

When I started designing this crochet giraffe amigurumi I loved the challenge and was excited by the idea of creating a realistic and cute giraffe doll. And I have to admit, I even surprised myself with the result. I think my giraffe looks absolutely fabulous! When the head was pinned to the first prototype body, I was stunned with how it looked, somehow I managed to get the spots in excactly the right place to get a perfect giraffe skin, it was amazing. A a few little adjustments would make everthing look ‘spot on’, but the main shape was just right.

As for all my crochet animal patterns, my giraffe had to have a realistic appearance. The spots are very important to achieve that. Real giraffes have many spots, the further down their body the bigger and there is some sort of pattern in them, like water puddles on the beach when it is low tide. I knew that with my limited number of spots, most important was to resemble that look.

Another special thing about this giraffe are his long ‘arms’. Giraffes are special looking creatures with their long necks and diagonal backs and because I wanted to make a doll shaped giraffe, it is a bit hard to reproduce that look. I think the longer arms do suggest that shape and also make this doll able to sit in different positions. I just love it when Matisse sits forward with his front paws between his legs and like that he even gets that unique giraffe shape. I hope you crafters are just as surprised and happy with this doll as I am!

Info about & links to buy the pattern

Matisse is made with Istex Lett Lopi, a 100% wool with a lot of fuzziness. He is 6.5 inch/ 16,5 cm when sitting. The pattern is written in standard American crochet terms and contains a clear and colour coded description of how to crochet and assemble this animal, with extra illustrations and example pictures at the bottom to help you get everything right. In the pattern you can also find what materials you need, the yarn colour numbers, in short, everything you need to know to make your own realistic and playful crochet giraffe amigurumi. All the additional information you need to know about this pattern you can find in the shop listings, like the yarn you need etc. You can buy this pattern in my shop at Ravelry, Etsy or order it here.

This pattern has a one dollar release discount till Tuesday the 3rd of July!

Stories, Uncategorized

It’s time for something new

I’m so happy to announce that I have finished the updates. Last week I updated the last 14 patterns and now all my patterns are text edited for correct English and proofed a last time. The older patterns also have extra head shots of the animals so it’s easier the see where the eyes, ears, muzzles or bills go. And the patterns might even look more fancy than the most recent ones because of the decorative images of the animals on their backs. I will add those to the newest patterns too, but will do that ‘in between’ because it isn’t really necessary but just looking great. Adding those images made this experience more fun for sure, just look at them!

It was a huge endeavour and in the end I really got tired of it, but it was worth it. For most patterns that got a big make over, I’ve send a Craftsy and Ravelry update message. But I forgot for some and for the rest of them I skipped the messages. I didn’t want to bother you peeps with loads of emails. Here’s a list of the patterns I have updated in case you would like to have an updated version. Send me a message and your receipt and I’ll email or send the new version to your library.

There are a few patterns I made temporarily unavailable because I felt like making new and better versions of them. Basil the otter is the one I am starting with, Monty the marmot, the lop rabbit and Sjuffel the dog will follow, but I am not sure when because I also want to make a completely new pattern, a giraffe that is, after the new Basil. When I look at my work now, I am so proud. Thanks for all of your support, you crafters are fabulous!

Now we are updated. Hope to be here soon with a glimpse of a new otter.

Patterns

New updates

Hi there, here’s an update on the progress of the updates. I am using the word ‘update’ so often these days I’m even dreaming it, lol. But I don’t mind doing it. The lovely thing about updating older patterns is, and I mean the big updates with new pictures and all, is that it reminds me of how beautiful some of the older animals are. Because their pictures looked less impressive and new crochet animals shift my attention, I seemed to have forgotten about them. But look at this!

When I added this picture to Dandylion’s pattern I thought ‘wow’! Despite his basic shape, Dandylion is the funniest and most mischievous looking crochet cat you can find. I really enjoyed updating his pattern.

I also updated Teddy’s and Balloo’s pattern. With the new pictures, they too look like I designed them recently and I love how they look now.

In short, these are the new updates:

Together with my editor, I’ve re-written the instructions for Dandylion’s head, which you don’t crochet in a spiral. With these new instructions you get an almost invisible colour change. It’s brilliant! And the pictures are new, but that’s obvious.


When I took new pictures of Balloo, I realised he looked much more like a lamb than a sheep! The pattern has new and improved pictures.


Teddy is the first original Son’s Popkes pattern. Now he finally shines bright in his new pictures. The former pictures had some pillows as background and a messy piece of fabric. Not very professional, but despite that people loved him.


Next week I’m doing an update on Chief and Rupert. Their bellies need to be replaced by the fancy neater bellies I design nowadays and they can use better pictures too.

Happy Easter dear crafters, I really need a little break.

Patterns

Floro, crochet red squirrel pattern

This one looks familiar! Meet Floro 2, the new version of my crochet squirrel amigurumi.

amigurumi squirrel animal

Floro the crochet squirrel has always been one my personal best-liked patterns. Together with badgers, red squirrels are my favourite animals. I’ve had the jolly pleasure to seeing them very often and they are such graceful little characters. I love how they wave their tail when seeing other squirrels and their sneaky attitude when it comes to hiding food. They are ever so entertaining to watch.

Because Floro was one of the first animal patterns I designed, he did not meet up to my recents standards. When I looked at him lately, I only saw what could look better. I decided he needed a makeover.

What has changed with Floro?

First of all, I wanted his head to be easier to make. There is nothing wrong with sewn on muzzles, but with heads shaped like Floro’s there is no need to anymore now I have improved my skills for that. I am able to crochet the muzzle and head in one piece and still have a muzzle shaped little snout. Also, the big eye patches did not seem to work for everyone. I had made Floro’s as small as possible, but it still looked a bit as if he was staring in utter surprise. The eye patches have been replaced by much more subtle lines around the eyes you can easily embroider in four stitches. I also replaced the ears for flat folded ears.

The body has also changed. It has an improved shape and a rounder white belly. The last thing I changed is the tail. I wanted it to look curved by itself, without the need of inserting pipe cleaners to bend it. It now consists of two pieces that make a lovely curved tail.

I am so happy with the result. Floro still is the same, but looks much better! And the good thing is, anyone who has bought the previous pattern, will receive a message about this update with a download link to download the new version for free.

Here are some more pictures of my lovely crochet squirrel and below them you can find info about and links to buy the pattern if you do not have it yet.

Info about & links to buy the pattern

This crochet red squirrel is made with Istex Lett Lopi, a 100% wool with a lot of fuzziness that works very well with brushing. Floro is sitting 6 inch / 15 cm, when made with worsted weight yarn.

The pattern contains a clear and colour coded description of how to crochet and assemble this animal, with extra illustrations and example pictures at the bottom to help you get everything right. In the pattern you can also find what materials you need, the yarn colour numbers, in short, everything you need to know to make your own graceful squirrel amigurumi. All the additional information you need to know about this pattern you can find in the shop listings. You can buy this pattern in my shop at Ravelry, Etsy or order it here.

Despite this being an update, the new pattern has a one dollar release discount till Monday the 26th of February.

Note: Floro’s original post will stay on my blog until google has indexed this one.

Art, Chit and Chat, Uncategorized

A phase

When I look at all the patterns I have made so far, I am quite proud of each and every one of them. Look at them, so many (and I even forgot a few), that is about three years of designing in that picture!

amigurumi patterns

But lately I’ve been so critical about my designs that I am having a hard time finishing them. This must be something every designer goes through every once and a while. Maybe it is just the soggy weather and the grey of winter that makes me judge my work differently.

It started when I was working on my tortoise pattern. I made this gorgeous looking shell, that would be a bit difficult to assemble. And because I couldn’t write it down perfectly scientifically, I had to re-think it so I fooled around with it for a while and did not enjoy it. Then I saw this picture of a gorgeous looking American red squirrel and decided I was going to set aside the tortoise and make a new squirrel that made me all excited. I started all enthusiastic but soon afterwards doubted every part I made. I guess designing the realistic animals got me into this phase. Because now, when I’m designing a doll, I’m not sure anymore how realistic it should look. These crochet animals must look like the real animal for sure, but they also should be a bit more whimsical and playful looking, well you’ve just seen my Popkes. When I look at my sweet little squirrel face, I’m thinking ‘isn’t this looking too complicated?’ or ‘isn’t this head too small, should I make a more round and basic head?’. It’s annoying, I’m doubting my every move, while I can clearly see what I came up with isn’t looking bad at all.

The best thing to do is to just keep working on it. Today I made a very smart looking tail, which doesn’t need pipe cleaners in it to make it look bended. And the body I made has a very formidable looking light belly, so I suppose I am just being a bit too hard on myself. I will just continue working on this sweetie and assemble a prototype. When that is finished I can decide if I find this squirrel whimsical and characteristic enough and if anything needs to be changed.

Yes, that is a good plan. See you when it is finished dear crafters!

Patterns

Martouf, crochet cat pattern

Finally I had the time to publish my latest pattern. Meet Martouf, an orange tabby crochet cat!

crochet cat pattern

When designing this pattern, I tried to make a simple and striking, but also very versatile crochet cat. Martouf has become an orange and white tabby cat. I also thought of making him a brownish tabby or a black & white cat, there were so many options! Cats are one of my favourite pets and I love their diversity in looks. It was hard to choose which kind to make. And making my own cat, a mad black one, was not an option because that would make this pattern a bit too basic. The cat had to be multi coloured.

And that diversity in looks presented another lovely challenge too. What if I could create a pattern that makes all sort of cats?

So, with that in mind I started designing and for every body part of the cat, I looked if there were easy colour changes to add to the pattern, so one could make a different looking cat.

This cat pattern has become so versatile, most types of cats can be made with it. For instance, in the part for the head, you can find an extra instruction of how to create a white line between the eyes. And the part for the body offers a second instruction to make a complete white belly. In the pattern you can find several of these instructions that can help you make your own cat.

Here are some more pictures of Martouf and below it you can find info about and links to buy this crochet cat pattern.

Info about & links to buy the pattern

This very versatile cat is made with Istex Lett Lopi, a worsted weight wool. It is 14 cm / 5.5 inch when sitting. The pattern is easy to crochet and offers many suggestions and instructions to create a different looking cat.

All the additional information you need to know about this pattern you can find in the shop listings. You can buy this pattern in my shop at Ravelry, Etsy or order it here. It contains a clear and colour coded description of how to crochet and assemble the cat, with example pictures at the bottom to help you get everything right. In the pattern you can also find what materials you need, the yarn colour numbers, in short, everything you need to know to make your own playful friend.

This pattern has a one dollar release discount till Tuesday the 11th of April.

Art, Stories

A very special project

This fresh new year, I am starting with a very special project. I am making the pattern for a fossilised monkey. And it is not even that simple, the monkey I am making is a prosimian or a lemur monkey. The researchers are not completely sure about it. This monkey, called Ida (based on Darwin’s name), died 47 million years ago and was found in Messel, Germany.

monkWhy am I making a fossilised monkey that lived 47 million years ago? To be honest, I’m not really a monkey fan. They just aren’t my kind of animals. I do love some lemurs and prosimians and please don’t get me wrong, I don’t dislike monkeys, but they aren’t on my list of cute and cuddly things that make me feel all happy like when I see a guinea pig, fox or squirrel.

But this Ida monkey does! This was the cutest and most beautiful monkey ever. A friend of mine, who is a wildlife and paleo artist, made the most fabulous illustrations for a book about Ida. Because Ida was so very well preserved, Esther could draw her exactly as she looked, except for the colours. They couldn’t see those from the fossil so she had to chose the most likely colours. And how she portraid Ida, I was in love with her from the start! She made the monkey look so gorgeous and exotic.

Ida is a lemur or prosimian monkey and has this specific type of body. I really like the shape of her head and flexible form. She is perfect for the monkey I like to make. The coloured illustration you see is one of the illustrations Esther made for the book. Ida is the baby monkey carried by the mother.

idaEsther has asked me before if I could make an Ida monkey, but I never wanted to because it doesn’t exist anymore and therefor crafters won’t recognise the crochet monkey. But lately I was thinking about making a hanging monkey and got stuck on which type. I asked Ether if she knew an extra cute one and of course she said I should make the Ida monkey. I wasn’t sure about it at first but the more I thought about it, the less unlikely it felt. Why wouldn’t I make a pattern for this type of monkey? Ida is absolutely gorgeous and If I design a hanging Ida monkey, I bet many crocheters would just love it. The colours can easily be replaced for colours of existing monkeys if one prefers so what’s the problem. It was done. I was making a fossilised monkey as first project of the year! Now to think of a suitable name…


Chit and Chat

Just a little update

Hi Crafters! I just wanted to let you know I am working on a new pattern. An armadillo that is and I must say, it is very challenging! Making the mostly seen on four legs creature sitting on its bottom for one thing is a bit tricky,  but let’s not forget about that very cool but difficult to crochet armour.

img_3987I have the head finished and decided to go for one piece. Originally I thought of giving the head an armoured patch, but I couldn’t manage myself to get it into the right place so that was a no go. Now, the armoured part of the head is crocheted differently than the rest of the head and to let it stand out more I used a neat looking and simple sewing trick. You’ll find out more about that when I publish the pattern.

Yesterday I spend most of the day by googling crochet stitches that give a smooth texture. The body armour is worked flat in rows. Working in rows and therefor turning your work, results in a sort of striped texture because every row you work in the opposite direction of the previous row. I needed to find an existing crochet stitch with a very different texture. Luckily for me, that isn’t very hard these days. Just type the right search terms and a whole new world of crochet stitches opens up for you. I found the perfect stitch for the body armour, called the linen stitch (or moss, or granite stitch) and it is very easy to do, it isn’t even a stitch really but more a skip and chain thingy but it gives a gorgeous knit looking texture.

Well, I am off now, have to actually make the armour and the rest of the armadillo. I wish you all a lovely weekend!

Uncategorized

Son’s Popkes Holiday gifts CAL & photo contest!

santa-and-rupert-guinea-pigs

Hi there lovely Crafters!

It still feels a lot like autumn but the holiday season is getting so close. Many of you crafters will be making their own gifts and a lot of Popkes will be made. Therefor, let’s share some crafty fun! I thought it would be a splendid idea to give a crochet along another try. And, by adding an Instagram and Ravelry photo contest to this CAL, you can win two of my patterns.

You can join this festive crochet along in my Ravelry group. It starts now and ends December 24, just before Christmas. You can choose any of my patterns.

There will be a discount on all my patterns for this CAL too. The coupon code for a 10% discount you can find in the CAL’s topic in my group.

There’s also an Instagram and Ravelry photo contest attached to this CAL, where the winner can win two of my patterns by their choice and a second price of one pattern.

  • To join the photo contest, simply post a gorgeous picture of the end result in the CAL thread on Ravelry and add it is your entry for the contest.
  • If you do not have a Ravelry account but are making Popkes as Christmas gifts, you can also join via Instagram, if you do, use hashtag #popkejoy
  • You can enter the maximum of three pictures
  • The winner will be announced on boxing day, December the 26th.

Do not be shy and join my group and this CAL, it is so much fun. You meet lovely new people and can even make friends, and you can win two patterns. If you can, share the word about this CAL and photo contest, the more people who join, the merrier.

See you in my group!