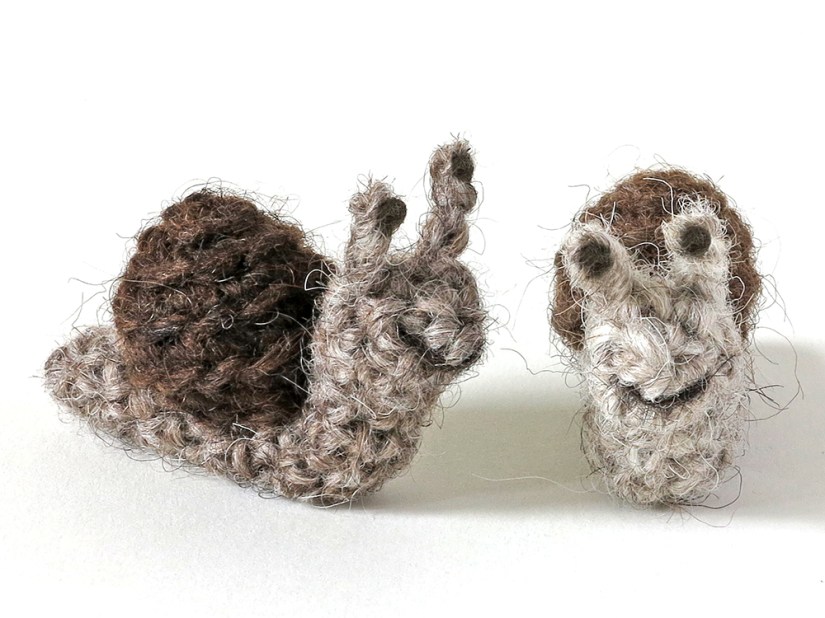
Am I serious? Yes, I thought it would be fun to make a crochet snail, a little friend who can accompany the hedgehog in pictures. So why not make a free pattern as well. I know you all yearned for a crochet snail. Who doesn’t want to make a crochet snail?!
Crochet snail pattern
Before you start
This pattern is written in standard American crochet terms. It’s useful to read it before you start. If you use the recommended yarn, your snail will be 3 inch / 7 cm long. The yarn I’ve used is Istex Lètt lopi, a 100% wool. Use a stitch marker to mark the beginning of a round, move it up each time you start a new round.
Materials
For these snails you’ll need worsted weight yarn and an E US/3.5 mm crochet hook. You need 2 colours of yarn (left-over bits are enough): I’ve used light beige (0086) and acorn (0053) for the light snail and oatmeal (0085) and chocolate (0867) for the darker one. I’ve split a strand of the darkest colour to embroider a mouth. You will also need fibrefill to stuff the snail and a pipe-cleaner to bend the body is optional. Not really my style, but I painted the eyes, using acrylic paint. I couldn’t think of another way the create dark dots. (Needle felting could do the trick, but most people don’t have the tools for that.)
Accessories
Hook E US / 3.5 mm, scissors, embroidery needle, stitch markers or paper clips.
Abbreviations: ch = chain, sc = single crochet, st = stitch, sl st = slip stitch, hdc = half double crochet stitch, dc = double crochet stitch, s2tog = invisible decrease, dec = normal decrease.
Instructions
Shell
The whole shell (round 2 – 5) is worked in the backloops only, so the unworked frontloops form a visible spiral on the outside of the shell.
1. magic ring of 4 = 4
2. 2 sc in each around = 8
3. (sc in next, 2 sc in next) x 4 = 12
4. sc in each around = 12
5. (sc in next, dec) = 8, sl st in 1st backloop and leave yarn end for sewing.
Body
1. magic ring of 4 = 4
2. sc in each around = 4
3. (sc in next, 2 sc in next) x 2 = 6
4-9. sc in each around = 6
10. sc in next, s2tog, sc in next, 2 sc in next 2 = 7
11. sc in next, s2tog, sc in next 2, 2 sc in next, sc in next = 7
12. s2tog, sc in next 2, 2 sc in next, sc in next 2 = 7
13. repeat round 12 = 7
14. sc in next, 2 sc in next, sc in next, s2tog x 2 = 6, sl st and leave yarn end for sewing.
You can now insert a pipe cleaner if you like to use one. Sew the hole closed by putting the needle from the inside out through all the outside loops of the 6 st, clockwise. Ifyou do it correctly, you can now pull the end and it will close the gap. Weave in the end.
Make the eyes by attaching the yarn at the side of the head, between round 2 and 3. Ch 3 st, in 2nd ch from hook sl st and weave in the yarn ends as shown in the image. You can embroider the mouth between round 1 and 2.
Now stuff the shell and attach it to the body. Position the shell as shown in the image and sew between the frontloops of the last round so you don’t change the edge. I’ve sewn back and forth between the side of the snail.
There, your not-so-slimy slimy new friend is finished!
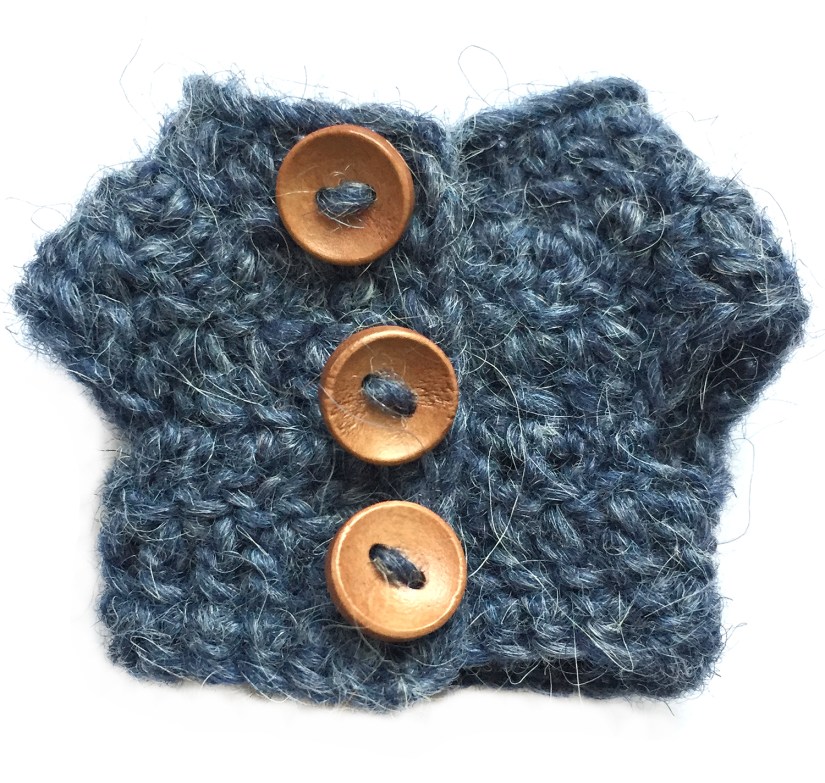
Maybe I should call it ‘Popke crochet cardigan pattern’. How cute is this?!
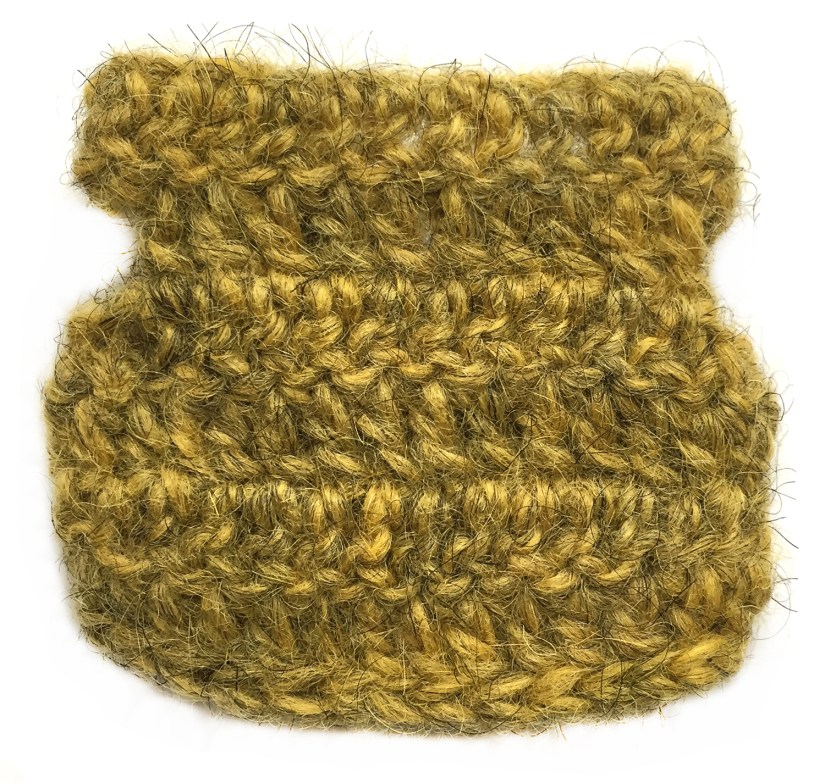
Most of you have already seen Poochey in his dapper outfit on my Instagram page and I got many requests for the little cardigan pattern. Because I wanted to design another little cardigan for the squirrel, I wanted to publish both when the squirrel was finished. And now is the time! Here are two free patterns for very trendy Popke cardigans. The cardigans are about the same size but the rabbit cardigan has different shaped sleeves, the squirrel cardigan doesn’t really have sleeves.
Instructions
I’ll keep this pattern very basic. The cardigans are approximately 7 cm / 3 inch wide and high, when made with worsted weight yarn and hook 3.5 mm/ E. I’ve used Istex Lett Lopi for the cardigans, the same yarn as the animals are made with.
Abbreviations: ch = chain, sc = single crochet, st = stitch, sl st = slip stitch, hdc = half double crochet stitch, BLO = work in back (inside) loops only, lst = loop stitch, s2tog = invisible decrease, pm = place marker.
The cardigans are made in rows. After you’ve made the starting chain, you do a first dc in the 4th ch from hook. You’ve actually made two dc’s because the top of the chain that forms when you work into the 4th stitch will be the 1st dc. After each turn, you ch 3 and dc in 5th ch from hook. Here you also make two dc’s in one and by skipping the 1st dc (that’s why you work into the 5th st) you keep the stitch count the same. It’s useful to keep marking the 1st stitches, because you might overlook them.
Rabbit cardigan
1. ch 26, in 4th ch from hook dc (pm in 1 st before this dc), dc in next 22 = 24, turn
2. ch 3, in BLO: in 5th ch from hook dc (pm in 1 st before this dc too), dc in next, 3 dc in next, dc in next 4, 3 dc in next, dc in next 6, 3 dc in next, dc in next 4, 3 dc in next, dc in next 3 = 32, turn
3. ch 3, in 5th ch from hook dc (make sure to mark the right stitch as 1st), dc in next 2, 3 dc in next (this is in the middle st of the 3 you did in the previous row), dc in next 6, 3 dc in next, dc in next 8, 3 dc in next, dc in next 6, 3 dc in next, dc in next 4 = 40, turn
4. ch 3, in 5th ch from hook dc, dc in next 3, dc in next (in the middle of 3), skip 8 st, dc in next (middle of 3), dc in next 10, dc in next (middle of 3), skip 8, dc in next (middle of 3), dc in next 5 = 24, turn
5. ch 3, in 4th ch from hook dc, dc in next 22, 2 dc in last = 26, turn
6.ch 1, in 2nd ch from hook sc, sc in next 5, hdc in next 2, dc in next 10, hdc in next 2, sc in next 5, sl st in last = 26, weave in yarn end.
Now sl st a neat seam all the way around the cardigan (not the collar) by starting at the top left corner.Make sure you have the same number of stitches on each front. The unworked loops from round 2 should be on the inside of the cardigan. You can add some buttons if you like, there is enough space between the stitches to form the buttonholes.
Squirrel cardigan
1. ch 26, in 4th ch from hook dc (pm in 1 st before this dc), dc in next 22 = 24, turn
2. ch 3, in 5th ch from hook dc, dc in next 2, skip next 3, ch 4, dc in next 10, skip next 3, ch 4, dc in next 4 = 26, turn
3. ch 1, in 2nd ch from hook sc (1st stitch), sc in next 7, dc in next 10, sc in next 8 = 26, turn
4. ch 1, in 2nd ch from hook sc, sc in next 4, hdc in next 3, dc in next 10, hdc in next 3, sc in next 5 = 26, turn
5. ch 1, in 2nd ch from hook 2 sc, sc in next 4, hdc in next 3, dc in next 10, hdc in next 3, sc in next 4, 2 sc in next = 28, turn
6. ch 1, in 2nd ch from hook sc, sc in next 4, hdc in next 4, dc in next 10, hdc in next 4, sc in next 4, sl st in last = 28, weave in yarn end.
Now sl st a neat seam like you did for the other cardigan. I’ve added small beads as buttons because there isn’t much space between the stitches to form buttonholes. But there are of course alternative ways to create ‘buttonholes’.
Note: this 1st version of the pattern isn’t edited professionally as, just by me, so if you notice a mistake, please let me know.
Now look what I’ve made this time, a new and improved crochet squirrel pattern! This is Floof, a cheeky little grey squirrel. Buy now – directly from me 🐱
Some of you might be thinking, ‘A squirrel amigurumi? I thought you were making a fox?’ And erm, yes, I did write that I was working on a fox. But I just couldn’t resist using the new skills I learned when I made the rabbit pattern for a more realistic squirrel pattern. Because in short, that is how designing works sometimes. You learn something from making one animal and a process starts in your head where that new skill is enhanced for another animal. When I was working on the fox, an idea began evolving around a squirrel. ‘What if I made the rabbit’s body more curved with smaller feet and a bigger belly patch, wouldn’t that be perfect for a crochet squirrel if I combined it with a tail similar to the look of the hedgehog spines?’ I asked myself. And when something so exciting like that starts to take shape in my mind, I can barely wait to start making it!
It sounded easier than it was. Creating the characteristic curved back of a squirrel was rather difficult to design, especially when there also had to be a white belly patch. I couldn’t just decrease a few stitches here and there at the back and increase them on the front, because that made the belly look way too wide. So I had to find the right balance between a curved back and a good looking belly. The squirrel turned out a little bit less bent forward than I had imagined, but I like this better. Because Floof is standing up a bit, he looks much more cheeky, like real grey squirrels look after they’ve come into your garden and stolen the bird food. I’m very satisfied with this look – and the tail … the tail is magnificent! The loop stitches take a bit more time to make, but after they are cut and brushed a bit, they absolutely make a very realistic, fluffy squirrel tail. For this grey squirrel amigurumi, I’ve used two contrasting colours of a thinner yarn to create a double coloured effect, but you can of course choose one colour as well. I think I’m totally in love with this fellow. And because I like red squirrels even more, I think I’ll have to make another squirrel very soon! Here are some more pictures of this scrumptious looking crochet squirrel, and below them you can find info about and links to buy the pattern.
Info about & links to buy the pattern
Floof is made with Istex Lett Lopi, a 100% wool with a lot of fuzziness, and the tail is made with two strands of Lopi Einband held together. If you use the recommended yarn, your squirrel will be 5.5 inch / 14 cm standing.
The pattern is written in US terms and contains a clear and colour-coded description of how to crochet and assemble the crochet squirrel and acorn, with extra illustrations and example pictures at the bottom to help you get everything right. In the pattern you can also find what materials you need, the yarn colour numbers – in short, everything you need to know to make your own realistic fluffy squirrel. All the additional information you need to know about this pattern you can find in the shop listings. You can buy this pattern in my shop at Ravelry, Etsy or directly from me with the link below.
This pattern has a permanent discount if you use this link. Patterns purchased directly from me cost 5,00 eur. I will have to email the pattern manually so it can take a bit longer, but I promise, you’ll have it in a day. If not, check your spam and if it is not there either, message me to wake me up, as I might have fallen asleep or something…
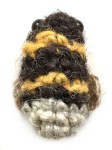
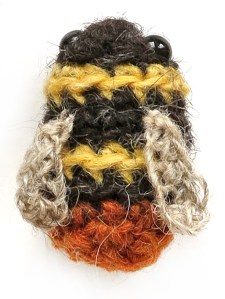
I’m ever so excited to present to you this little gift pattern. Just look at these crochet bumblebee species!
Last week I had a Spring holiday and suddenly got the idea of making a free crochet bumblebee pattern. The first bumblebee turned out so lovely that I decided to make more kinds of bumblebees. And when they where finished, I wanted to create a classic-looking image with the bees on a white background and their species name written next to them. In short, I had a lot of fun with my sweet little pattern and hope you will too! Bumblebees and insects are so important but their numbers are declining dramatically. Make these bees to show the world we must not forget about them! 🐝
Crochet bumblebees
Before you start
This pattern is written in standard American crochet terms. It’s useful to read it before you start. If you use the recommended yarn, your bumblebees will be 3 inch / 5 cm long. Because the size of the bee is dependent on the yarn you use and how tight you crochet, it’s useful to experiment with the eye size, despite my recommendations. I would strongly recommend a fuzzy yarn for the bumblebees. The yarn I’ve used is Istex Lètt lopi, a 100% wool. Use a stitch marker to mark the beginning of a round, move it up each time you start a new round. The colour changes are written after the description of the round, so read the whole line before you start. Always change colour in the last loop of a stitch, so the loop on the hook you end with is the new colour. That means the next stitch is in the new colour, not the one you changed in. At Son’s Popkes is a tips & tricks category. Here you can find useful info regarding my patterns.
Materials
For these bumblebees you’ll need worsted weight yarn and an E US/3.5 mm crochet hook. You’ll also need some lace weight yarn (Lopi Einband) for the wings: beige heather (0886). You need four colours of worsted weight yarn (left-over bits are enough): sheep or mixed black (0052 or 0005), yellow (1703), orange (1704) and light grey (0054). For the eyes I’ve used 7 mm animal eyes. You will also need fibrefill to stuff the bees.
Accessories
Hook E US / 3.5 mm, scissors, embroidery needle, stitch markers or paper clips.
Abbreviations: ch = chain, sc = single crochet, st = stitch, sl st = slip stitch, hdc = half double crochet stitch, dc = double crochet stitch, s2tog = invisible decrease.
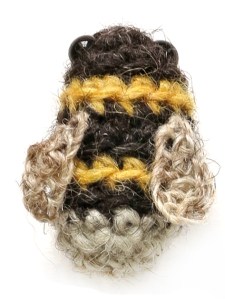
White-tailed bumblebee (bombus terrestris)
Body
Bottom of bee
Start in black, change colour when indicated. To get neater colour changes, you aren’t working in a spiral but closing each round with a sl st. At the end of each round, sl st in the first sc of the next round, then ch 1 and sc in that same stitch. This is the 1st stitch of the next round. At the end of each round you will skip over the sl st and ch and crochet a sl st, ch, sc in the following stitch. Don’t cut the yarnbetween the colour changes but carry it along.
1. magic ring of 4 = 4
2. (sc in next, 2 sc in next) x 2 = 6
Mark the stitches of round 3 in which you’ll make the 2nd and the 6th stitch with a coloured strand. (Insert the strand into the gap of the stitch you normally put your hook in.) When the strand is placed, just do the stitch like you always do. You’ve now marked where you later attach the eyes.
3. (sc in next 2, 2 sc in next) x 2 = 8, change colour to yellow in last st, sl st in 1st
4. ch 1, sc in same, [2 sc in next, (sc in next, 2 sc in next) x 3] in BLO = 12, change colour to black in last, sl st in 1st
5. ch 1, sc in same, [sc in next 11] in BLO = 12, sl st in 1st
Attach the eyes permanently in the marked spots. It helps turning the piece inside-out when you attach the caps. After I attached the eyes, I inserted a little bit of stuffing between them, as shown in the images below.
6. ch 1, sc in same, sc in next 11 = 12, change colour to yellow in last st, sl st in 1st
7. ch 1, sc in same, [sc in next 11] in BLO = 12, change colour to black in last and cut yellow, sl st in 1st
8. ch 1, sc in same, [sc in next 11] in BLO = 12, change colour to light grey in last and cut black, sl st in 1st
9. ch 1, sc in same,[sc in next 11] in BLO = 12, sl in 1st
10. ch 1, sc in same, s2tog, (sc in next, s2tog) x 3 = 8, sl st in 1st
Stuff the bumblebee.
11. ch 1, sc in same, sc in next, s2tog, sc in next 2, s2tog = 6, sl st in 1st
Add a little bit of stuffing if needed and then sew the hole closed by putting the needle from the inside out through all the outside loops of the 6 st, clockwise. If you do it correctly, you can now pull the end and it will close the gap. Make sure your bombus has a nice oval bottom.
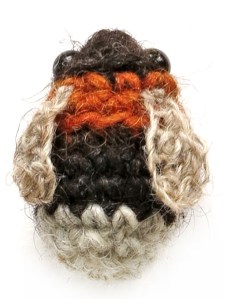
Red-tailed bumblebee (Bombus lapidarius)
1-3. Follow the instructions for the white-tailed bee but skip the sl st and ch 1 and don’t change colour to yellow in round 3.
4. In BLO: (sc in next, 2 sc in next) x 4 = 12
5. sc in each around = 12
Attach the eyes in the marked spots.
6-7. sc in each around = 12
8. sc in each around = 12, change colour to orange in last and cut black, sl st in 1st
9. ch 1, sc in same, sc in next 11= 12, sl st in 1st
10-11. follow the instructions for the white-tailed bumblebee.
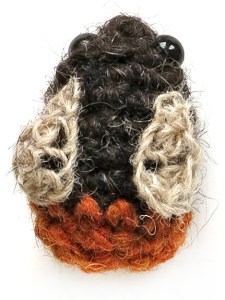
Tree bumblebee (Bombus hypnorum)
1-3. Follow the instructions from the white-tailed bumblebee, change colour to orange instead of yellow.
4. ch 1, sc in same, [2 sc in next, (sc in next, 2 sc in next) x 3] in BLO = 12, sl st in 1st
5. ch 1, sc in same, sc in next 11 = 12, change colour to black in last st and cut orange, sl st in 1st
Attach the eyes in the marked spots.
6. ch 1, sc in same, [sc in next 11] in BLO = 12, sl st in 1st
7. ch 1, sc in same, sc in next 11 = 12, sl st in 1st
8. ch 1, sc in same, sc in next 11 = 12, change colour to light grey in last and cut black, sl st in 1st
9. ch 1, sc in same, [sc in next 11]= 12, sl st in 1st
10-11. follow the instructions for the white-tailed bumblebee.
Early bumblebee (Bombus pratorum)
To make this bee, follow the instructions for the white-tailed, but make the bottom in orange instead of light grey. That’s all.
Wings
Make two for each bumblebee, use the thinner yarn with the same hook. If you use Lopi yarn but don’t have the Einband weight, split a lopi strand in half. Make the starting chain as long as the end, so you can use both ends together to attach the wings.
1. ch of 6, in 3rd ch from hook dc, dc in same, hdc in next, sc in next, sl st in next and leave yarn ends for sewing.
Use both yarn ends to sew the wings to the body. Sew them on top of the third round behind the head, as shown in the images. The head ends at the first round you do in BLO.
Wow, how cute is this? Have fun with your bumblebee collection. You now have the ability to make even more kinds!
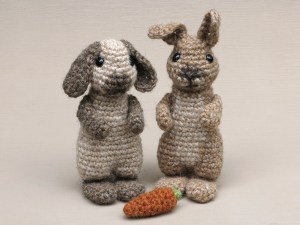
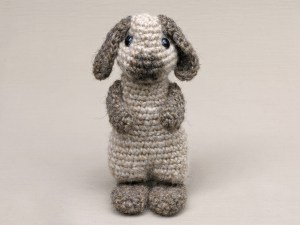
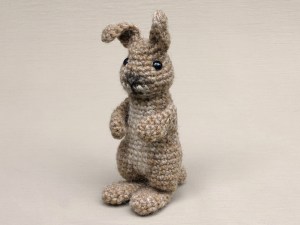
How did this happen? I wasn’t going to create new standing rabbits?! I wanted to redesign my lop rabbit pattern. But oh, my, they are so fabulously funny and cute, how could I stop making them? I very proudly present to you Poochey and Fudge, a new crochet bunny and lop rabbit amigurumi! Buy now – directly from me 🐱
It all started with pears. When designing the crochet rabbit’s head, I realised a rabbit head is pear-shaped. Basically, when you draw a pear, then draw a little circle at the bottom of it with a nose and mouth in it, ears at the top and eyes over the sides in the middle, you have a perfect bunny head. Knowing that, I didn’t immediately know how to translate that into crochet, but it helped a lot and made me discover the not-so-obvious head shape I now so love. Yes, my rabbits have pear-shaped heads too.
At this point, I still was working on a realistic lop rabbit, but having fun designing, I decided to also try a different-coloured head with the ears up. And that made all the difference! Not only did I love this version, so did many of you when I showed a little preview on Instagram. When contemplating this funny-looking character (yes, just a head, but I saw the rest of him), I knew an on-all-fours body would not work with this design. I imagined a silly, chubby, standing rabbit.
I also realised the leg/ feet shape of the sea otter would work perfectly for a flexible crochet rabbit body. Very cute, playful, and soft! These little bunnies have become so very whimsical. I adore their silly curly ears and surprised expressions. With crochet rabbits like these, there is no need to try to make them look perfect. It’s their wonkiness that makes them so utterly adorable.
You might be wondering about the differences between Poochey and Fudge. There aren’t many more than the eyes can see. They are practically the same with different colouring, except Fudge’s head is a bit narrower at the top and the lop ears are longer and shaped a bit differently, that’s all.
Here are some more pictures of these funny-looking crochet rabbits, and below them you can find info about and links to buy the pattern.
Info about & links to buy the pattern
Poochey & Fudge are made with Istex Lett Lopi, a 100% wool with a lot of fuzziness. If you use the recommended yarn, Poochey will be 7 inch / 17 cm high and Fudge 6 inch / 15 cm. If you are making a Poochey, I would strongly recommend a fuzzy yarn, because it hides the seams of the colour changes.
The pattern is written in US terms and contains a clear and colour-coded description of how to crochet and assemble the crochet rabbits, with extra illustrations and example pictures at the bottom to help you get everything right. In the pattern you can also find what materials you need, the yarn colour numbers, in short, everything you need to know to make your own utterly cute duo. All the additional information you need to know about this pattern you can find in the shop listings. You can buy this pattern in my shop at Ravelry, Etsy or directly from me with the link below.
This pattern has a permanent discount if you use this link. Patterns purchased directly from me cost 5,00 eur. I will have to email the pattern manually so it can take a bit longer, but I promise, you’ll have it in a day. If not, check your spam and if it is not there either, message me to wake me up, as I might have fallen asleep or something…
Maybe this is the most special and adorable pattern I’ve ever made. I proudly present to you a mother and her pup, Sno & Snoosle the crochet sea otters pattern. Buy now – directly from me 🐱
Look at them together! They almost look as heartwarming together as real sea otters. Some animals melt my heart when I look at them. I have to admit, I’m easily melted by animal beauty. Seeing mice, blackbirds or foxes doesn’t really matter, to me they all are gorgeous. But when I was looking online at pictures of sea otters, I even got a bit emotional by some of them. The love a sea otter has for its pup is so overwhelming. The way she holds her baby, tends and dries it and the way the baby sleeps on top of her, feeling completely safe, it’s absolutely heartwarming and shows the intelligence and consciousness of them. Of course the utter cuteness of the sea otter and especially the pup helps. Baby sea otters look like living plushies. Their thick and warm coat makes them look incredibly cute and that was a huge challenge for me in the design process. How could I ever match the cuteness of a real baby sea otter?
Well, I did the best I could, my first prototype pup looked more like a sloth than a sea otter, but at least I knew how not to make it. Actually, I started with the head of the adult. Most adult sea otters have a white face that looks flat, but if you take a better look, you notice they do have quite a snouty face. So, I had to find a way to make the face look flat, but with a muzzle. After several attempts I found the solution. The body of course was not easy to design either, because I wanted the otter to look upwards a bit. That meant I had to make a curved neck. Also, I wasn’t sure about how to attach the legs and tail to the body to make it look natural. When I got stuck on the adult, I started on the pup, a teeny tiny thing it is! In order to achieve making a tiny little otter, I decided to crochet the body as one piece, so you connect the tail and legs and from that point you work your way upwards. That of course was also the solution to create a realistic looking body for the adult otter. How splendid that worked out.
Because I like this text to be as short as possible, I’m not going to tell more about the process. But I do want to add that I am ever so delighted with the result. I absolutely love my sea otter amigurumis. Here are some more pictures and below them you can find info about and links to buy the pattern. And yes, the baby is part of this crochet sea otter pattern!
Info about & links to buy the pattern
Sno and Snoosle are made with Istex Lett Lopi, a 100% wool with a lot of fuzziness. If you use the recommended yarn, your adult otter will be 8 inch / 20 cm and the baby 5.5 inch / 12 cm long.
The pattern is written in US terms and contains a clear and colour-coded description of how to crochet and assemble the animals, with extra illustrations and example pictures at the bottom to help you get everything right. In the pattern you can also find what materials you need, the yarn colour numbers, in short, everything you need to know to make your own adorable sea otter duo. All the additional information you need to know about this pattern you can find in the shop listings. You can buy this pattern in my shop at Ravelry, Etsy or directly from me with the link below.
This pattern has a permanent discount if you use this link. Patterns purchased directly from me cost 5,00 eur. I will have to email the pattern manually so it can take a bit longer, but I promise, you’ll have it in a day. If not, check your spam and if it is not there either, message me to wake me up, as I might have fallen asleep or something…
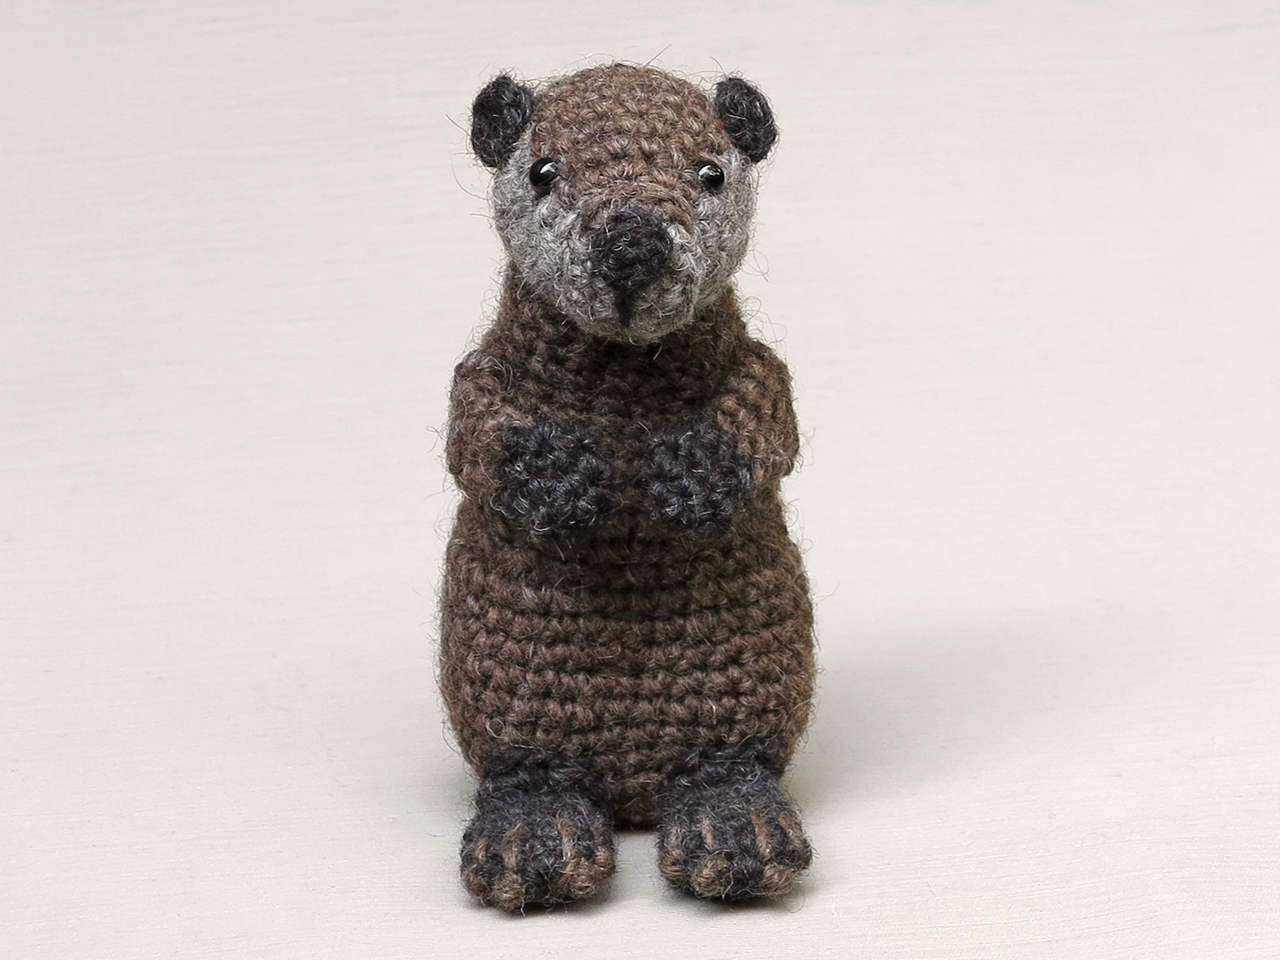
What a number of names this silly animal can be called by! I proudly present to you Monty II! In Europe we call them marmots, and I believe in the US people also know what animal you mean if you are talking about marmots, but they are also called groundhogs, woodchucks, or whistle pigs there. Yes, whistle pig is my favourite name from now on! Look at this new Monty, isn’t he a marvellous, cranky-looking crochet marmot? Perfectly suitable for Groundhog Day, I would say! Buy now – directly from me 🐱
Many years ago I designed a marmot amigurumi pattern after a holiday in the Alps. During our hikes, we often heard a strange high whistle, and after longing to find out what made the noise, we finally saw the culprit. It was the first time we saw Alpine marmots, and I absolutely loved them. Such funny-looking fluffy beasts. After seeing the marmots, of course I had to make a pattern for them. I later realised that the silly animal in the much-loved movie “Groundhog Day” is a marmot, too, how perfect!
Last year I updated many of my older patterns. Some crochet animals got a little makeover, and others stayed the same but got an updated pattern with more pictures and a better layout. There were a few patterns I skipped, and Monty was one of them. I realised that I had learned so much in the past few years that I would make him quite different if I redesigned him. I decided to temporarily put his pattern on hold till I found the right moment to design a new one. And because at the beginning of the new year it always is a bit difficult for me to start something new, this seemed the perfect moment to make Monty II.
And look at him! He looks so much more like a marmot than Monty did. When I made the beaver pattern, I realised that proportions similar to that would be very suitable for a marmot. I designed a new head for Monty with little crocheted-in eyebrows and a new body with a much better shaped yellowish belly. The first Monty was a cute little doll but this one has much more of the marmot attitude, don’t you think? Check out these pictures of this cute marmot/ woodchuck/ groundhog/ whistle pig amigurumi; below them you can find info about and links to buy the pattern.
Info about & links to buy the pattern
Monty is made with Istex Lett Lopi, a 100% wool with a lot of fuzziness. I chose to make the ears, hands, feet, and tail a little bit darker than the body and head, but doing them all in one colour works perfectly well, too. Monty is 5.5 inch / 14 cm high when made with this yarn.
The pattern is written in US terms and contains a clear and colour-coded description of how to crochet and assemble the animal, with extra illustrations and example pictures at the bottom to help you get everything right. In the pattern you can also find what materials you need, the yarn colour numbers, in short, everything you need to know to make your own fluffy marmot amigurumi. All the additional information you need to know about this pattern you can find in the shop listings. You can buy this pattern in my shop at Ravelry, Etsy or directly from me with the link below.
This pattern has a permanent discount if you use this link. Patterns purchased directly from me cost 5,00 eur. I will have to email the pattern manually so it can take a bit longer, but I promise, you’ll have it in a day. If not, check your spam and if it is not there either, message me to wake me up, as I might have fallen asleep or something…
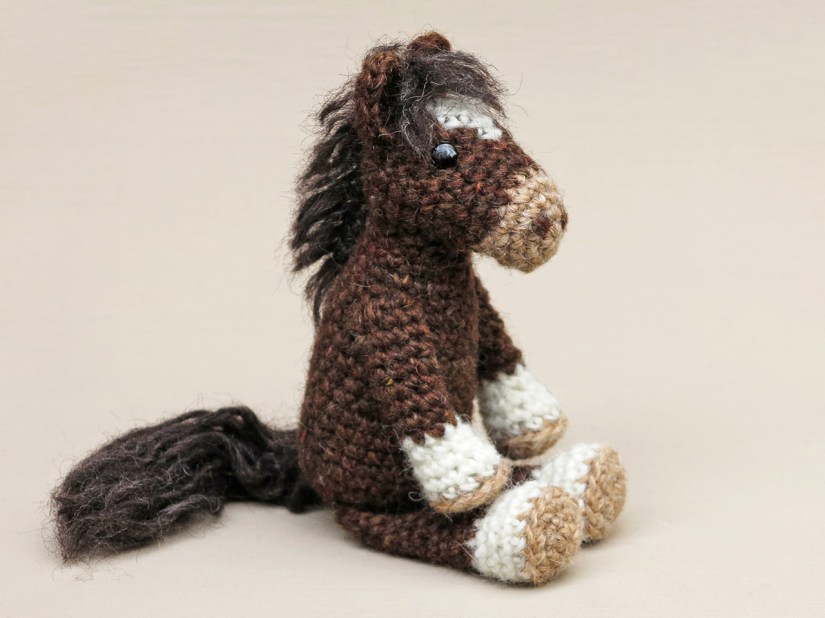
Brace yourselves, horse girls and boys, for I have finally made you a pattern! I present to you Windu the crochet horse! Buy now – directly from me 🐱
Now that this amigurumi horse is finished, I almost regret I haven’t made a horse sooner. I think it’s not just horse people who will like this majestic cutie. I cannot deny that I have a preference to make small, furry wild animals. Horses are gorgeous and clever but I’ve never been a horse girl. There is a big heathland in our area that we often visit where sheep and cows and two sweet Shetland ponies graze. When we go there, we always call the ponies and they come running to us and we can pet them. They have a gorgeous wild fur, and it is so amusing to see those two characters between the other grazers. But it was when I met the Exmoor ponies in the wetlands close to my home that I got excited about making a horse pattern. I absolutely fell in love with those gorgeous, fuzzy and wild ponies.
Because Exmoor ponies are quite big, I decide I could make a horse pattern instead of a pony, as they look so similar anyway. And it is basically up to us, isn’t it? I mean, Windu could just a well be a Shetland pony as a horse!
When I started working on this crochet horse pattern, I wasn’t sure what colours to use. I decided to go freestyle and see what would happen. When I had created the perfect shape for the head, I knew I wanted a lighter nose and a white triangle shape on the head. When I designed the legs, my idea was to give this horse white socks. But while testing, I discovered a darker foot sole with white on top looked perfect. The pieces of the puzzle fell together and I found that I had created this beautiful horse. I’m especially proud of the shape of the head and the mane. Because the head has a very realistic horse shape, you can use any colour you like to create your own horse. So go ahead crafters, experiment and create your favourite! Here are some more pictures of Windu, and below them you can find info about the pattern and links to buy it.
This lovely fuzzy horse is made with Istex Lett Lopi, a 100% wool with a lot of fuzziness. He is 6 inch / 15.5 cm when sitting.
The pattern is written in US terms and contains a clear and colour-coded description of how to crochet and assemble this animal, with extra illustrations and example pictures at the bottom to help you get everything right. In the pattern you can also find what materials you need, the yarn colour numbers, in short, everything you need to know to make your own horse amigurumi. All the additional information you need to know about this pattern you can find in the shop listings. You can buy this pattern in my shop at Ravelry, Etsy or directly from me with the link below.
This pattern has a permanent discount if you use this link. Patterns purchased directly from me cost 5,00 eur. I will have to email the pattern manually so it can take a bit longer, but I promise, you’ll have it in a day. If not, check your spam and if it is not there either, message me to wake me up, as I might have fallen asleep or something…
It’s my pleasure to present a new crochet animal pattern to you! This time I made a rather nibbly little creature. I proudly present to you Floki the beaver amigurumi. Buy now – directly from me 🐱
A crochet beaver pattern has been on my list of animals for a long time, and now I have finally made one. I’m so glad I did. This beaver turned out to be a little doll but he is also very realistic. Before I start making a crochet animal, I think about how I picture the animal, and with beavers it’s their relaxed way of living that is striking to me. They are kind of plump creatures and whatever they do, they do it with total ease. I really like watching them.
So, for this beaver amigurumi I had in mind to create a ‘relaxed’-looking doll, nicely shaped with big webbed feet. For the body I wanted to try a different method of shaping, by crocheting the leg- and hip-shapes directly into the body with some extra increases. It worked out quite well, but after the body was stuffed, the shapes became a bit less noticeable. I decided a bit of extra shaping was needed after the body was stuffed, so I sewed a few stitches through the completed body to recover the intended dent. That worked out perfectly and resulted in chubby little hips, and a small tummy even emerged above the hips, how lovely! The dent that formed at the back could easily be covered underneath the big tail, which creates the bottom of the back before the actual tail starts.
The idea of how to make the feet looked webbed came pretty easily after the cute little toes I made for the realistic hedgehog. I had in mind to give the beaver the same little toes (nails), this time in a contrasting colour. Now if I embroidered four lines halfway over each foot, starting in the nails, I could create the impression of webbed feet. Luckily for me, my plan worked. The arms I kept small and basic, as beavers have such cute little front paws.
Now I’m being all positive about the process, but I had some difficulties. My hedgehog pattern had become so amazing that it felt like I had to make something just as perfect. And with every piece I made for this beaver, I was thinking ‘is this good enough?’ It was silly, really. I had to let that feeling go, because it is nonsense to think that hedgy is the best thing I ever made and now everything has to be just as perfect. I’m totally being honest here: I actually thought of abandoning the beaver. Fortunately, I’m not the kind of person to give up on something, and I had my mind set on finishing this beaver, so after a while that feeling disappeared and I started to really love the little creature I was making. I had so much fun I even made him a little stick. Here are some more pictures of little Floki, and below them you can find all the info you need to get the pattern.
This realistic crochet beaver is made with Istex Lett Lopi, a 100% wool with a lot of fuzziness. He is 5.5 inch / 14 cm high when made with this yarn. The pattern includes the instructions for the little stick. 🌿
The pattern is written in US terms and contains a clear and colour-coded description of how to crochet and assemble this animal, with extra illustrations and example pictures at the bottom to help you get everything right. In the pattern you can also find what materials you need, the yarn colour numbers, in short, everything you need to know to make your own beaver amigurumi. All the additional information you need to know about this pattern you can find in the shop listings. You can buy this pattern in my shop at Ravelry, Etsy or directly from me with the link below.
This pattern has a permanent discount if you use this link. Patterns purchased directly from me cost 5,00 eur. I will have to email the pattern manually so it can take a bit longer, but I promise, you’ll have it in a day. If not, check your spam and if it is not there either, message me to wake me up, as I might have fallen asleep or something…
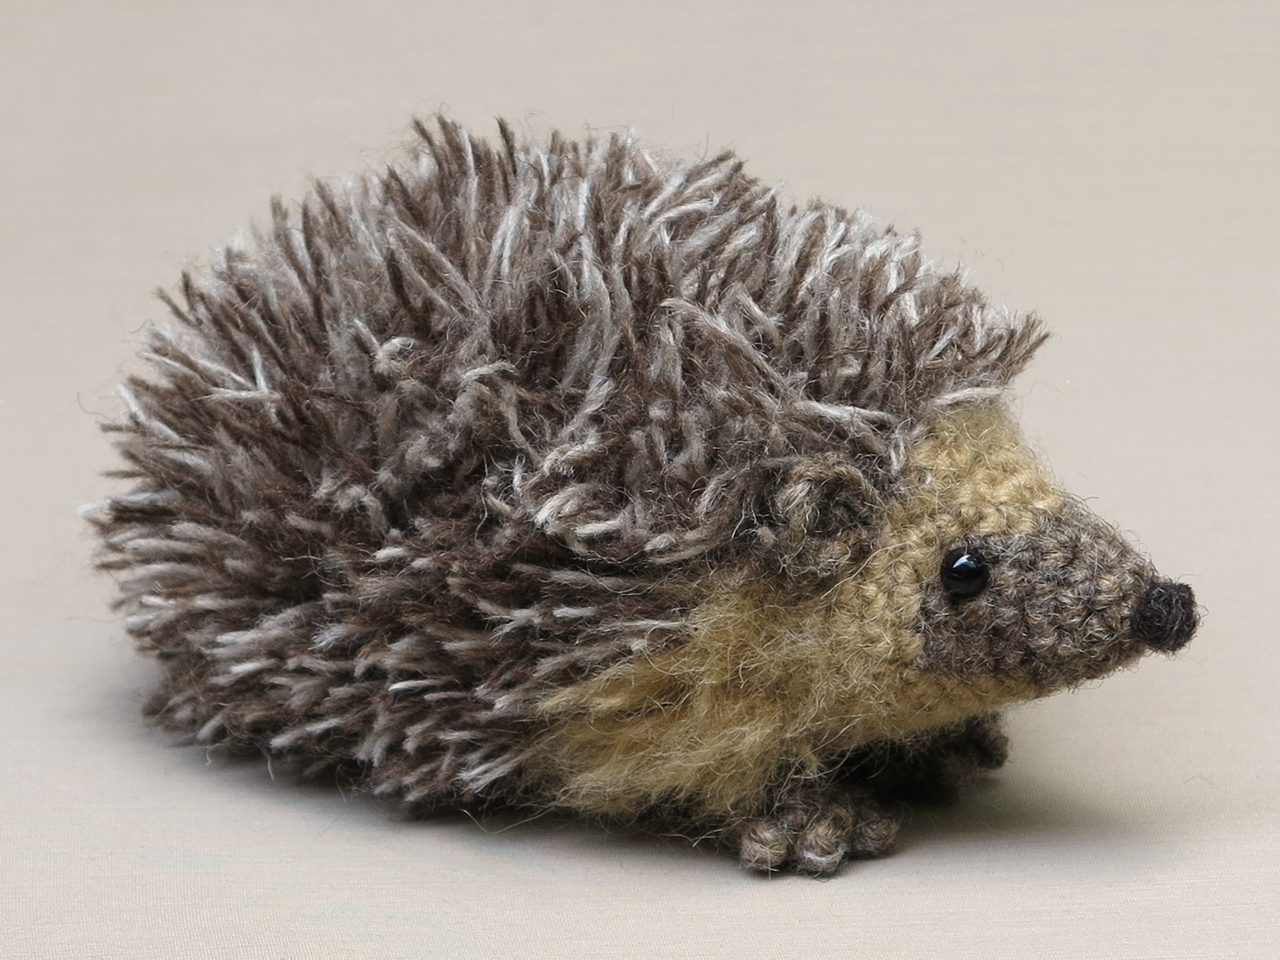
Wow, he’s finally finished, I’m so excited to share my realistic amigurumi hedgehog, just look at him! Buy now – directly from me 🐱
My editor commented in the pattern ‘it almost hurts to see the needle!’. I think that is the best compliment I have ever gotten. And I am so excited to share this pattern because I’m absolutely fond of the result. This little hedgehog looks so real I even surprised myself. Sometimes you have an idea, and you’re not sure it will work out, but this did – well, in the end it did!
I love creating playful doll-looking crochet animal patterns but it’s also challenging to create a realistic animal every now and then. When this Summer a gorgeous little hedgehog visited our garden every evening, I knew I had to design a realistic crochet version.
Hedgehogs do not have the most complex body shape, they basically are an oval-shape on paws. But they do have those prickly spines that makes them a huge challenge to create from yarn. But there I had this little advantage, I have a hedgehog plush with double coloured hair that looks very realistic. That gave me the idea to use two colours of lace yarn held together as one strand, to get a similar look. I also knew I had to use ‘cut loop stitches’ to get the most perfect result. And that is when the story began.
I started by making a nice looking hedgehog head, based on Flims’s head. My idea was to crochet the head and body in one piece and then to add the spines like a tortoise shell. When you crochet the loop stitch, the loops will form on the inside of your work, and turning around a two-coloured head was not an option. The spined-shell had to be attached later.
But the idea of a shell didn’t work out. My shell stayed flat and I could not get it tortoiseshell shaped….shoot. I had to come up with something different.
After some consideration I decided to make the head and body as separate pieces, so I could crochet the body the wrong side up. That was easier said than done. Designing a two-coloured body in loop stitches the wrong side up means you have practically no idea about the result when you turn it around and have cut the loops. Let’s just say you crafters are very blessed to have a pattern to follow. When I had finally managed to get a good proportioned body, I cut the spines too short and had to make another one. It was a good opportunity to test my own instructions. I had already seen how the hedgehog was going to look and that made me very enthusiastic. When the new body was finished, all I had to do was to design some cute footsies with little toes, and the hedgehog was finished.
And I am so proud and happy with the result. Here are some more pictures of this cuddly prickly crochet hedgehog, and below them you can find all the info you need.
Info about & links to buy the pattern
This realistic crochet hedgehog is made with Istex Lett Lopi and Einband Lopi, a 100% wool with a lot of fuzziness. He is 6.5 inch / 16.5 cm long from nose to bottom when made with this yarn. This isn’t a very difficult animal to crochet, even the loop stitch is quite easy when you get the hang of it, but cutting and modelling the spines does require your own skill together with the instructions in the pattern.
The pattern contains a clear and colour-coded description of how to crochet and assemble this animal, with extra illustrations and example pictures at the bottom to help you get everything right. In the pattern you can also find what materials you need, the yarn colour numbers, in short, everything you need to know to make your own realistic hedgehog amigurumi. All the additional information you need to know about this pattern you can find in the shop listings. You can buy this pattern in my shop at Ravelry, Etsy or directly from me with the link below.
This pattern has a permanent discount if you use this link. Patterns purchased directly from me cost 5,00 eur. I will have to email the pattern manually so it can take a bit longer, but I promise, you’ll have it in a day. If not, check your spam and if it is not there either, message me to wake me up, as I might have fallen asleep or something…

 You can now insert a pipe cleaner if you like to use one. Sew the hole closed by putting the needle from the inside out through all the outside loops of the 6 st, clockwise. If you do it correctly, you can now pull the end and it will close the gap. Weave in the end.