Patterns

Floki, crochet beaver pattern

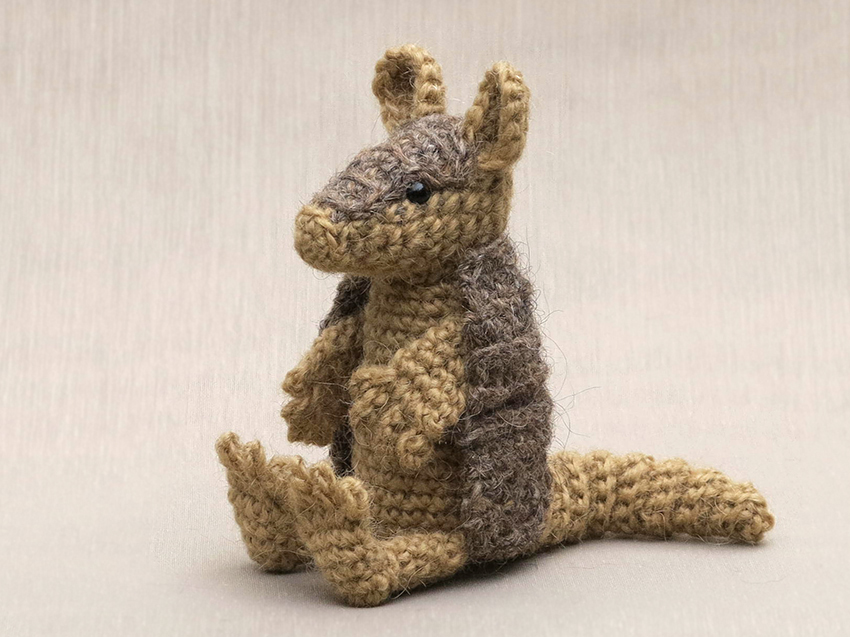
It’s my pleasure to present a new crochet animal pattern to you! This time I made a rather nibbly little creature. I proudly present to you Floki the beaver amigurumi.

Realistic crochet beaver pattern

A crochet beaver pattern has been on my list of animals for a long time, and now I have finally made one. I’m so glad I did. This beaver turned out to be a little doll but he is also very realistic. Before I start making a crochet animal, I think about how I picture the animal, and with beavers it’s their relaxed way of living that is striking to me. They are kind of plump creatures and whatever they do, they do it with total ease. I really like watching them.

So, for this beaver amigurumi I had in mind to create a ‘relaxed’-looking doll, nicely shaped with big webbed feet. For the body I wanted to try a different method of shaping, by crocheting the leg- and hip-shapes directly into the body with some extra increases. It worked out quite well, but after the body was stuffed, the shapes became a bit less noticeable. I decided a bit of extra shaping was needed after the body was stuffed, so I sewed a few stitches through the completed body to recover the intended dent. That worked out perfectly and resulted in chubby little hips, and a small tummy even emerged above the hips, how lovely! The dent that formed at the back could easily be covered underneath the big tail, which creates the bottom of the back before the actual tail starts.

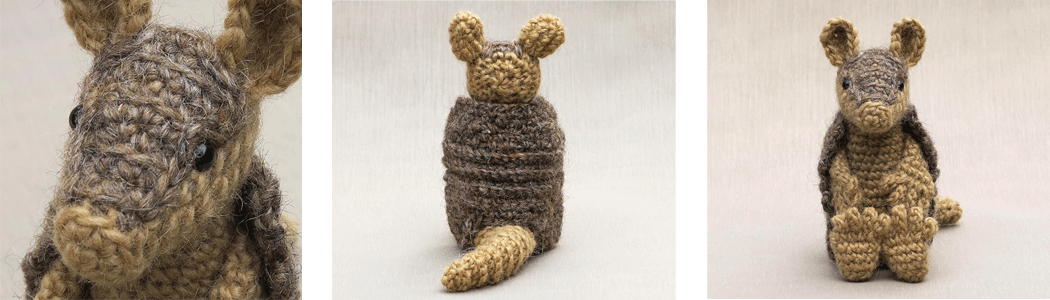
The idea of how to make the feet looked webbed came pretty easily after the cute little toes I made for the realistic hedgehog. I had in mind to give the beaver the same little toes (nails), this time in a contrasting colour. Now if I embroidered four lines halfway over each foot, starting in the nails, I could create the impression of webbed feet. Luckily for me, my plan worked. The arms I kept small and basic, as beavers have such cute little front paws.

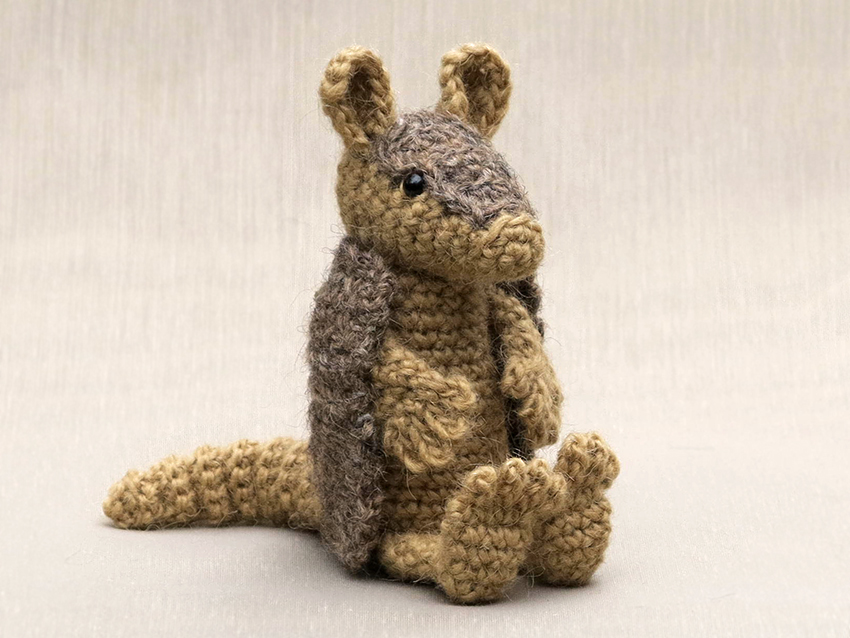
Now I’m being all positive about the process, but I had some difficulties. My hedgehog pattern had become so amazing that it felt like I had to make something just as perfect. And with every piece I made for this beaver, I was thinking ‘is this good enough?’ It was silly, really. I had to let that feeling go, because it is nonsense to think that hedgy is the best thing I ever made and now everything has to be just as perfect. I’m totally being honest here: I actually thought of abandoning the beaver. Fortunately, I’m not the kind of person to give up on something, and I had my mind set on finishing this beaver, so after a while that feeling disappeared and I started to really love the little creature I was making. I had so much fun I even made him a little stick. Here are some more pictures of little Floki, and below them you can find all the info you need to get the pattern.

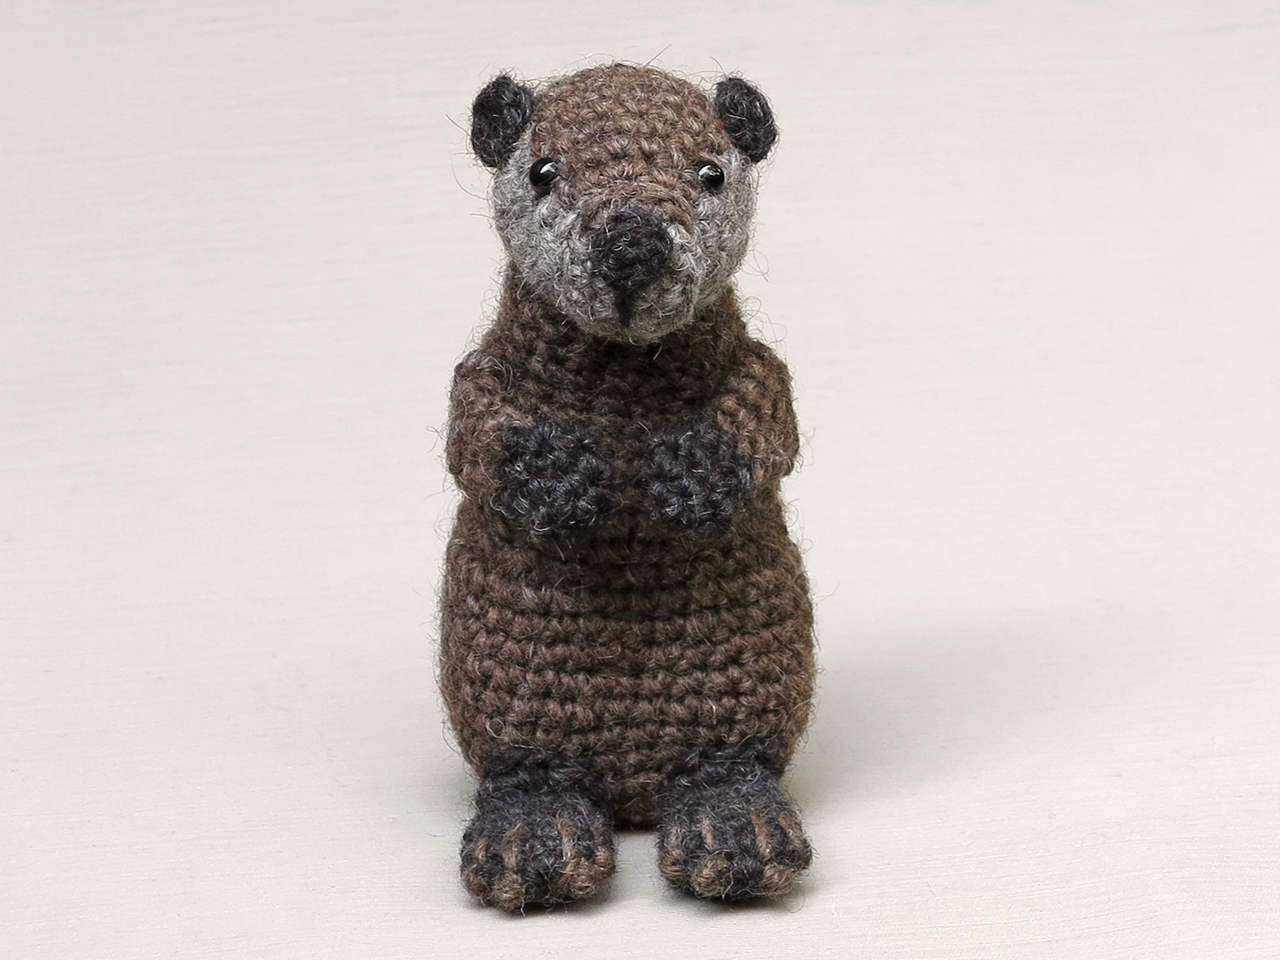
This realistic crochet beaver is made with Istex Lett Lopi, a 100% wool with a lot of fuzziness. He is 5.5 inch / 14 cm high when made with this yarn. The pattern includes the instructions for the little stick. 🌿

The pattern is written in US terms and contains a clear and colour-coded description of how to crochet and assemble this animal, with extra illustrations and example pictures at the bottom to help you get everything right. In the pattern you can also find what materials you need, the yarn colour numbers, in short, everything you need to know to make your own beaver amigurumi. All the additional information you need to know about this pattern you can find in the shop listings. You can buy this pattern in my shop at Ravelry, Etsy or order it here.

This pattern has a one dollar release discount till Friday the 9th of November so get your copy in time!

Art, Chit and Chat, Uncategorized

A phase

When I look at all the patterns I have made so far, I am quite proud of each and every one of them. Look at them, so many (and I even forgot a few), that is about three years of designing in that picture!

amigurumi patterns

But lately I’ve been so critical about my designs that I am having a hard time finishing them. This must be something every designer goes through every once and a while. Maybe it is just the soggy weather and the grey of winter that makes me judge my work differently.

It started when I was working on my tortoise pattern. I made this gorgeous looking shell, that would be a bit difficult to assemble. And because I couldn’t write it down perfectly scientifically, I had to re-think it so I fooled around with it for a while and did not enjoy it. Then I saw this picture of a gorgeous looking American red squirrel and decided I was going to set aside the tortoise and make a new squirrel that made me all excited. I started all enthusiastic but soon afterwards doubted every part I made. I guess designing the realistic animals got me into this phase. Because now, when I’m designing a doll, I’m not sure anymore how realistic it should look. These crochet animals must look like the real animal for sure, but they also should be a bit more whimsical and playful looking, well you’ve just seen my Popkes. When I look at my sweet little squirrel face, I’m thinking ‘isn’t this looking too complicated?’ or ‘isn’t this head too small, should I make a more round and basic head?’. It’s annoying, I’m doubting my every move, while I can clearly see what I came up with isn’t looking bad at all.

The best thing to do is to just keep working on it. Today I made a very smart looking tail, which doesn’t need pipe cleaners in it to make it look bended. And the body I made has a very formidable looking light belly, so I suppose I am just being a bit too hard on myself. I will just continue working on this sweetie and assemble a prototype. When that is finished I can decide if I find this squirrel whimsical and characteristic enough and if anything needs to be changed.

Yes, that is a good plan. See you when it is finished dear crafters!

Art, Stories

Badger update

Hi crafty folks, I just wanted to give you and update on the progress of the badger. Here is a little teaser image for you.

I have a first badger finished and it is already sitting on my bedside table. Now you probably are thinking ‘what am I supposed to do with that info?’ Well, when a doll is finished, I always bring it with me to the bedroom, because I want to have it close to me. You know, like when you were a kid and put your new shoes next to your bed. Or was that only me?

Anyway, now you probably will understand I love this badger plushy to bits. It wasn’t easy to create this more realistic shaped pattern and I got stuck many times. I will tell all about that when I publish the pattern. What I can say now is that this crochet badger means a lot to me. Badgers are me favourite animals and after seeing one in the wild this summer it is very special to now have a homemade miniature badger next to my bed. I think this badger radiates my love for the animal and will make a very special pattern for all animal and badger lovers out there.

And one more thing. This crochet badger is brushed and to be sure all the proportions are good before I could do the promo and pattern photoshoot, I had to finish a first badger. I also want pictures in the pattern of how you assemble the animal, so I needed an unfinished doll for that purpose. I am happy to say everything turned out good so that means I will have two almost identical badgers. Maybe I will sell one off them. I have to think about that.

See you next week 🦊

Chit and Chat

Realistic animals

For a long time I have been fantasising about making realistic animals. Even now, most of my patterns are more realistic looking than many crochet animal doll patterns around, but they are dolls. The idea of making a real looking animal is extremely tempting. It makes me feel excited and I think I’m able to do it.

This Summer I was so incredibly lucky, I saw a badger in broad daylight, in the middle of the afternoon and very closeby. It was amazing, I was completely flabbergasted. The badger was foraging in bushes very close to where we walked, then saw us and disappeared till it decided to cross the path a bit further away from us anyway and passed us again. We had enough time to be amazed first and then got a proper look! It felt like the badger was there just for me to see it.

Now you can guess the realistic animal I am going to make, yes, a badger! I’m looking so forward to start working on it. And no worries, I will never stop making ‘Popkes’ (little dolls), that’s just too much fun. And because I never made a realistic animal before, I have now idea if I will succeed. Let’s hope it will work out and there will be a pattern in the nearby future.

Back to little dolls for now, there is one that is almost ready to get published, the sloth. And oh, what a joy I had making the sloth.

At first, I didn’t even felt like making a sloth. Ashamed as I am, I must admit I found them quite hideous. Many people seemed to like them a lot and I often got requests if I could make a pattern for one. Then I decided to ask in my Ravelry group which animal pattern people were looking forward to and the sloth won.

By change, I had just bought the cutest ever sloth calendar and started to look better at them. I got enchanted by their utterly sweet and loving face. They might have the strangest body proportions, but they have the most kind face you can imagine. I soon started to love them and couldn’t wait to get the pattern ready. Here’s a little preview of my sloth’s sweet and mischievous face.

We’ll meet here soon when I publish the pattern!


Uncategorized

An exciting new design

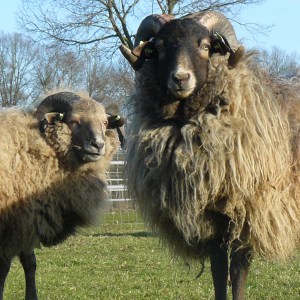
Sometimes a small coincidence can make all the difference. After I finished the piglet pattern, I started thinking about what animal to make next. Usually, I already know what to make next when I am working on another one but this time that wasn’t the case. That was until I saw this lovely crochet horned sheep on someone’s Instagram feed. It was not made in my style but it looked so nice and interesting that I could immediately visualise how I could make a fabulous sheep, it was instant inspiration. In fact, it made me so excited I wanted to start right away!
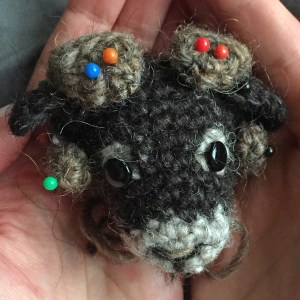
And I did. The sheep is already finished and looking spectacular. Now only the pattern needs to be written, edited and tested and I can hit publish.

I assume you are curious about the kind of sheep I made. I based my sheep on a local heather sheep called Drents heideschaap. It is a sheep I often see on our hikes through the countryside. The sheep are curious and friendly grazers with a slender build and long tails. The males have these gorgeous horns that grow in a lovely curl.

In my ‘about’ story I added a picture on which you see me walking with a tail of curious sheep, that is them indeed, but just the hornless females. In the last picture below (from the web) you see how the males look with their impressive horns.

Oh, I am so excited to show you the finished sheep and hope to be able to do so by the end of this week. Here are some glimpses and one funny pic of a curious young sheep I met this week.

See you at the end of the week!

Art, Patterns

Oakie, crochet armadillo pattern

Sitting as promised in my original Popke style, I proudly present to you Oakie the crochet armadillo.

armadillo crochet pattern

Wow, what a process this was. I never expected all the bumps on the road of designing this crochet armadillo pattern. In my previous post I explained about the challenge of making this interesting looking creature. Making an animal that would never, ever even think of sitting on its bottom, sit on its bottom was for starters a classical design issue. But the body armour was so utterly complicated to design that the sitting thing seemed nothing. I wrote about the smooth textured Linen stitch I was planning to use for the armour. When I started everything seemed so jolly well. What a perfect stitch for armadillo armour. But then some in- and decreasing had to be done and how on earth could I do that with this stitch? I googled for info and found nothing, who would have thought about that? People only seem to crochet scarfs and pillowcases with this stitch, not animals. So I had to find a way myself. After testing all sorts of solutions and almost writing a post here begging someone to help me, I found the solution to my problem. Decrease three stitches instead of two. How simple could it be. Not everything was rough on this road. From the start I knew how I was going to design the arms. The legs and feet just fell into place when I made them and the tail looks fabulous because it is worked flat.

I really like the almost reptile looking appearance of Oakie’s face. The smaller eyes, unworked back loops and chain stitches form a perfect whole to create that characteristic armour texture. The rugged Lopi yarn accentuates it even more. Oakie might be unable to roll himself into a ball, but you can easily imaging him to do so. Just look at him! This armadillo is the most special creature I have ever made a crochet pattern for. Below the pictures you can find info about this armadillo amigurumi and the links to buy the pattern.

armadillo-amigurumi

crochet-armadillo-amigurumi

Info about & links to buy the pattern

This very rugged but cuddly crochet armadillo is made with Istex Lett Lopi, a worsted weight wool. He is 14 cm / 5.5 inch when sitting. All the additional information you need to know about this pattern you can find in the shop listings. You can buy this pattern in my shop at Ravelry, Etsy or order it here. It contains a clear and colour coded description of how to crochet and assemble the armadillo with extra illustrations and example pictures at the bottom to help you get everything right. In the pattern you can also find what materials you need, the yarn colour numbers, in short, everything you need to know to make your own ancient looking friend.

And heads up, this pattern has a one dollar release discount till Wednesday the 28th.

Patterns

Pudding & Cake, crochet guinea pig patterns

With a lot of excitement and some pride, I present to you Pudding and Cake, my crochet guinea pig patterns. Meet the furry little boys!

Guinea pig crochet pattern

Not one crochet guinea pig pattern but two? Well yes! I started by making a sketch as I always do and somehow got to a final one showing two cuddly guinea pigs. At first that was just the lovely sketch but the further I got with making Pudding, I felt like actually making that second piggy on all fours too. My basic idea was to make a standing guinea pig, a whimsical character like most of my crochet animals are. I think because guinea pigs have a special place in my heart (I have had them when I was little and for the last 10 years too), it felt so natural to make Pudding a friend.

pudding-cakeMy crochet animals usually are a blend between a realistic looking animal and a playful doll shaped character. For the second piggy I decided to go for a more classical shape, standing on all fours. As that isn’t really my thing, it felt a bit odd designing an animal like that so I tried best to capture the playfulness my patterns normally have. And I had to, making Cake a perfect match to Pudding. Don’t they make the cutest pair? I’m a bit stunned myself, they look so adorable and funny together with their wild looks.

When I started designing Pudding, I really wanted to give my crochet guinea pig the appearance of the abbesinian guinea pig, my favourite type. But adding yarn like lion’s manes felt a bit too much, so I decided to go for brushing. Brushing the crochet surface gives an animal such a wonderful look and is so easy to do too. All you need is a hard brush and some courage.

Now about the patterns. Both piggies are about 5,5 inch/ 14 cm tall and made with Isex Lett Lopi wool. There are three versions you can buy.

You can order them directly from me here too.

All three versions contain a clear and colour coded description of how to crochet and assemble the piggies with example pictures at the bottom to help you get everything right. In the patterns you can also find what materials you need, the yarn colour numbers, in short, everything you need to know to make them. All the additional information you need to know about the patterns you can find in the shop listings.

Here are some extra pictures of the separate crochet guinea pigs.

guinea pig amigurumi pattern

amigurumi crochet guinea pig

Designing two crochet guinea pig patterns was such a delight. As always, the patterns have a one dollar release discount till Tuesday the 22nd!

Patterns

Drago, crochet crocodile pattern

Is it a dragon? Is it an alligator? No, this is Drago, a cuddly crochet crocodile!

crocodile crochet pattern

After a long holiday break I am so glad to present this new crochet pattern. To be honest, I was a bit worried I might have lost the skill to come up with something good enough. Looking back now that’s me being a bit insecure. When I finished the head of this crochet animal I was so relieved. I made a sweet looking head which looked like an actual crocodile or alligator, like the kind and cuddly version of the fierce animal. Usually, when I design a new crochet doll, I look at many pictures of the real animal for inspiration and always am delighted by their beauty. On this case however, I mostly used pictures of plush crocodiles as inspiration. Of course I took some peeks at the real animal and kept its features in mind, but I didn’t fell in love with these reptiles.

Some of you might think when seeing Drago, ‘where are the special stitches you were going to do?’ Well, I later realised I am crocheting in a spiral, which means a popcorn based stitch, which creates the horny surface of the back, would never become symmetrical but the stitches would lean towards one side. That meant I needed to make a big flat piece you sew to the back which I don’t like. Also, when I had a prototype crochet crocodile, I liked the idea of a horny scaled chain much better. I was going to place two next to each other, which is most realistic, but that made Drago look way too bulky. My boyfriend said, ‘why don’t you just do one in the middle?’ So, I tried that and it look lovely. And exactly what I had unconsciously in mind in the first place as you can see in the sketch.

Anyway, to sum up this long story, Drago has become the friendly but recognisable crocodile I hoped. Here you can see him from another angle and below the picture you can find all the info about this crochet crocodile pattern and the links to buy it.

Amigurumi crocodile pattern

Info about & links to buy the pattern

This ever so fluffy and cuddly crocodile is made with Istex Lett Lopi, a worsted weight wool. He is 13.5 cm / 5.6 inch when sitting. All the additional information you need to know about this pattern you can find in the shop listings. You can buy this pattern in my shop at Ravelry, Etsy or order it here. It contains a clear and colour coded description of how to crochet and assemble the crocodile with extra illustrations and example pictures at the bottom to help you get everything right. In the pattern you can also find what materials you need, the yarn colour numbers, in short, everything you need to know to make your own friendly reptile.

And heads up, the pattern has a one dollar release discount till Friday the 30th.

Art

And the winner is…

It was so hard to choose! I never realised that when I started this little contest. I though, ‘hey that will be fun’, till I saw all the funny and creative pictures. Some of you created these lovely settings, Popkes giving each other a haircut or stealing cookies out of a jar together. Also there were adventures Popkes who went rock climbing or visited Hogwarts (those were the extremely lucky ones!)

But a winner had to be chosen. For that I didn’t only look at the setting or idea, but also at the composition of the picture, the light, in basic the quality of the picture. With all that in mind, I came up with a shared first place but before I reveal the winners, I want to share a selection of the pictures.

And now the winners

Rock climbing mouse by Helen and the Popkes who are up to no good by Chris. Helen posted her picture on Instagram and Chris in my group at Ravelry. Her picture isn’t square, you can see it in its full glory here.

Helen and Chris, you are the winners. Please let me know the pattern you would like to have and I will email it to you!

Uncategorized

An upcoming bird pattern

Puffinsketch2This week I began quietly working on a new pattern. It is of a bird! When we visited the UK, we also visited the Bempton cliffs in Yorkshire, hoping to see one of my favourite birds, a puffin. We tried to see them a few years back at a little Norwegian island called Runde, but with no luck.

This time, we did have luck. I saw a fabulous little puffin sitting on a nest. I only could see her through a scope, but so amazing it was to actually see one.

PuffinsketchWhat a very special bird. I think they look like a mix of duck and penguin, but with a very special shaped and coloured bill.
Actually, I was planning on designing a rhinoceros pattern. But when I saw that puffin during my vacation, a puffin needed to be made in crochet. I have drawn a few simple sketches of the shape and size and already finished a prototype head. I’m rather excited with the looks, how thrilling!