Patterns

Plubby, crochet puffin pattern

With utter joy, I proudly present my crochet puffin pattern! Meet Plubby, a proud and happy fluffy crochet puffin. Buy now – directly from me đŸ±

puffin amigurumi pattern

When I saw a puffin while being on holiday to the UK, I immediately knew I had to make a crochet pattern of this spectacular bird. I had thought of it before, but never actually got to making one.

It was quite a journey, making this pattern. Mainly because I got ill and it took me a long time to recover from it. But now when this pattern is finished, I am ever so thrilled with the result.

The head was a joy to design. Finding the correct circled shape for the white parts was a bit tricky but very rewarding when it was finished and looking good. With the bill attached, I had a very striking puffin head. And blimey, it was even shown in BBC’s Springwatch Unsprung, what it thrill that was! But then for the rest of the puffin….

Halfway through, I got stuck a bit, because I had no idea how to make the wings. What I had in mind looked way too bulky and more realistic flat wings I considered not an option. I took a break and went on designing some other parts of the doll. The tail was such a pleasure to design. At first, I had in mind to make the tail in two pieces, but when trying it, it looked rather silly. Suddenly I had this idea of a one piece tail. I made a test version and it worked perfectly. The white bottom combined with a part of the tail sewed flat, created the perfect looking ‘feathered’ flap. What a few tiny stitches can accomplish!

When I pinned the puffin together, I realized I had to make simple, arm like wings, just like my other Popkes have, but a bit more wing like. That was the perfect finishing touch for the puffin. Plubby had come to life!

Here are some more shots of my dear Plubby. Below it you can find more info about this crochet puffin pattern.

puffin amigurumi

Plubby-profile 2

Plubby is sitting 5,1 inch / 13 cm. He is made with Istex Lett Lopi, a 100% wool yarn. I’ve used five colours to make Plubby, from which three are basic. Black, white and orange. For the grey and yellow colours of the bill, you only need just a bit. Like all my patterns that contain colour changes, the complicated rounds in which you need to de- and increase are written in stitch colour to make changing colour as easy as it can get. I would strongly advice the use of a fuzzy yarn, as it leaves much neater colour changes. The pattern contains a clear description of how to crochet and attach the puffin with example pictures at the bottom to help you get everything right. In the pattern you can also find what materials you need, the Lopi colour numbers, in short, everything you need to know to make your own crochet puffin!

The pattern for this cheerful puffin, you can find in my shop at Ravelry, Etsy or you can order it directly from me with the link below.

This pattern has a permanent discount if you use this link. Patterns purchased directly from me cost 5,00 eur. I will have to email the pattern manually so it can take a bit longer, but I promise, you’ll have it in a day. If not, check your spam and if it is not there either, message me to wake me up, as I might have fallen asleep or something


Patterns

Koji, crochet tiger pattern

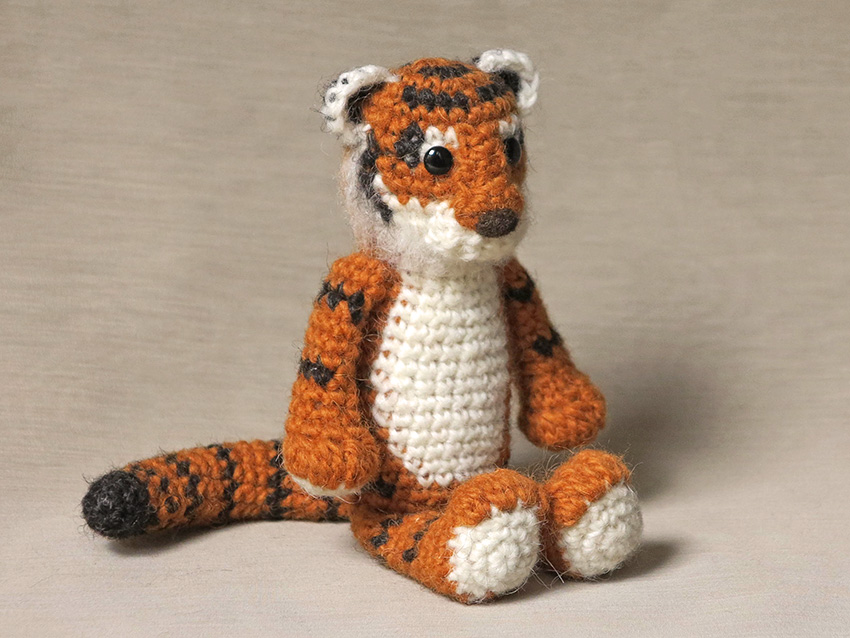
My glorious crochet tiger pattern is finished. Meet Koji! Buy now – directly from me đŸ±

tiger amigurumi crochet pattern

This was beyond doubt the most ambitious crochet animal I have made so far. Yet, knowing that from the start, I was ever so excited to make a crochet tiger. I fully accepted I probably had to make many more test pieces than usual, but I knew that in the end it would be worth it. Well, at least I hoped it would be!

Making a crochet version of a complexed coloured animal like a tiger, comes with many dilemmas. I always fancy my animals to look as realistic as possible, but with a tiger, I knew I had to make some compromises. Certain characteristics of a tiger just are impossible to recreate in a small crochet version. For instance, a tiger’s face has many stripes, going in different directions. I only had room for two stripes at the top of the head and two at the sides. I had to find the right look for my simple stripes, to get that classic tiger face. Also, tiger ears are quite striking with light orange fuzzy front sides and dark backs with a white spot. But there was no way I could make a simple crochet version of such small ears, coloured like that.

Essentially, the whole proces went like that. Should I let the dark stripes of the body run over into the white belly? Nope, did not look good at all whatever I tried. Tigers have orange toes, black soles and white hair between the toes. What should I do to make that look best? Many questions like these followed, but it was very rewarding every time I found a good solution.

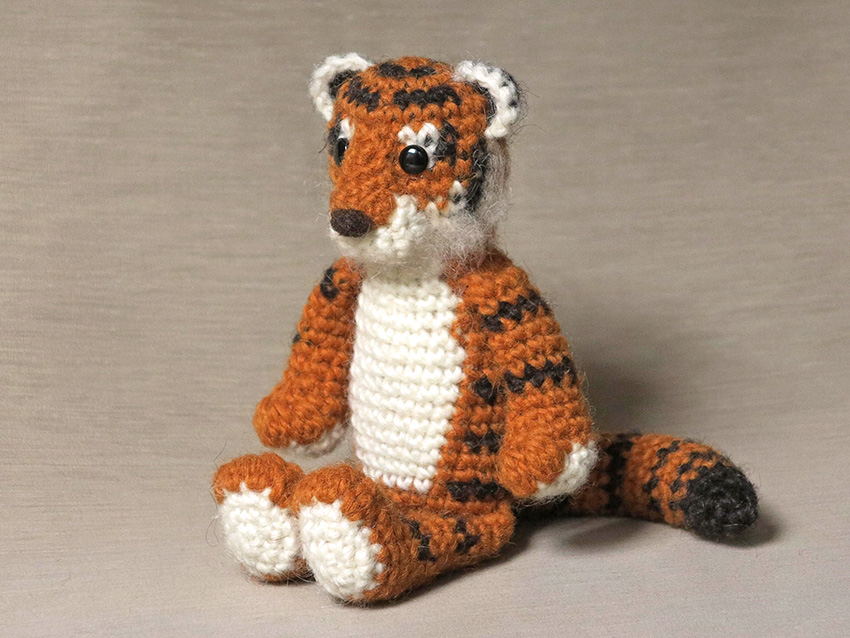
Koji has become a striking tiger doll. I think he looks playful, but also shows a bit of that tiger wisdom. Personally, I think he looks young and sweet in the first picture and more wise and mature in the picture below, that is really curious isn’t it!

Here is another picture of Koji and below it you can find info about and links to the pattern.

amigurumi tiger

Koji

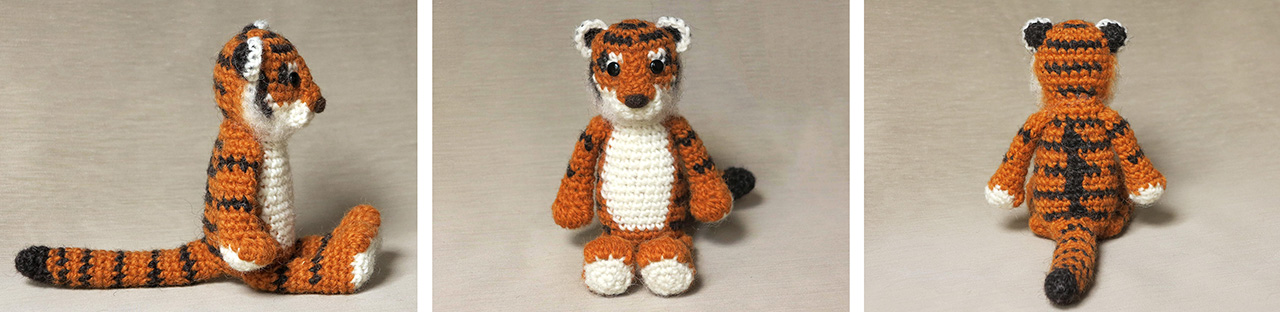
This crochet tiger is 5,8 inch / 14,8 cm when sitting. I spend a lot of time writing an extra easy pattern to make this animal. There is a lot of colour changing, so I added a bit more info about it and wrote the pattern for the head and body in stitch colour, so you can even see from the lines how your rounds of stitches should look. Koji is made with three colours of lett lopi, a 100% wool. I would strongly advice the use of a fuzzy yarn, as it leaves much neater colour changes.

The pattern contains a clear description of how to crochet and attach the tiger with example pictures at the bottom to help you get everything right. In the pattern you can also find what materials you need, the Lopi colour numbers, in short, everything you need to know to make this glorious animal.

You can find the pattern for this beautiful animal in my shop at Ravelry, Etsy or you can order it directly from me with the link below.

This pattern has a permanent discount if you use this link. Patterns purchased directly from me cost 5,00 eur. I will have to email the pattern manually so it can take a bit longer, but I promise, you’ll have it in a day. If not, check your spam and if it is not there either, message me to wake me up, as I might have fallen asleep or something


Patterns, Stories

It is spring!

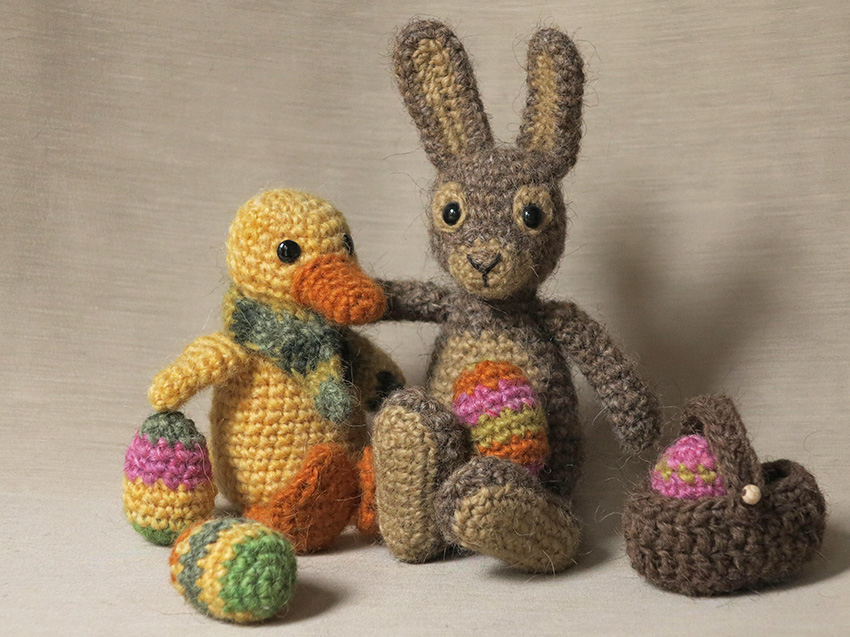
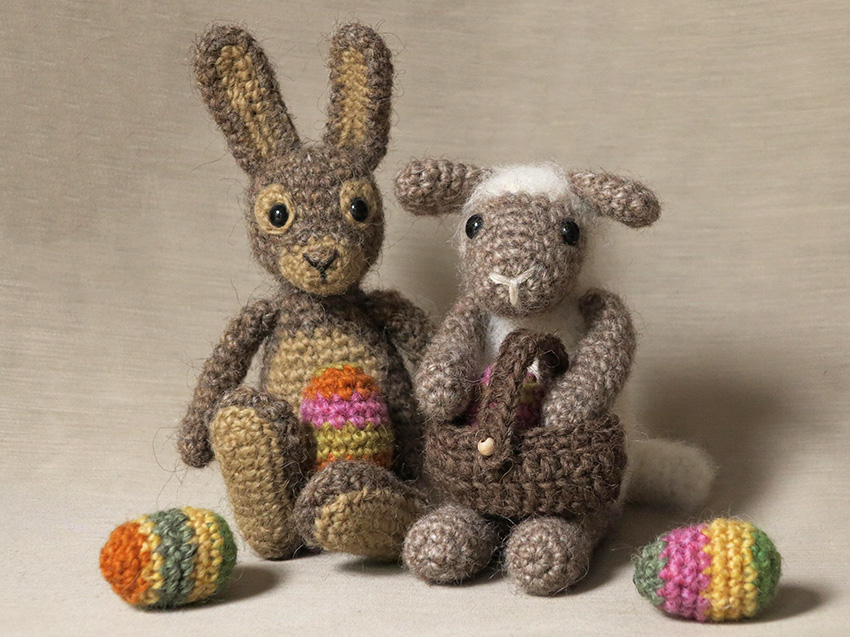
And I am celebrating it with two special spring & Easter offers. Aren’t they the cutest crochet animal couples!

easter spring crochet animals

amigurumis

These pictures I specially made for my spring and Easter offers. Both packs contain the patterns for the two animals in the picture and the pattern for the Easter eggs and basket is included in the rabbit pattern. You can find the packs in my shop. Unfortunately I couldn’t offer them in my Ravelry shop, as they rejected the listings. You can of course order them directly from me also. Let me know which pack you would like to purchase and I’ll send you a Paypal request. The packs cost $9,98 and they are available till good Friday.

It always is a delight to photograph my crochet animals. I prefer to use daylight and I do, but it can be a bit dark in my home studio. I do my very best to capture both the light and the animals at their best. I love dramatic shadows, but for these photographs there has to be a good balance.

*pattern update* My tiger pattern is coming along very well and I’m looking forward to share some first glimpses of the head.

Enjoy spring!

Patterns

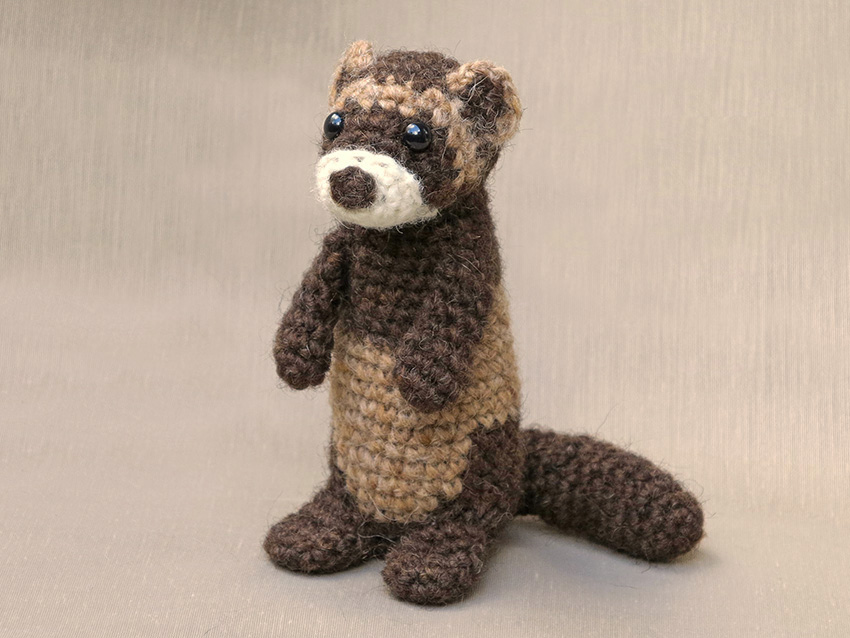
Bunsie, crochet ferret aka polecat pattern

ferret crochet pattern, amigurumi

This time I have made a rather special creature. Meet Bunsie, my crochet ferret or polecat pattern. In Europe and Asia we know this animal as well as a wild animal, the polecat, as the pet version you Americans know too, the ferret. Polecats are the wild ancestors of ferrets. The English name ‘polecat’ is based on the French ‘poule chat’ which means chicken cat. I think we all can imagine why that name is chosen for this sneaky little critter. Buy now – directly from me đŸ±

Especially ferrets come in all kinds of colours. For Bunsie, I decided to use the dark colours of a polecat youngster. The most common colour in both polecats and ferrets is a white muzzle, dark brown line between the muzzle and eyes, a white line above the eyes and ears and a lighter brown for the rest of the head and the middle part of the body. I have tried several colours but absolutely loved these. The witty thing is, you can choose any colour you like, as I have created the right spots for them to go in.

It took me a while to design this animal, because the colour schemes were fairly complicated to make in crochet. I wanted everything to look perfect and at the same time, this crochet animal pattern had to be easy to make for all of you.

Here is another picture of Bunsie the ferret amigurumi, and below it you can find info about, and links to the pattern.

amigurumi ferret crochet pattern

This crochet ferret is 5,7 inch / 14,5 cm tall. Bunsie is made with three colours of lett lopi, a 100% wool. The pattern for the head is written in stitch colour, so it is a piece of cake to make a perfect ferret yourself. The pattern contains a clear description of how to crochet and attach the animal with example pictures at the bottom to help you get everything right. In the pattern you can also find what materials you need, the Lopi colour numbers, in short, everything you need to know to make this special creature.

The pattern for this whimsical animal, you can find in my shop at Ravelry, Etsy or you can order it directly from me with the link below.

This pattern has a permanent discount if you use this link. Patterns purchased directly from me cost 5,00 eur. I will have to email the pattern manually so it can take a bit longer, but I promise, you’ll have it in a day. If not, check your spam and if it is not there either, message me to wake me up, as I might have fallen asleep or something


Patterns

Lumi, crochet arctic fox pattern

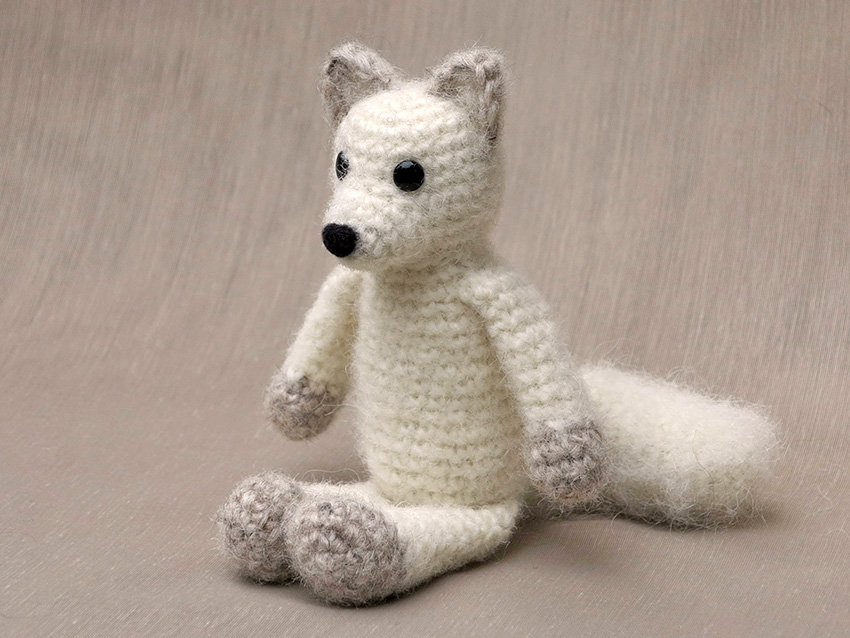
crochet arctic fox pattern, amigurumi

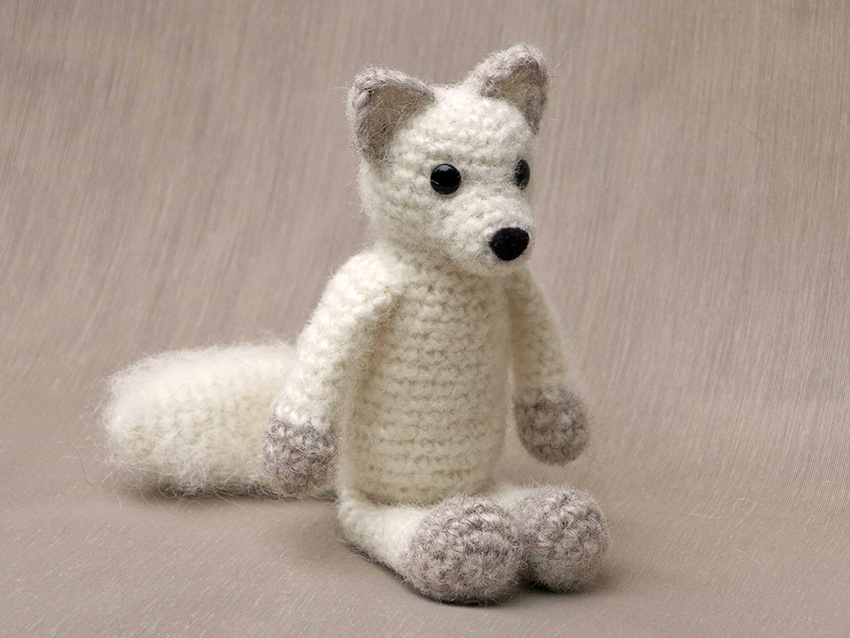
Lumi is finished and he turned out ever so cuddly and soft. I wanted this crochet arctic fox to feel and look soft, but not to have a completely fuzzy appearance. To get this result, I first brushed him, and then cut off all the long hairs, which gave the exact result I hoped for. You can still see the crochet stitches, but Lumi looks furry too. Buy now – directly from me đŸ±

Working on this arctic fox felt a bit odd from time to time, as I already designed a red fox in the past. I absolutely did not want this fox to look the same, but that seemed to be a bit inevitable, as they both are foxes and I do prefer my designs to have that realistic touch. Luckily, there are some major differences in the foxes and my fox patterns are vey different in shape and sizes although they look like cousins. This fox feels younger to me, whilst he also is more compact. Lumi has a very sweet appearance and I love his subtile colour changes.

Below the pictures of dear Lumi, you can find info and links to the arctic fox crochet pattern.

amigurumi arctic fox crochet

poolvos amigurumi, haakpatroon vos

I choose to make this crochet arctic fox in two colours. A warm grey for the paws and edges of the ears and a milky white for the rest of the body. However, this fox would also look very good in just white. Lumi is made with Lett Lopi, a 100% wool. It is easy to brush and gets a very soft result, but acrylic yarns also look good when brushed. Lumi is sitting 5,5 inch / 14 cm tall. The pattern contains a clear description of how to crochet and attach the animal with example pictures at the bottom to help you get everything right. In the pattern you can also find what materials you need, the Lopi colour numbers, in short, everything you need to know to make this furry little friend.

The pattern for this utterly soft Arctic fox, you can find in my shop at Ravelry, Etsy or you can order it directly from me with the link below.

This pattern has a permanent discount if you use this link. Patterns purchased directly from me cost 5,00 eur. I will have to email the pattern manually so it can take a bit longer, but I promise, you’ll have it in a day. If not, check your spam and if it is not there either, message me to wake me up, as I might have fallen asleep or something


Patterns

Tuffs, crochet lynx pattern

lynx crochet pattern amigurumi

The design proces of this crochet lynx went all so jolly well. It started when I was working on the head. How to get a fairly realistic cat face the first dilemma was. With a bit of experimenting and an extra nose patch, the cat face was there and pretty catty it looked. Even the ears had to be special, as lynxes have a rather particular white spot at the back of their ears. It took me quite some time to make this pretty face, but I was very happy with the result. Buy now – directly from me đŸ±

As for the body, it should not become too fat or skinny, nor too high or short, so a bunch of bodies were made and there was the right size. Then came the claws. How could I possibly make those very typical cat toes? I remembered a doll I made long ago with very special feet and decided feet like that could do the trick and they very well did. As last I made a tail, no two, the first one wasn’t right. I brushed some pieces of the cat and carefully sewed my Tuffs together. There he was, my dear and tufted, crochet lynx. I’m afraid this story makes it sound a bit more easy than it actually was, but this was a very fun proces with more ups than downs.

Here are more pictures and below it you can find info and the links to this crochet lynx pattern.

lynx amigurumi pattern, haakpatroon lynx

Tuffs-side

Info about Tuffs, the crochet lynx pattern.

Tuffs is made with a 100% wool and he is sitting 5,5 inch/ 14 cm. Crocheting this lynx isn’t at all that difficult. The special stitches for the toes are so clearly written, even my boyfriend could make them. The pattern contains a clear description of how to crochet and attach the animal with example pictures at the bottom to help you get everything right. In the pattern you can also find what materials you need, the Lopi colour numbers, in short, everything you need to know to make this unique crochet animal.

The pattern for this tufty crochet lynx you can find in my shop at Ravelry, Etsy or you can order it directly from me with the link below.

This pattern has a permanent discount if you use this link. Patterns purchased directly from me cost 5,00 eur. I will have to email the pattern manually so it can take a bit longer, but I promise, you’ll have it in a day. If not, check your spam and if it is not there either, message me to wake me up, as I might have fallen asleep or something


Patterns

Son’s Popkes pattern pack

The Son’s Popkes pattern pack is a permanent offer that allows you to buy any three patterns and get a fourth pattern for free.

You can purchase it directly from me using this link. Please include a note with your payment letting me know which four patterns you would like, or send me a message. I’ll then email them to you as soon as possible.

You can also buy three patterns at once in my shop at Ravelry or LoveCrochet and send me a message to let me know which pattern you would like to have as the fourth. I’ll always email you the fourth free pattern within 12 hours.

In my Etsy shop you can simply purchase the pattern pack listing and let me know there which four patterns you want.

Happy crocheting!

Patterns

Bodo, crochet red panda pattern

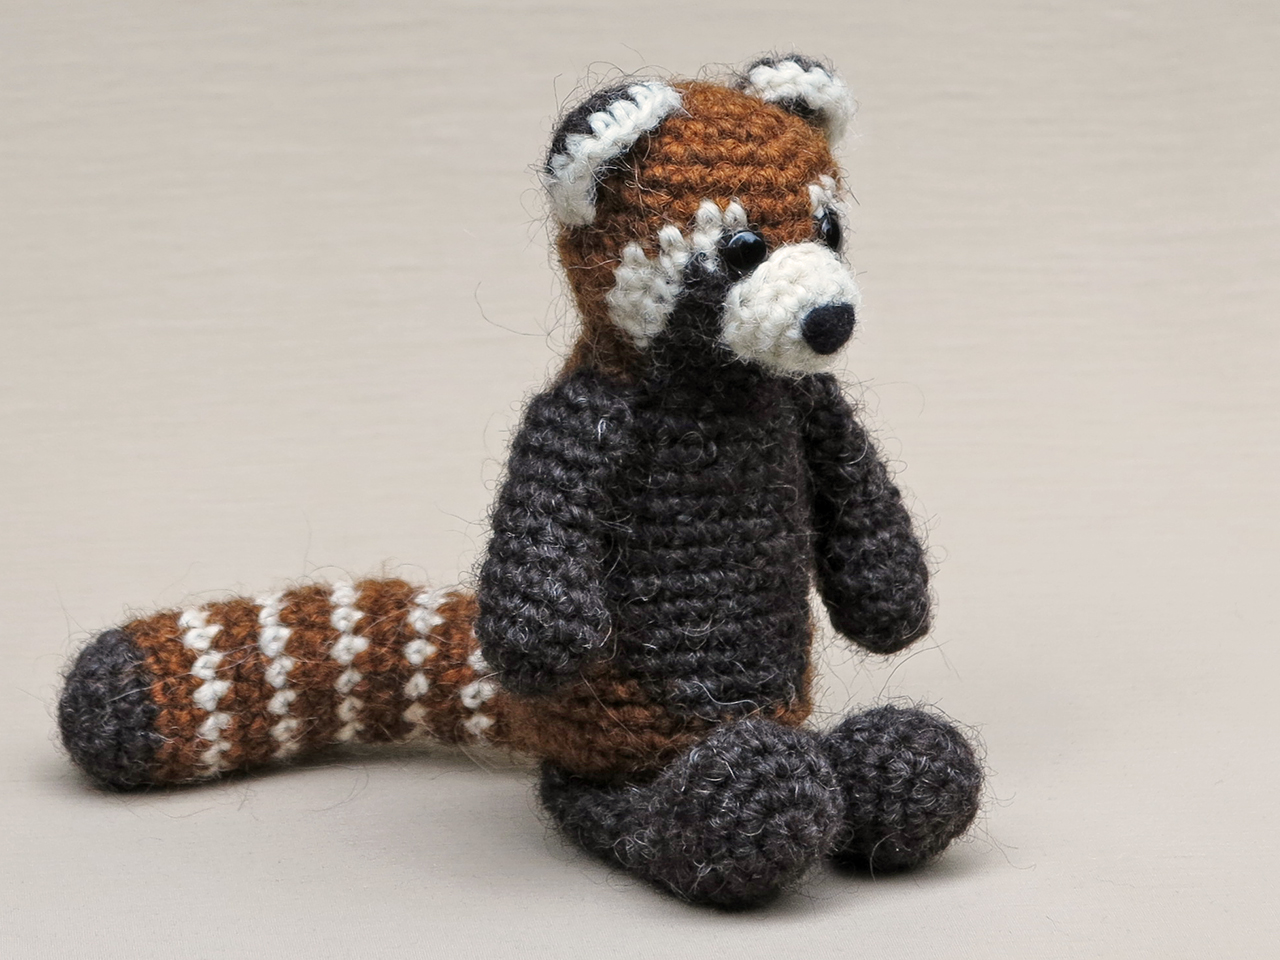
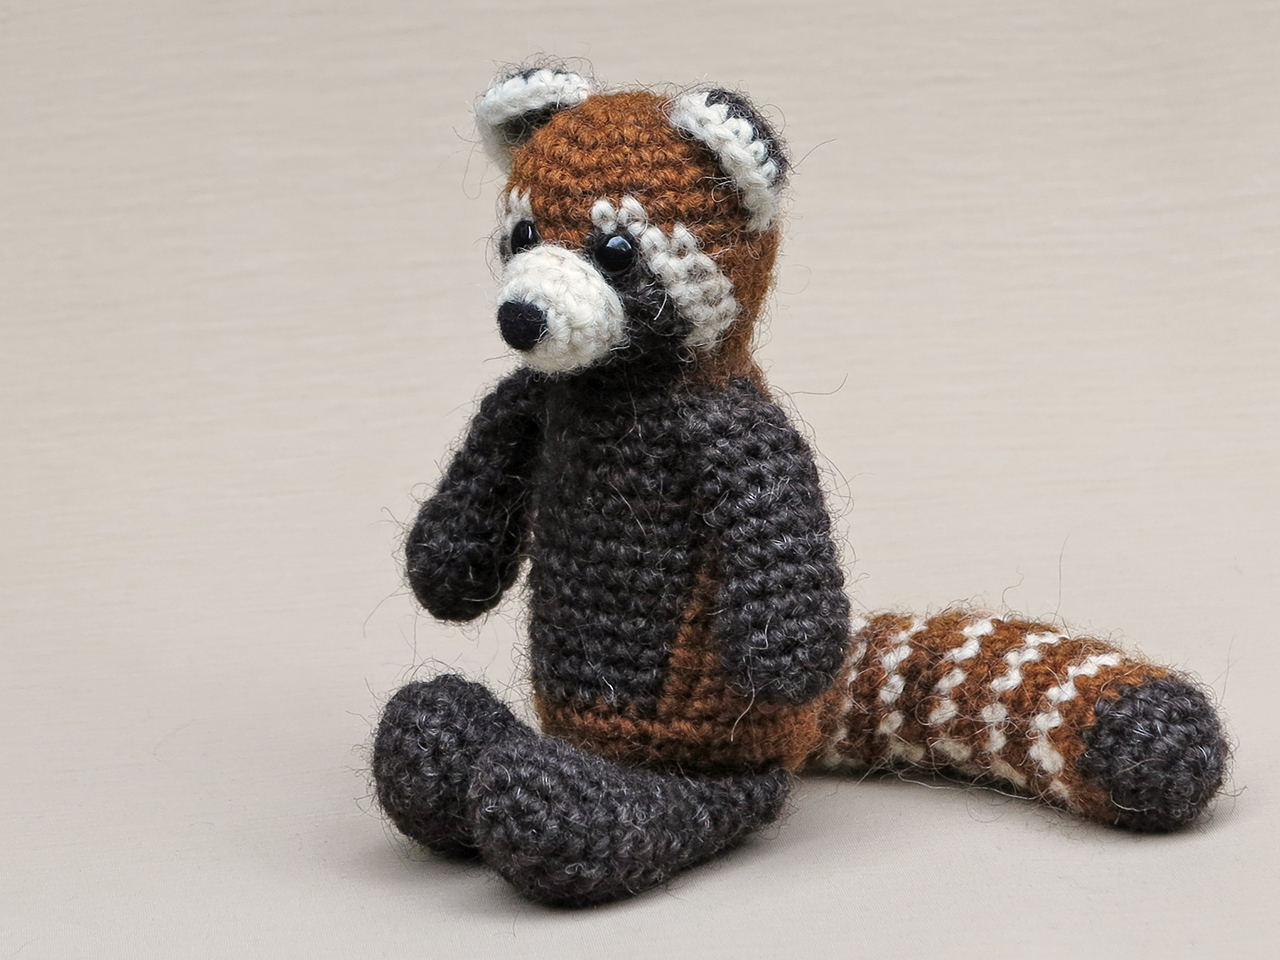
And here is Bodo, a sturdy and woolly crochet red panda.

red panda amigurumi, crochet red panda

This red panda amigurumi has turned out exactly as I hoped. I absolutely love the result and am very proud to share this pattern. Buy now – directly from me đŸ±

For this crochet animal, using the right colours was very important to me. I only wanted to use three colours of yarn, so I had to make compromises in the design. Should I give him dark cheeks, or rust ones? And the tail, dark striped or white? I looked at many red panda pictures online and decided a face with dark cheeks was most characteristic.

As everyone knows, red pandas have a very recognisable tail. It has a dark tip and light stripes. However, the stripes are not as white as the white in the face and ears, so especially this part was a bit hard to do in my three colours. Initially I thought of making a dark striped tail but that didn’t work out. Bodo looked in whole with that tail, far too dark. I imagined a tail with white stripes would look too light, so I decided to combine two rounds of rust, with one round of white, and it had an amazing result. The white doesn’t look too bright and the result is very striking.

Bodo is 5,1 inch/ 13 cm tall when sitting. He’s made with a 100% wool, called Lett Lopi. I strongly recommend the use of a wooly or fuzzy yarn, because that gives a very smooth result if you work in multiple colours.

Here is another picture of Bodo and below it you can find info and links to the crochet pattern.

crochet red panda doll, crochet animal pattern

Where to get the pattern

The pattern contains a clear description of how to crochet and attach the animal with example pictures at the bottom to help you get everything right. The colour changes for the face are written down in the stitch colours, to make changing colour extra easy. In the pattern you can find what materials you need, the Lopi colour numbers, in short, everything you need to know to make this wild friend.

The pattern for this sturdy and woolly crochet red panda you can find in my shop at Ravelry, Etsy or you can order it directly from me with the link below.

This pattern has a permanent discount if you use this link. Patterns purchased directly from me cost 5,00 eur. I will have to email the pattern manually so it can take a bit longer, but I promise, you’ll have it in a day. If not, check your spam and if it is not there either, message me to wake me up, as I might have fallen asleep or something


Patterns

Jonesy, crochet duckling pattern

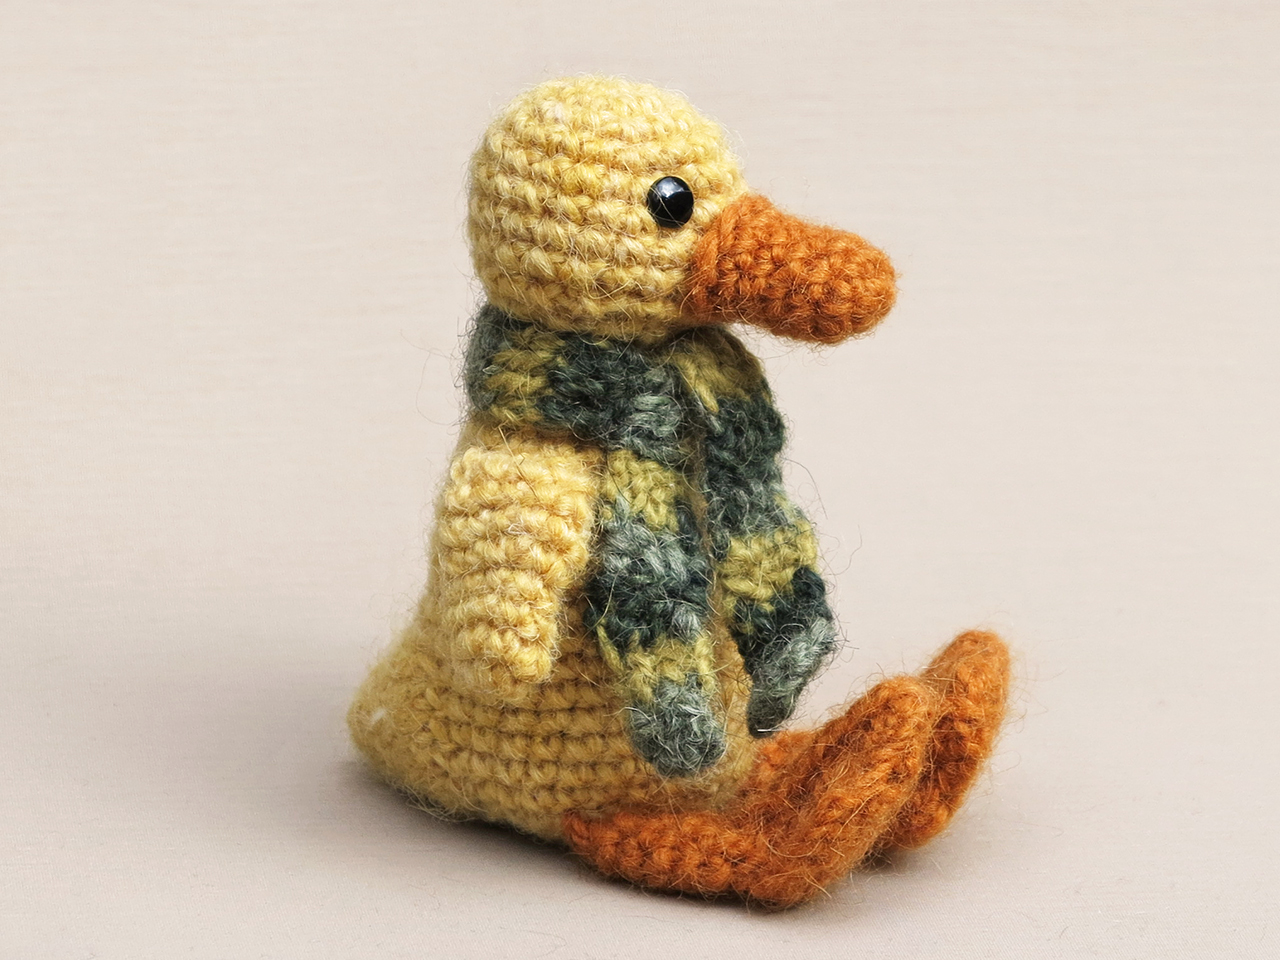
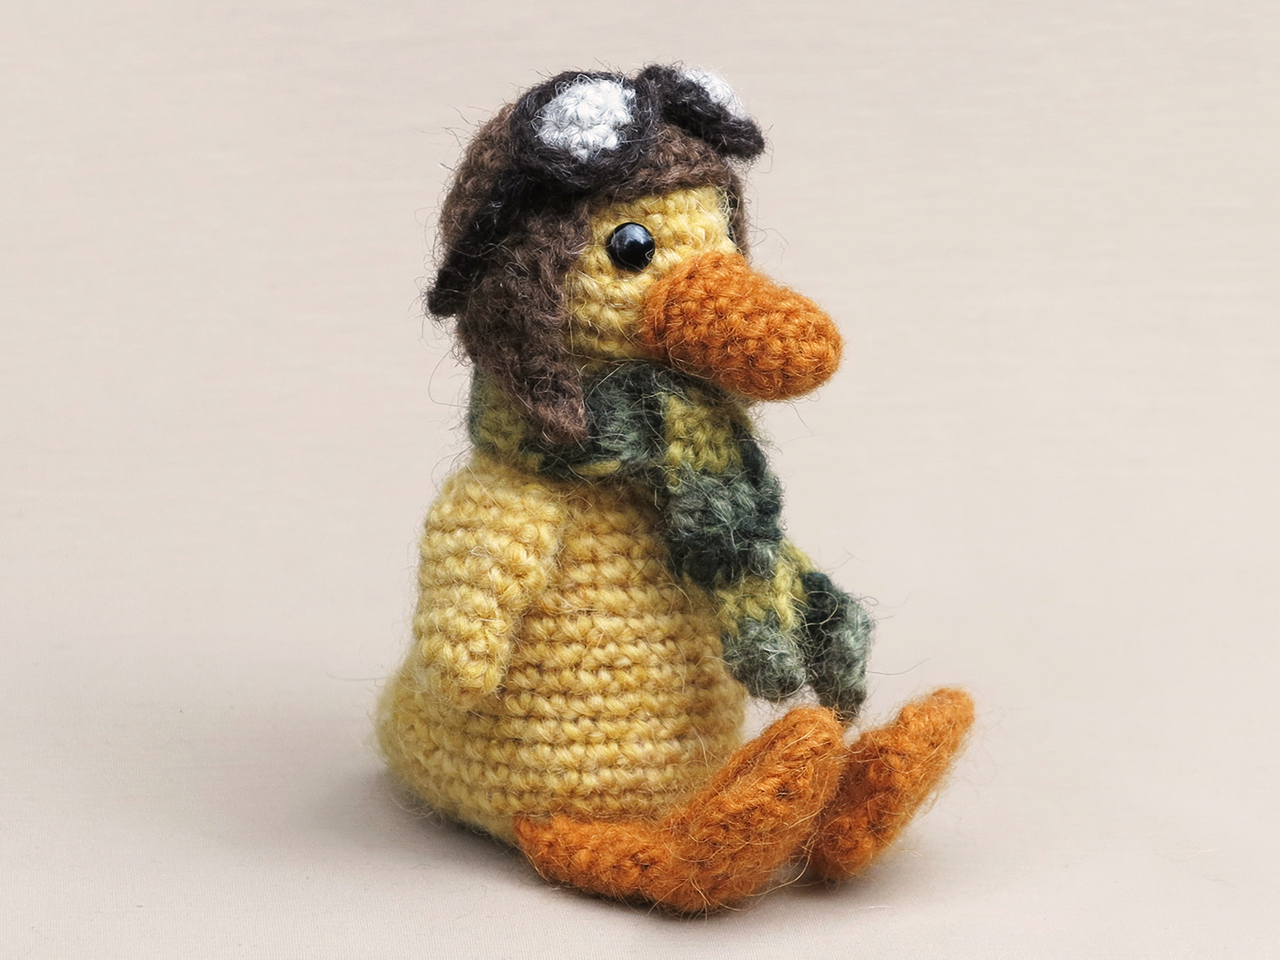
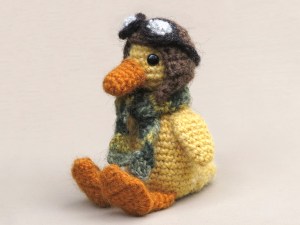
Now, here is another spring and Easter like animal, a yellow duckling. I proudly present Jonesy, my new crochet duckling pattern. Buy now – directly from me đŸ±

crochet pattern duckling, amigurumi duck

This crochet duckling is the first bird pattern I have designed and I’m absolutely fond of the result. When Jonesy was finished, I immediately got many ideas for more birds. And after a year, I had this crazy idea. Long ago I purchased a little Snoopy plush wearing an aviator helmet in a local shop. It was sitting in our bedroom in a big net and when I looked at it more closely, it inspired me to make such a hat for my duckling. And it turned out ever so fabulous. Here is another picture of Jonesy, but this time he’s a very sturdy aviator amigurumi duckling! The helmet now is a part of the pattern, so everyone can make their own little aviator.

The part of this duckling pattern I found the hardest to design were the feet. I had no idea how to make them. I decided to start with a flat, upside down triangle and it worked out wonderfully perfect. I started by making a narrow triangle, till it was wide enough and then realized I could easily decrease the top of it to get the pointed middle toe. For both feet, two pieces are sewn and crocheted together and it is very easy to do and gives a fantastic result.

This cheerful duckling is 4.9 inch/ 12.5 cm tall, sitting. I designed him without a scarf, but soon realized a scarf looked perfect on this little duck. Both duckling, scarf and helmet are made with my favourite Létt Lopi yarn, a 100% wool. Here are some more pictures of Jonesy. Below the pictures you can find info about and links to buy the pattern.

Where you can buy this pattern

The pattern contains a clear and colour coded description of how to crochet and assemble this animal, with extra illustrations and example pictures at the bottom to help you get everything right. In the pattern you can also find what materials you need, the yarn colour numbers, in short, everything you need to know to make your own aviator duckling. All the additional information you need to know about this pattern you can find in the shop listings.

The crochet pattern for this spring time, cheerful duckling Jonesy, you can find in my shop at Ravelry and Etsy. You can also order it directly from me with the link below.

This pattern has a permanent discount if you use this link. Patterns purchased directly from me cost 5,00 eur. I will have to email the pattern manually so it can take a bit longer, but I promise, you’ll have it in a day. If not, check your spam and if it is not there either, message me to wake me up, as I might have fallen asleep or something


Patterns

Free Easter crochet pattern

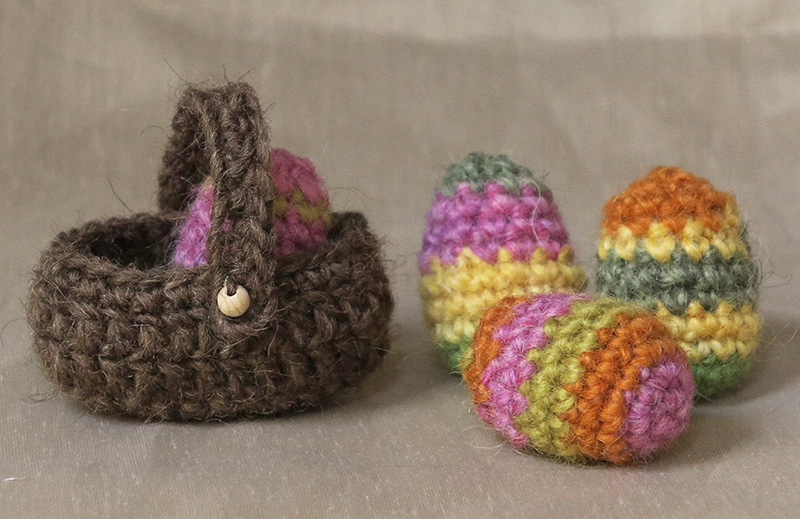
A few times a year I try to design fun and free crochet patterns, as a ‘thank you’, to all of you who have bought my crochet patterns and have supported me. This time I made little crochet Easter eggs and a basket that fits precisely two of the eggs.

free easter crochet pattern

With this free crochet pattern for little Easter eggs and a basket, you can create fun Easter ornaments. I made the size of the eggs and basket so it combines well with my crochet animal patterns.

Of course especially Finse will make a lovely, quizzical crochet Easter bunny.

crochet easter bunny, rabbit, hare amigurumi pattern, haakpatroon paashaas

Finse finds himself not particularly a crochet Easter bunny, but more a normal rabbit, as you can tell by his expression.


The eggs and basket pattern

For this pattern you’ll need worsted weight yarn and hook US E/3,5 mm. to get an approximately 2,7 inch /7 cm wide basket and 1,77 /4,5 cm high eggs. I used a bunch of colours of LĂštt Lopi, a 100% wool. To stuff the eggs you will need fiberfill and a two beads or buttons are optional. I’ve used beads to accentuate where the handle of the basket is fixed.

You can use a paper clip as stitch marker to mark the beginning of each round. Move it up each time you start a new round. The exact colours I have used for this little pattern you can find below it and,  if you’ve become fond of Finse and want to complete the eggs and basket with a suitable bunny, you can find the pattern in my shop or my shop at Ravelry.

Abbreviations: ch = chain, sc = single crochet, sl st = stip stitch, dc = double crochet stitch, hdc = half double crochet stitch, s2tog = decrease.

The basket

Work around the chain.

1. ch of 7, in 2nd ch from hook 2 sc, sc in next 4, 2 sc in last, turn/go to bottom loops, 2 sc in bottom loop of that last st, sc in next 4, 2 sc in last = 16

2. 2 sc in next, sc in next 6, 2 sc in next 2, sc in next 6, 2 sc in next = 20

3. 2 sc in next, sc in next 8, 2 sc in next 2, sc in next 8, 2 sc in next = 24

4. 2 sc in next, sc in next 10, 2 sc in next 2, sc in next 10, 2 sc in next = 28, close with sl st.

5. ch 2 and go back (you go back so the stitches will be stacked different, which will form a nice seem for the side of the basket. You only do it this one time) dc in next 28 = 28, sl st

6. ch 2, dc in nect 28 = 28, sl st

7. ch 1, sc in next 28 = 28, sl st and weave in end.

 The strap.

Leave a long tail when you make the chain, for sewing.

1. ch of 20, in 2nd ch from hook hdc, hdc in next 17, sl st and leave tail.

(You can of course make the strap as long as you like, or two so you can make a backpack for a doll. Do whatever you like!)

Sew the strap to the basket and add a button or bead if you like.

 The eggs. In multiple colours. If you make striped eggs, change colour in the last stitch of a round. Change colour in the last loop of a stitch, so the loop on the hook you end with, will be in the new colour.

1. magic ring of 5 = 5

2. 2 sc in each around = 10

3. (2 sc in next, sc in next) x 5 = 15

4 – 6. sc in each around = 15

7. (sc in next 3, s2tog) x 3 = 12

8. sc in each st around = 12

9. (sc in next 4, s2tog) x 2 = 10, now stuff the egg firmly.

10. sc in each st around = 10

11. s2tog x 5 = 5. Sew the hole closed by putting the needle from the inside out, trough all the outside loops of the 5 st, clockwise. If you do it correctly, you can now pull the tail and it will close the gap. Weave in the end.

Lopi colour numbers. Brown: 0053, orange: 1410, yellow: 1411, pink: 1412, apple green: 1406, grey green: 9422 and mustard: 9264.

Have a lovely spring and Easter festive.