Art, Patterns

Oakie, crochet armadillo pattern

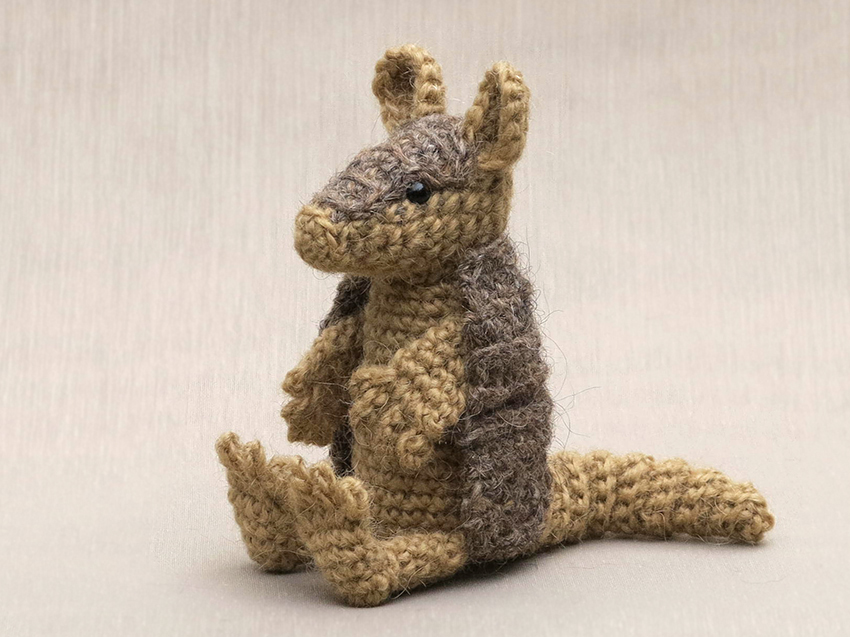
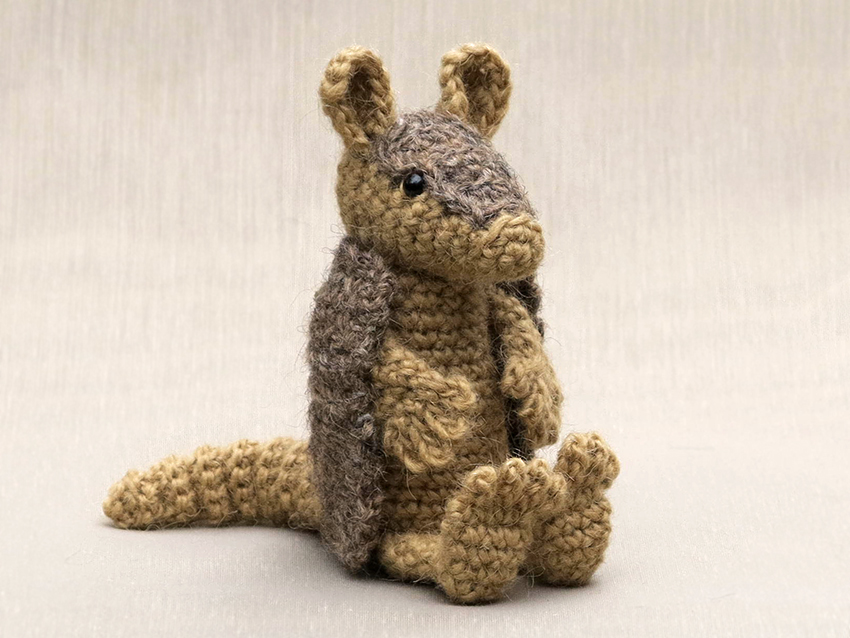
Sitting as promised in my original Popke style, I proudly present to you Oakie the crochet armadillo. Buy now – directly from me đŸ±

armadillo crochet pattern

Wow, what a process this was. I never expected all the bumps on the road of designing this crochet armadillo pattern. In my previous post I explained about the challenge of making this interesting looking creature. Making an animal that would never, ever even think of sitting on its bottom, sit on its bottom was for starters a classical design issue. But the body armour was so utterly complicated to design that the sitting thing seemed nothing. I wrote about the smooth textured Linen stitch I was planning to use for the armour. When I started everything seemed so jolly well. What a perfect stitch for armadillo armour. But then some in- and decreasing had to be done and how on earth could I do that with this stitch? I googled for info and found nothing, who would have thought about that? People only seem to crochet scarfs and pillowcases with this stitch, not animals. So I had to find a way myself. After testing all sorts of solutions and almost writing a post here begging someone to help me, I found the solution to my problem. Decrease three stitches instead of two. How simple could it be. Not everything was rough on this road. From the start I knew how I was going to design the arms. The legs and feet just fell into place when I made them and the tail looks fabulous because it is worked flat.

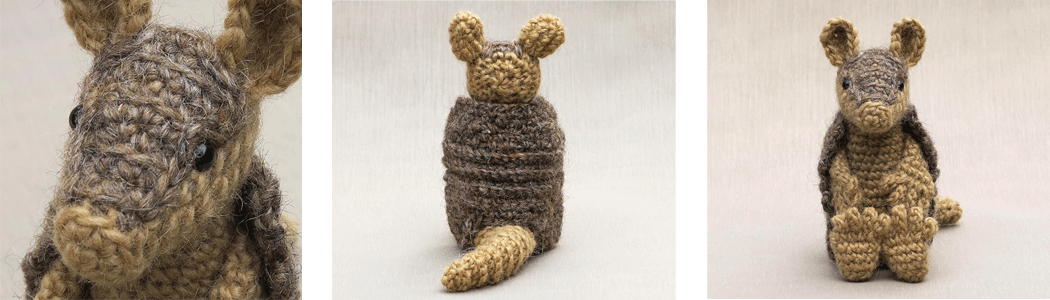
I really like the almost reptile looking appearance of Oakie’s face. The smaller eyes, unworked back loops and chain stitches form a perfect whole to create that characteristic armour texture. The rugged Lopi yarn accentuates it even more. Oakie might be unable to roll himself into a ball, but you can easily imaging him to do so. Just look at him! This armadillo is the most special creature I have ever made a crochet pattern for. Below the pictures you can find info about this armadillo amigurumi and the links to buy the pattern.
armadillo-amigurumi

crochet-armadillo-amigurumi

Info about & links to buy the pattern

This very rugged but cuddly crochet armadillo is made with Istex Lett Lopi, a worsted weight wool. He is 14 cm / 5.5 inch when sitting. All the additional information you need to know about this pattern you can find in the shop listings. It contains a clear and colour coded description of how to crochet and assemble the armadillo with extra illustrations and example pictures at the bottom to help you get everything right. In the pattern you can also find what materials you need, the yarn colour numbers, in short, everything you need to know to make your own ancient looking friend.

You can buy this pattern in my shop at Ravelry, Etsy or directly from me with the link below.

This pattern has a permanent discount if you use this link. Patterns purchased directly from me cost 5,00 eur. I will have to email the pattern manually so it can take a bit longer, but I promise, you’ll have it in a day. If not, check your spam and if it is not there either, message me to wake me up, as I might have fallen asleep or something


Patterns

Free mini antlers pattern

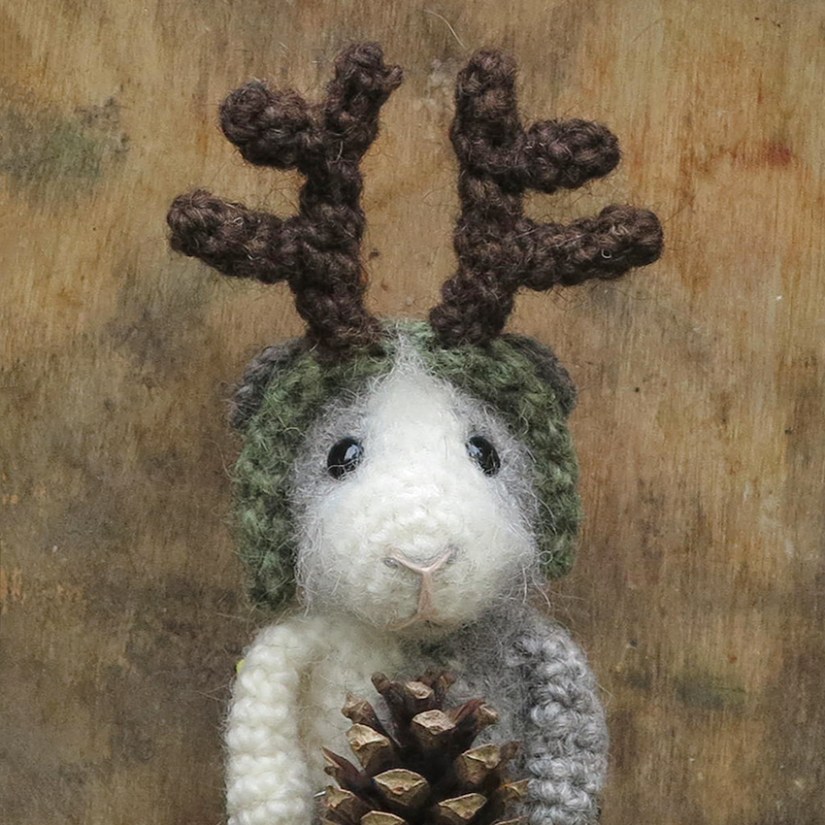
With this funny little pattern, you can now turn every Popke into a reindeer. It’s an easy and quick to make pattern, although the antlers are a bit tiny so enough light and some patience is very much needed.

free crochet animal accessory pattern

Mini antlers pattern

You’ll need worsted weight yarn in brown and any other colour you like and hook E/ 3.5 mm. You will also need pipe cleaners to make the pieces bendable.

The antlers

(Brown, make two of each piece)

Part 1
1. magic ring of 4 = 4
2 – 6. sc in each around = 4, sl st and leave yarn end

Part 2
1. magic ring of 4 = 4
2 – 4. sc in each around = 4, sl st and leave yarn end

Part 3
1. magic ring of 4 = 4
2 – 3. sc in each around = 4, sl st and leave yarn end

Now you can put the pipe cleaners in the longest 4 pieces. Stretch the parts to get the right length and make sure the cleaners in the longest two (part 1’s) stick out just a little bit, so you can prick them into the headband. Now attach the parts 2 to the bottom parts of the parts 1 and the parts 3 to the top part of the parts 1, as shown in the picture. Sew in the end tails but skip the yarn end of the longest parts, so you can use them to sew the antlers to the headband.

Headband

(Any cheerful colour will do)

1. magic ring of 4 = 4
2 – 22. sc in each around = 4, sl st.

Now stretch this piece too and insert the pipe cleaner. Now you can sew the band closed by putting the needle from the inside out through all the outside loops of the 4 st, clockwise. If you do it correctly, you can pull the yarn end and it will close the gap

All you have to do now is attach the antlers to the headband, about two rounds apart. There, now you can give all your Popkes a reindeer metamorphose!

Patterns

Pudding & Cake, crochet guinea pig patterns

With a lot of excitement and some pride, I present to you Pudding and Cake, my crochet guinea pig patterns. Meet the furry little boys! Buy now – directly from me đŸ±

Guinea pig crochet pattern

Not one crochet guinea pig pattern but two? Well yes! I started by making a sketch as I always do and somehow got to a final one showing two cuddly guinea pigs. At first that was just the lovely sketch but the further I got with making Pudding, I felt like actually making that second piggy on all fours too. My basic idea was to make a standing guinea pig, a whimsical character like most of my crochet animals are. I think because guinea pigs have a special place in my heart (I have had them when I was little and for the last 10 years too), it felt so natural to make Pudding a friend.

pudding-cakeMy crochet animals usually are a blend between a realistic looking animal and a playful doll shaped character. For the second piggy I decided to go for a more classical shape, standing on all fours. As that isn’t really my thing, it felt a bit odd designing an animal like that so I tried best to capture the playfulness my patterns normally have. And I had to, making Cake a perfect match to Pudding. Don’t they make the cutest pair? I’m a bit stunned myself, they look so adorable and funny together with their wild looks.

When I started designing Pudding, I really wanted to give my crochet guinea pig the appearance of the abbesinian guinea pig, my favourite type. But adding yarn like lion’s manes felt a bit too much, so I decided to go for brushing. Brushing the crochet surface gives an animal such a wonderful look and is so easy to do too. All you need is a hard brush and some courage.

Now about the patterns. Both piggies are about 5,5 inch/ 14 cm tall and made with Isex Lett Lopi wool. There are three versions you can buy.

You can order them directly from me with the link below.

This pattern has a permanent discount if you use this link. Patterns purchased directly from me cost 5,00 eur. I will have to email the pattern manually so it can take a bit longer, but I promise, you’ll have it in a day. If not, check your spam and if it is not there either, message me to wake me up, as I might have fallen asleep or something


All three versions contain a clear and colour coded description of how to crochet and assemble the piggies with example pictures at the bottom to help you get everything right. In the patterns you can also find what materials you need, the yarn colour numbers, in short, everything you need to know to make them. All the additional information you need to know about the patterns you can find in the shop listings.

Here are some extra pictures of the separate crochet guinea pigs.

guinea pig amigurumi pattern

amigurumi crochet guinea pig

Patterns

Free mole accessory pattern: Moser’s miners safety helmet

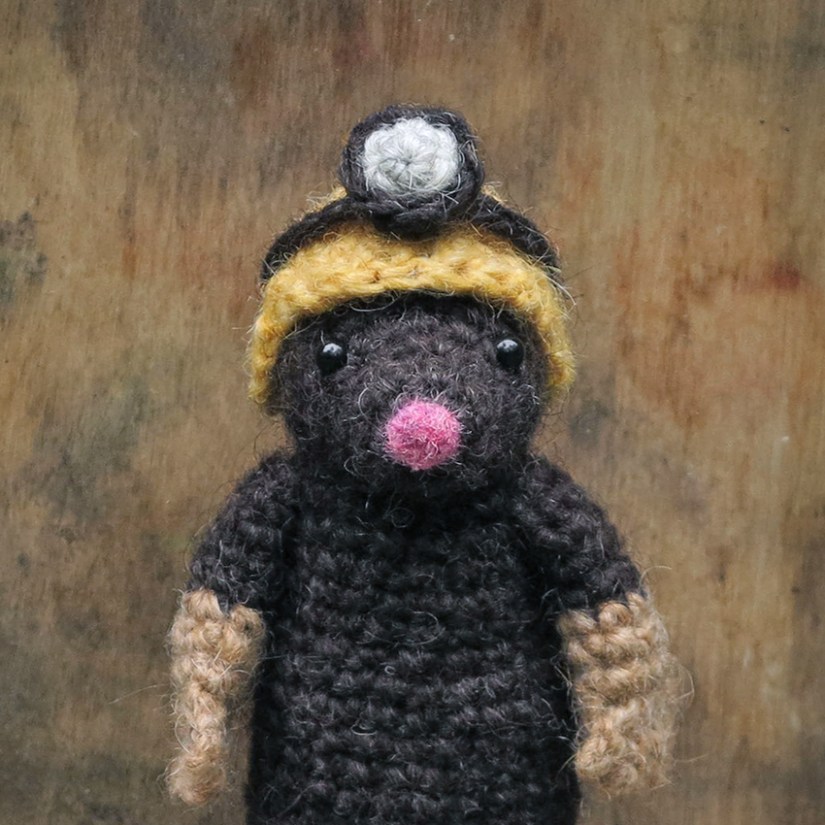
Just for the fun of it I made another free accessory pattern, a miners safety helmet for Moser the crochet mole. I really think these simple accessories make the animals look even more whimsical than they did. And with the holiday season coming, I already have a fun accessory in mind that will fit every animal, so keep an eye on the blog for these little free patterns.

Look at Moser, isn’t he an adorable little miner! Below the pictures you can find the free pattern for the miners safety helmet and links to buy the crochet mole pattern you can find here.

Miners safety helmet pattern

Helmet (yellow)

  1. magic ring of 6 = 6
  2. 2 sc in each around = 12
  3. (sc in next, 2 sc in next) x 6 = 18
  4. (sc in next 3, 2 sc in next, sc in next 4, 2 sc in next) x 2 = 22
  5.  sc in each around = 22

Short rows to make the face opening

  1. sc in next 8, ch 1, turn
  2.  in 2nd ch from hook sc in next 17 = 17, ch 1, turn
  3.  in 2nd ch from hook sc in next 17 = 17, ch 1, turn
  4.  in 2nd ch from hook sc in next 15, s2tog = 16, ch 1, turn
  5.  in 2nd ch from hook sc in next 14, s2tog = 15, ch 1, turn
  6.  in 2nd ch from hook s2tog, sc in next 2, s2tog, sc in next 3, s2tog, sc in next 2, *s2tog (*finish this last st as a sl st), weave in yarn end.

Helmet flap (yellow)

To make a little flap to protect Moser’s eyes better, you crochet a new row into the outside loops of the face opening edge. You are going to crochet 9 new stitches. If you look closely to the face opening of the helmet when it is facing you, you see 7 normal stitches around the opening (the part above the eyes).

Row 1

Work front loops only. To create the flap, you insert your hook from the outside in, into the 3rd st before the normal stitches and pull a loop. Now make an sc in the next  2 st, sc in next 7 normal stitches, sc in the next st of the side of the face opening. You should now see a new row of 9 st in the middle of the face opening. If not, start this row one stitch later. It is a bit hard to explain in which stitch to start, because the stitches at the side edges of the face opening look different and are harder to identify. As long as your flap is in the middle of the helmet, nicely placed above Moser’s eyes, everything is ok.

Row 2 (this row is worked in both loops like you normally do.)

ch 1, turn. In 2nd ch from hook s2tog, hdc in next, dc in next 3, hdc in next, *s2tog (*finish this last st as a sl st), weave in yarn end.

Lamp (dark brown and light grey)

Ouside in dark brown

  1. Magic ring of 4 = 4
  2. 2 sc in each around = 8
  3. sc in each around = 8, sl st and leave yarn end for sewing

Light in light grey

  1. Magic ring of 4 = 4
  2. (sc in next, 2 sc in next) x 2 = 6, sl st and leave yarn and for sewing

Strap

Make a ch of 25 with long ends for sewing at both sides.

Now assemble the lamp by placing the light into the lamp bulging out, but as deep into it as possible. Attach it with one stitch trough the back of the outside with the tail of the light. Use the tail of the lamp to secure the light better and weave in the end. Attach the strap to the middle of the lamp using both tails. You don’t join the strap but attach both sides next to the magic ring of the lamp. Like that the lamp isn’t placed completely on top of the chain which would make it stick out more, but runs over into it at both sides, giving a slightly flatter appearance.

Well look at that. You have made Moser a very sturdy helmet!

Patterns

Free crochet duckling accessory

In my quest to make enchanting Instagram portraits of my crochet animals, I have to come up with interesting accessories. Today Jonesy the duckling was my subject because I had this rather cool idea to make him look very special, and to publish a little free pattern for all of you.

Look at this very sturdy aviator duckling! Maybe Jonesy needed this helmet all along. The free aviator helmet and goggles pattern you can find below the pictures and links to buy the crochet duckling pattern you can find here.

Aviator helmet and goggles pattern

You need worsted weight yarn and hook E/ 3.5 mm (or the same yarn and hook you used when you made the duckling.) I’ve used Istex Lett lopi, colours brown (0053), dark brown (0052) and light grey (0054). You also need an embroidery needle to attach the strap to the goggles.

Aviator helmet (brown)

  1. magic ring of 6 = 6
  2. 2 sc in each around = 12
  3. (sc in next, 2 sc in next) x 6 = 18
  4. (sc in next 3, 2 sc in next, sc in next 4, 2 sc in next) x 2 = 22
  5. sc in each around = 22

Short rows to make the face opening

  1. sc in next 8, ch 1, turn
  2. in 2nd ch from hook sc in next 17, ch 1, turn
  3. in 2nd ch from hook sc in next 17, ch 1, turn
  4. in 2nd ch from hook sc in next 17, ch 1, turn
  5. in 2nd ch from hook sc in next 17, ch 4, turn
  6. in 2nd ch from hook sc in next 3, (s2tog, sc x 3) x 3, s2tog, ch 4, turn
  7. in 2nd ch from hook sc in next 3, sl st in next (side of helmet opening) and weave in end

Goggles (light grey and dark brown)

Glass 1, start in light grey and change colour to dark brown in the last stitch of round 2

  1. magic ring of 4
  2. 2 sc in each around = 8 (change colour to dark brown in last stitch)
  3. sc in each around = 8
  4. sl st and weave in end

Glass 2, start in light grey and change colour to dark brown in the last stitch of round 2

  1. magic ring of 4
  2. 2 sc in each around = 8 (change colour to black in last stitch)
  3. sc in each around = 8
  4. sl st, ch 1
  5. join glass two to glass one with a normal sc in glass one, sl st in next and weave in end

Strap (dark brown)

Make a chain of 20 with long ends at both sides for sewing it to the glasses.


Happy crocheting!

Patterns

Drago, crochet crocodile pattern

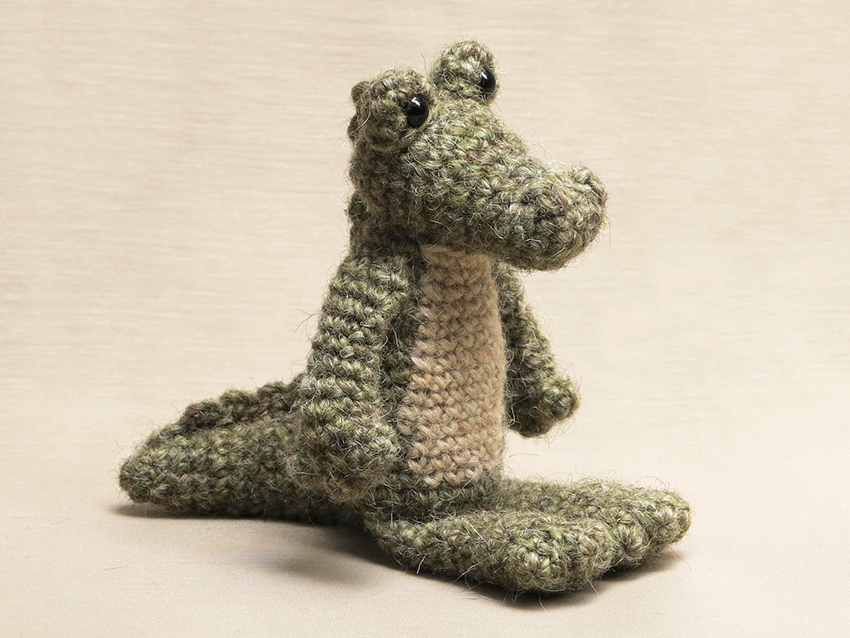
Is it a dragon? Is it an alligator? No, this is Drago, a cuddly crochet crocodile! Buy now – directly from me đŸ±

crocodile crochet pattern

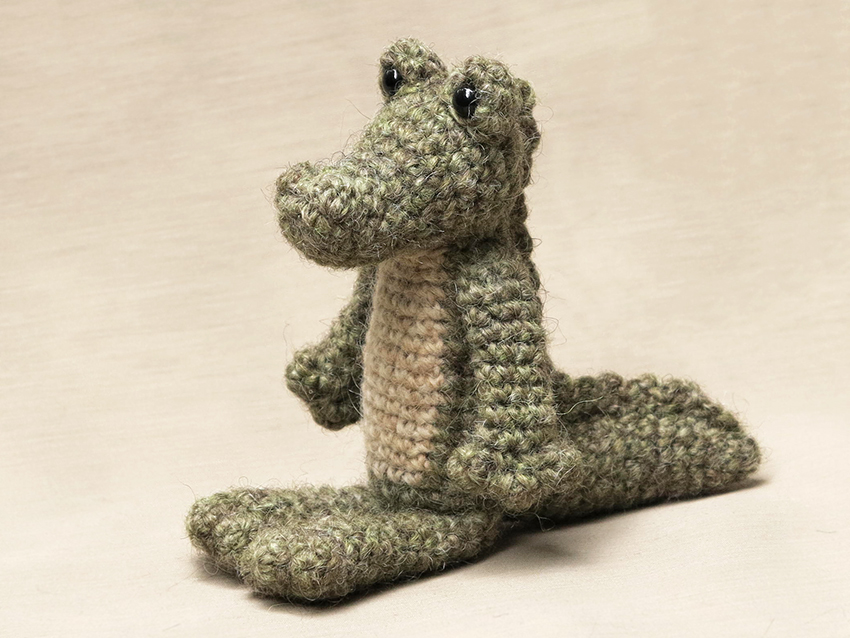
After a long holiday break I am so glad to present this new crochet pattern. To be honest, I was a bit worried I might have lost the skill to come up with something good enough. Looking back now that’s me being a bit insecure. When I finished the head of this crochet animal I was so relieved. I made a sweet looking head which looked like an actual crocodile or alligator, like the kind and cuddly version of the fierce animal. Usually, when I design a new crochet doll, I look at many pictures of the real animal for inspiration and always am delighted by their beauty. On this case however, I mostly used pictures of plush crocodiles as inspiration. Of course I took some peeks at the real animal and kept its features in mind, but I didn’t fell in love with these reptiles.

Some of you might think when seeing Drago, ‘where are the special stitches you were going to do?’ Well, I later realised I am crocheting in a spiral, which means a popcorn based stitch, which creates the horny surface of the back, would never become symmetrical but the stitches would lean towards one side. That meant I needed to make a big flat piece you sew to the back which I don’t like. Also, when I had a prototype crochet crocodile, I liked the idea of a horny scaled chain much better. I was going to place two next to each other, which is most realistic, but that made Drago look way too bulky. My boyfriend said, ‘why don’t you just do one in the middle?’ So, I tried that and it look lovely. And exactly what I had unconsciously in mind in the first place as you can see in the sketch.

Anyway, to sum up this long story, Drago has become the friendly but recognisable crocodile I hoped. Here you can see him from another angle and below the picture you can find all the info about this crochet crocodile pattern and the links to buy it.

Amigurumi crocodile pattern

Info about & links to buy the pattern

This ever so fluffy and cuddly crocodile is made with Istex Lett Lopi, a worsted weight wool. He is 13.5 cm / 5.6 inch when sitting. All the additional information you need to know about this pattern you can find in the shop listings. It contains a clear and colour coded description of how to crochet and assemble the crocodile with extra illustrations and example pictures at the bottom to help you get everything right. In the pattern you can also find what materials you need, the yarn colour numbers, in short, everything you need to know to make your own friendly reptile.

You can buy this pattern in my shop at Ravelry, Etsy or directly from me with the link below.

This pattern has a permanent discount if you use this link. Patterns purchased directly from me cost 5,00 eur. I will have to email the pattern manually so it can take a bit longer, but I promise, you’ll have it in a day. If not, check your spam and if it is not there either, message me to wake me up, as I might have fallen asleep or something


Patterns

Friebel, crochet mouse pattern

After many modifications to my original idea, Friebel the crochet mouse is finished! Buy now – directly from me đŸ±

House mouse crochet pattern

amigurumi mouse pattern

This pattern is the perfect celebration of all the little mice that came and visited my garden the past few months. It may be, that because of all those lively creatures, I became very critical about how my crochet mouse should look. When I started this pattern, I had a standing crochet mouse in mind. But when all the parts were finished and I had made a first prototype, the mouse looked like Bamse on a diet. Oh dear, that wasn’t at all good.

So, I frogged everything except for the rather sweet head and started all over. While working on a more classic doll shaped body, I realised it suited a crochet mouse much better as mice are such adaptable and playful animals. For the standing version I had made little pink hands and feet and when I gave the mouse doll such hands and feet, that didn’t work out either. Yet another modification had to be made. Even the tail became different that I had anticipated.

Of course there were moments during this process that I got annoyed I had to start over again, but that is a part of the designing process. Every crochet animal doll needs to have the proportions matching that specific animal and I cannot be satisfied until I adore what I see. There has to be a certain perfection in the cuteness. And in the end it is so rewarding to cherish the new creation.

Info about & links to buy the pattern

This cute mouse is made with Istex Lett Lopi, a worsted weight wool. He is 13 cm / 5.1 inch when sitting. All the additional information you need to know about this pattern you can find in the shop listings. It contains a clear and colour coded description of how to crochet and assemble the mouse with example pictures at the bottom to help you get everything right. In the pattern you can also find what materials you need, the yarn colour numbers, in short, everything you need to know to make your own little friend.

You can buy this pattern in my shop at Ravelry, Etsy or directly from me with the link below.

This pattern has a permanent discount if you use this link. Patterns purchased directly from me cost 5,00 eur. I will have to email the pattern manually so it can take a bit longer, but I promise, you’ll have it in a day. If not, check your spam and if it is not there either, message me to wake me up, as I might have fallen asleep or something


Patterns

Droebel, crochet dog pattern

And now I proudly present to you, Droebel the crochet dog, woof! Buy now – directly from me đŸ±

amigurumi dog crochet pattern

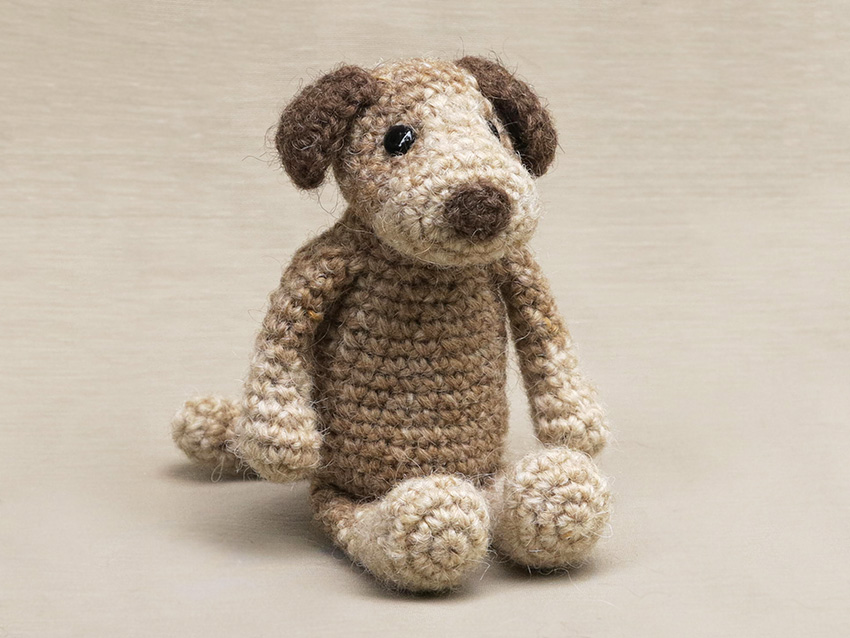
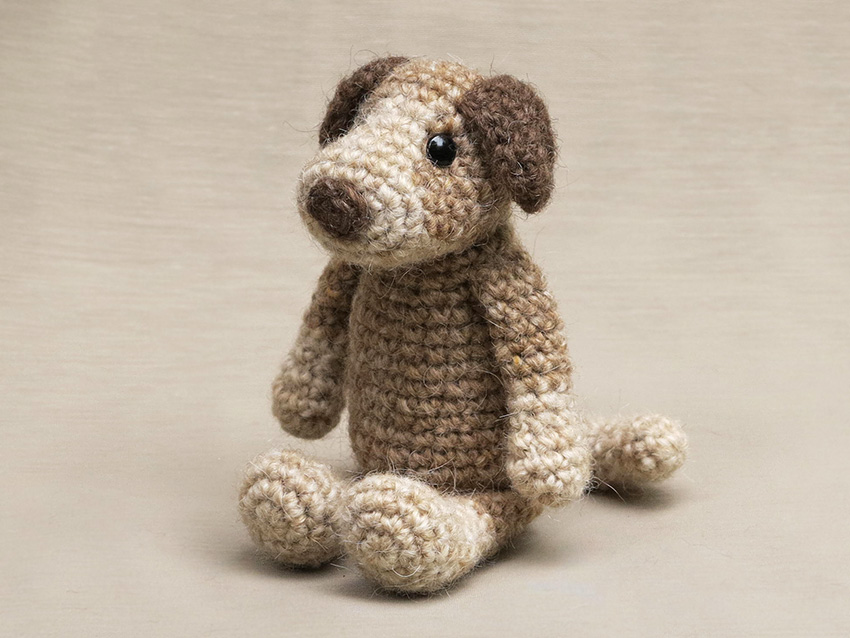
When I designed this crochet pattern, creating a dog looking doll was my idea. A funny looking amigurumi character that could be enjoyed by every one who loves dogs and animals. I think I succeeded and am ever so excited, isn’t he cute!

It was when Droebel was finished that I noticed he reminds me a little bit of Gromit, that clever and pleasant companion of Wallace. You know, from those amazing clay animations created by Aardman. I can easily imagine Droebel having all sorts of thrilling adventures. Yes, he is an adventure dog. Just look at him!

dog amigurumi pattern

ami dog

Generally, I find the sketch and the doll of a similar cuteness. The dolls never are exactly as the sketches, but they come close. This time however, I find the doll much cuter and better looking than the sketch I made. Droebel looks like the younger version of himself in the sketch. I’m very happy I managed to get that puppy look. Maybe it is because of my new shaping technique for which I used a rather simple and clever trick.

For this crochet dog pattern I have chosen to use soft colours. It makes him look very rustic and even a bit retro, which I like. Droebel is sitting 4.9 inch/ 12.5 cm when made with a worsted weight yarn. I thought of giving him a coloured collar or handkerchief scarf, but decided not to and leave him plain and simple. It is up to you crafters to give him accessories and I’m sure some of you will not hesitate to do so! As always, the pattern contains a clear description of how to crochet and assemble the wee dog with example pictures at the bottom to help you get everything right. In the pattern you can also find what materials you need, the yarn colour numbers, in short, everything you need to know to make your own barking friend.

Now where can you find this pattern

The crochet pattern for Droebel the dog you can find in my shop at Ravelry, Etsy or directly from me with the link below.

This pattern has a permanent discount if you use this link. Patterns purchased directly from me cost 5,00 eur. I will have to email the pattern manually so it can take a bit longer, but I promise, you’ll have it in a day. If not, check your spam and if it is not there either, message me to wake me up, as I might have fallen asleep or something


Patterns

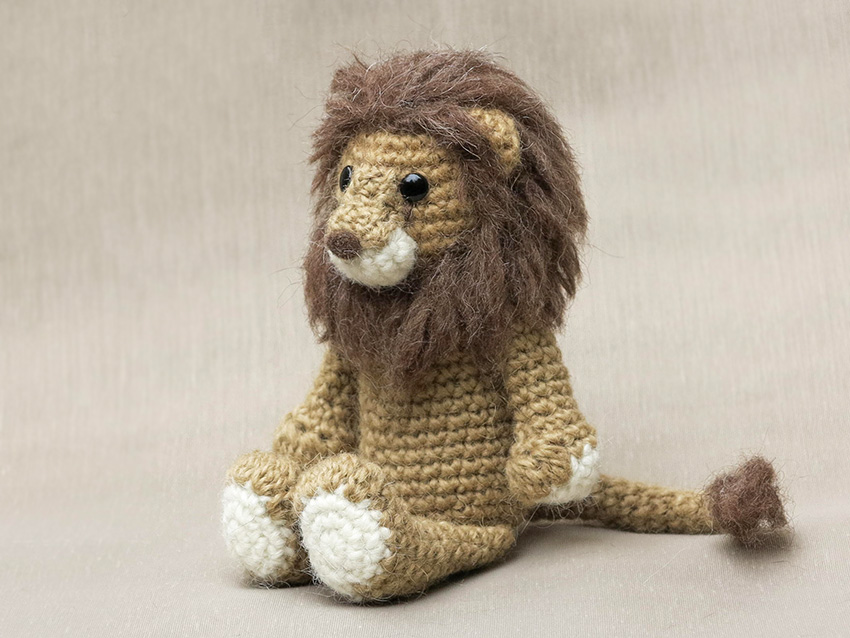
Lopi, crochet lion pattern

Look! Now we all can become lion tamers, the pattern is finished. You have already seen the teaser picture of Lopi the crochet lion, but here he is in full glory. Buy now – directly from me đŸ±

Lion amigurumi crochet pattern

amigurumi lion

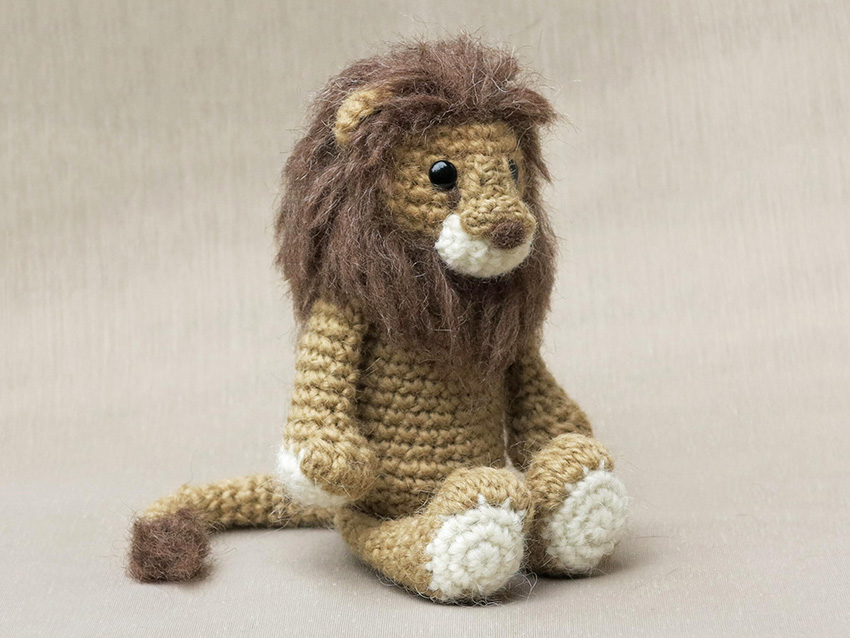
This was a lovely crochet animal to design. The most intensive part of making this crochet lion was inserting all the manes. Before I started I had thought of different ways to make the manes. I could use a mane cap, or just sew in the manes. I decided to go for manes crocheted right into the stitches. It’s not very difficult to do and gives the perfect result. (You just fold a piece of thread in half and pull it through the top part of a stitch with your hook and then fold the tails of the thread through the loop.) When I had all the manes inserted, the lion looked rather silly with his reggae hair. But after brushing and cutting, and some more brushing and cutting, he looked absolutely marvelous. Even my first attempt had such a beautiful lion look. I decided to change the mane colour for the final version but definitely would use this technique. The rest of the lion was fun to make, especially the haired tail, which also looked splendid after the hairs were inserted.

This crochet lion is not very difficult to make. The crocheting bit is very easy but giving the lion the final haircut does require your own skills. I can’t exactly instruct how long each hair has to be. I explained it as good as possible and with help from the pictures I (always) add to the pattern, I think everyone will be able to give his or her lion a nice lion mane cut. Lopi is 6 inch / 15 cm tall when sitting. He is made with Istex lett lopi, 100% wool. The pattern contains a clear description of how to crochet and assemble the lion with example pictures at the bottom to help you get everything right. In the pattern you can also find what materials you need, the Lopi colour numbers, in short, everything you need to know to make this king of the savanna.

Now, where can I get this pattern?

The pattern for this glorious and cuddly crochet lion, you can find in my shop at Ravelry, Etsy or directly from me with the link below.

This pattern has a permanent discount if you use this link. Patterns purchased directly from me cost 5,00 eur. I will have to email the pattern manually so it can take a bit longer, but I promise, you’ll have it in a day. If not, check your spam and if it is not there either, message me to wake me up, as I might have fallen asleep or something


Patterns

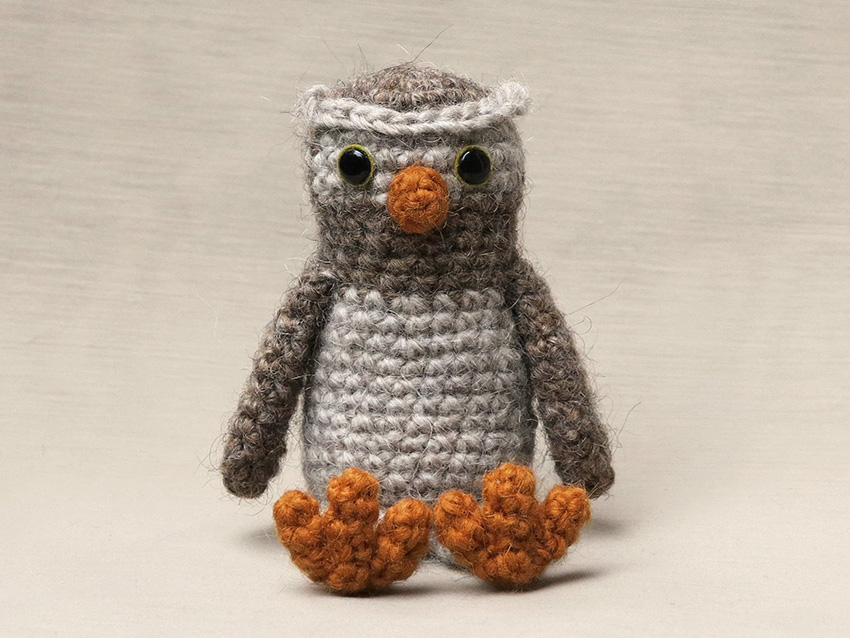
Odi, little owl crochet pattern

And here he is. Meet Odi, a crochet little owl. Buy now – directly from me đŸ±

crochet owl pattern amigurumi

Never have I been so insecure during the process of designing a crochet pattern. Thankfully, now I am very happy with my little Odi. Why was this so difficult?

Well, I wanted to create a crochet owl that resembled a real owl species. There are loads of crochet owl patterns to find online, and you can see they are owls, but they don’t look like real owls, you probably know what I mean. And I wanted to make a little owl.

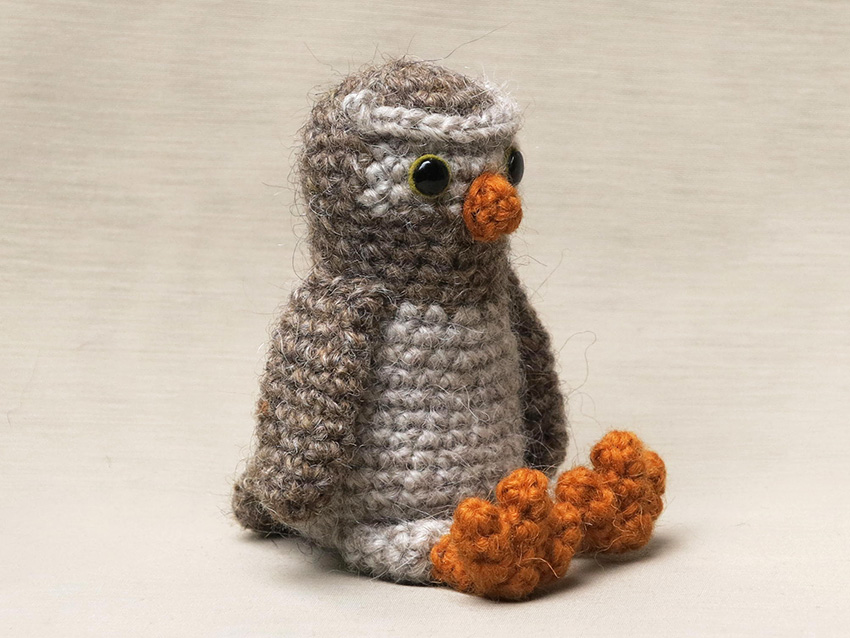
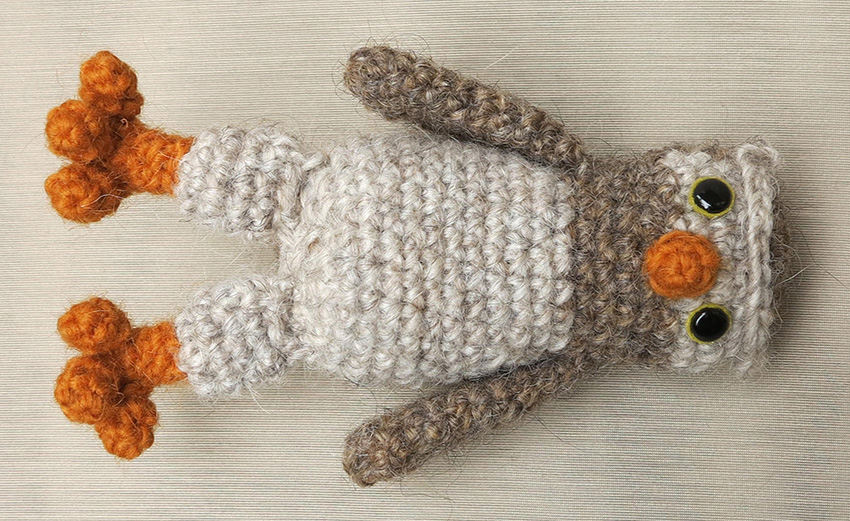
Giving it a sweet face, was the first obstacle I stumbled upon. I made several heads and they all looked quite unpleasant. When I finally had succeeded in making a sweet little face, I had trouble getting the size of the body right. At some point after taking things apart who knows how many times, I just continued working because of the amount of time I’d already spend on this project. And then there came a turning point. I had this lovely idea for the legs and feet and it did look so adorable, that the love for my crochet owl came back. I finished the feet and attached them to prototype Odi. It looked marvelous. Now I only had to make some wings and the little owl was finished.

But then, when I looked at the promotional and pattern pictures I had taken, I realized there still was something wrong with this doll. He did not look owly enough. His beak was much too big. After all this work I could not just let that be. So, I made a new tiny beak and took new photos. Now I can finally show you the result. I know Odi is not completely realistic looking. I did exaggerate the colours of the beak and feet to make him a more fun and expressive crochet owl. Just look at him!

realistic crochet owl pattern

How to get this whimsical crochet owl pattern?

Odi is 14,7 inch / 12 cm tall when sitting. He is made with Istex lett lopi, 100% wool. The pattern contains a clear description of how to crochet and attach the bird with example pictures at the bottom to help you get everything right. In the pattern you can also find what materials you need, the Lopi colour numbers, in short, everything you need to know to make this lovely creature.

The pattern for this adorable and rather realistic looking owl, you can find in my shop at Ravelry, Etsy or directly from me with the link below.

This pattern has a permanent discount if you use this link. Patterns purchased directly from me cost 5,00 eur. I will have to email the pattern manually so it can take a bit longer, but I promise, you’ll have it in a day. If not, check your spam and if it is not there either, message me to wake me up, as I might have fallen asleep or something


Ok, this one is just for fun.

Odi-fun