Art

Finse and Jonesy’s night of fireflies

night painting forest fireflies

As desktop wallpaper I most often use one of my illustrations. Untill yesterday, my Christmas illustration featured on both my laptop and iPhone desktops, which obviously was becoming outdated. I had many ideas for new illustrations, but didn’t find the time to actually make one. After Jones was finished I decided to skip crocheting for a few weeks to paint a new illustration.

First I thought of making a strictly seasonal spring painting but also had the idea of a big field with fireflies in it. And by all means, it had to become a Son’s Popkes themed illustration. I decided to go for the field with fireflies, and Finse and Jonesy.

When the illustration was finished, I was not happy at all with the result. Somehow the colours didn’t seem right to me. As usual I’m starting to like the illustration now. It is not perfect, but I love the atmosphere and the expressions of the animals. It is probably some kind of an artist syndrome, not liking the result immediately….it always takes time for me to really love what I made and then I’m absolutely proud. It is a weird thing.

Well, now I’m back to crocheting. On a whim I decided I’m going to design a panda. Two leftovers of yarn caught my attention and I decided they had to become a panda. (Hopefully there is enough for the whole beast.) After that I’m back to my list of otter, mole and red panda. I don’t know the order in which I’m going to make them and a rat or mouse also is on my mind.

Enough to be done!

Finse and Jonesy’s night of fireflies is acrylic on canvas, 24 x 18 cm.


Patterns

Jonesy, crochet duckling pattern

Now, here is another spring and Easter like animal, a yellow duckling. I proudly present Jonesy, my new crochet duckling pattern.

crochet pattern duckling, amigurumi duck

This crochet duckling is the first bird pattern I have designed and I’m absolutely fond of the result. When Jonesy was finished, I immediately got many ideas for more birds.

And after a year, I had this crazy idea. Long ago I purchased a little Snoopy plush wearing an aviator helmet in a local shop. It was sitting in our bedroom in a big net and when I looked at it more closely, it inspired me to make such a hat for my duckling. And it turned out ever so fabulous. Here is another picture of Jonesy, but this time he’s a very sturdy aviator amigurumi duckling! The helmet now is a part of the pattern, so everyone can make their own little aviator.

The part of this duckling pattern I found the hardest to design were the feet. I had no idea how to make them. I decided to start with a flat, upside down triangle and it worked out wonderfully perfect. I started by making a narrow triangle, till it was wide enough and then realized I could easily decrease the top of it to get the pointed middle toe. For both feet, two pieces are sewn and crocheted together and it is very easy to do and gives a fantastic result.

This cheerful duckling is 4.9 inch/ 12.5 cm tall, sitting. I designed him without a scarf, but soon realized a scarf looked perfect on this little duck. Both duckling, scarf and helmet are made with my favourite Létt Lopi yarn, a 100% wool. Here are some more pictures of Jonesy. Below the pictures you can find info about and links to buy the pattern.

Where you can buy this pattern

The crochet pattern for this spring time, cheerful duckling Jonesy, you can find in my shop at Ravelry and Etsy. You can also order it directly from me. The pattern contains a clear and colour coded description of how to crochet and assemble this animal, with extra illustrations and example pictures at the bottom to help you get everything right. In the pattern you can also find what materials you need, the yarn colour numbers, in short, everything you need to know to make your own aviator duckling. All the additional information you need to know about this pattern you can find in the shop listings.

Assembling crochet animals

The sewing of parts tutorial

When making crochet animals, the attaching of body parts is something that goes with it. But how do you do it the neatest and best possible way? For example, when I started making these animals, sometimes my sewed on muzzle looked very different from when it was pinned on, and certainly not better.

When designing my latest animals, I paid close attention to how I attach the muzzles and heads. How do I do it and how can I explain it to you? I have come up with two photo tutorials.

How to attach a muzzle.

You can see the direction of the needle for all four steps of both tutorials in the pictures.

1. Of course the muzzle or beak is pinned to the head before you start. When you start sewing, make sure the thread is at the outside of the muzzle, like you see in the first image.

2. To make your first stitch, sew through both loops of the next stitch of the muzzle and pull the thread.

3. Now find ‘the right stitch’ in the head and sew through that stitch and pull the thread. Usually that stitch is below the pinned on muzzle. Sometimes you have to try a few stitches to get the desired result.

4. Now sew through both loops of the same stitch of the muzzle you just came from, as illustrated in the last picture.

If you repeat step 2 till 4 for the complete muzzle or beak, you have it sewed on exactly as it looks when pinned on. Because you have sewed behind the crochet loops, the stitches you’ve just made are barely visible. Now you can decide if and which stitches need to be tighter, so the muzzle blends in better. You can stitch them the way you like to.

Attaching the head to the body, both open pieces with the same stitch count.

The most challenging thing about sewing these parts together, is preventing the neck from becoming too narrow. You also want the pieces to blend together nicely.

1. I usually sew with the tail of the head. Make sure it is on the outside of the head when you start.

2. Now sew through both loops of the body, from the outside to the inside and pull the yarn, but not too tight.

3. Sew now through only the outside loop of the stitch of the head, which is just above the stitch of the body you just sewed through, like you see in the second picture. Again, pull the yarn, but not too tight.

4. Now sew through both loops of the second stitch of the body and repeat the steps.

By pulling the yarn not too tight, the stitches become less visible and the neck won’ become too narrow. It does have to feel steady, so experiment a bit how tight works best for your doll.

I hope this tutorial is a good tool so everyone who makes my patterns can attach their animals perfectly. If you think something is missing, please let me know.


Patterns

Free Easter crochet pattern

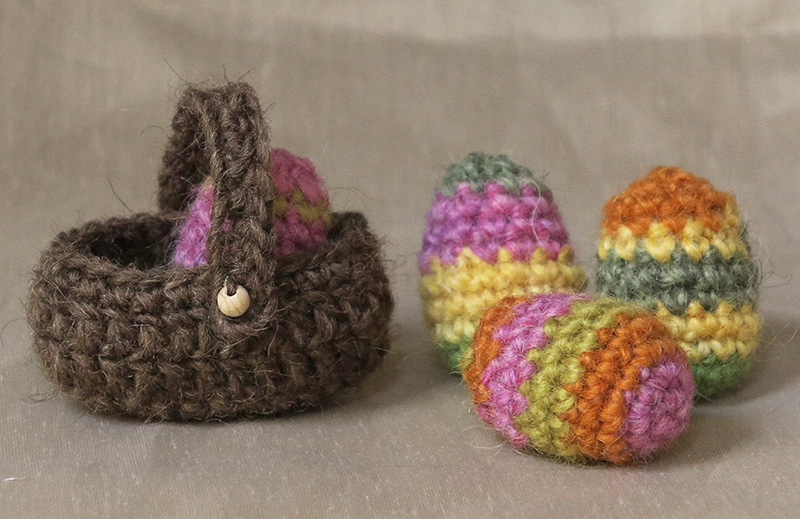
A few times a year I try to design fun and free crochet patterns, as a ‘thank you’, to all of you who have bought my crochet patterns and have supported me. This time I made little crochet Easter eggs and a basket that fits precisely two of the eggs.

free easter crochet pattern

With this free crochet pattern for little Easter eggs and a basket, you can create fun Easter ornaments. I made the size of the eggs and basket so it combines well with my crochet animal patterns.

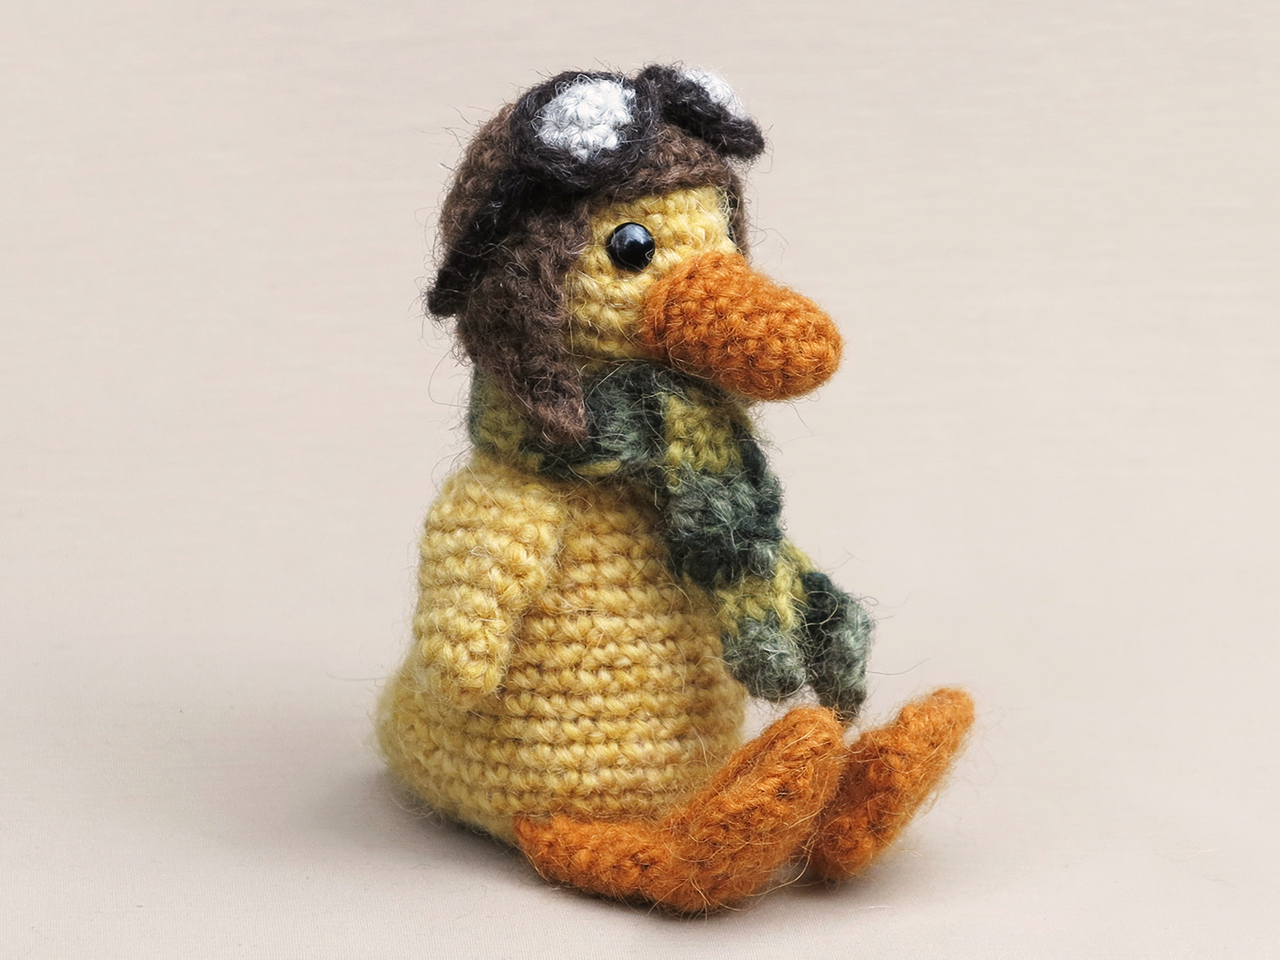
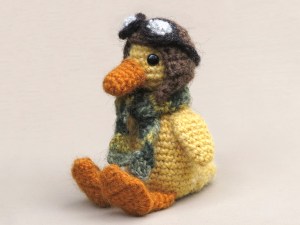
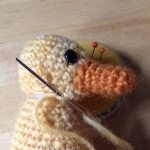
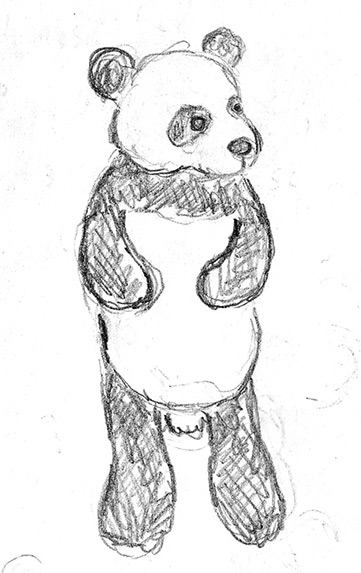
Of course especially Finse will make a lovely, quizzical crochet Easter bunny.

crochet easter bunny, rabbit, hare amigurumi pattern, haakpatroon paashaas

Finse finds himself not particularly a crochet Easter bunny, but more a normal rabbit, as you can tell by his expression.


The eggs and basket pattern

For this pattern you’ll need worsted weight yarn and hook US E/3,5 mm. to get an approximately 2,7 inch /7 cm wide basket and 1,77 /4,5 cm high eggs. I used a bunch of colours of Lètt Lopi, a 100% wool. To stuff the eggs you will need fiberfill and a two beads or buttons are optional. I’ve used beads to accentuate where the handle of the basket is fixed.

You can use a paper clip as stitch marker to mark the beginning of each round. Move it up each time you start a new round. The exact colours I have used for this little pattern you can find below it and,  if you’ve become fond of Finse and want to complete the eggs and basket with a suitable bunny, you can find the pattern in my shop or my shop at Ravelry.

Abbreviations: ch = chain, sc = single crochet, sl st = stip stitch, dc = double crochet stitch, hdc = half double crochet stitch, s2tog = decrease.

The basket

Work around the chain.

1. ch of 7, in 2nd ch from hook 2 sc, sc in next 4, 2 sc in last, turn/go to bottom loops, 2 sc in bottom loop of that last st, sc in next 4, 2 sc in last = 16

2. 2 sc in next, sc in next 6, 2 sc in next 2, sc in next 6, 2 sc in next = 20

3. 2 sc in next, sc in next 8, 2 sc in next 2, sc in next 8, 2 sc in next = 24

4. 2 sc in next, sc in next 10, 2 sc in next 2, sc in next 10, 2 sc in next = 28, close with sl st.

5. ch 2 and go back (you go back so the stitches will be stacked different, which will form a nice seem for the side of the basket. You only do it this one time) dc in next 28 = 28, sl st

6. ch 2, dc in nect 28 = 28, sl st

7. ch 1, sc in next 28 = 28, sl st and weave in end.

 The strap.

Leave a long tail when you make the chain, for sewing.

1. ch of 20, in 2nd ch from hook hdc, hdc in next 17, sl st and leave tail.

(You can of course make the strap as long as you like, or two so you can make a backpack for a doll. Do whatever you like!)

Sew the strap to the basket and add a button or bead if you like.

 The eggs. In multiple colours. If you make striped eggs, change colour in the last stitch of a round. Change colour in the last loop of a stitch, so the loop on the hook you end with, will be in the new colour.

1. magic ring of 5 = 5

2. 2 sc in each around = 10

3. (2 sc in next, sc in next) x 5 = 15

4 – 6. sc in each around = 15

7. (sc in next 3, s2tog) x 3 = 12

8. sc in each st around = 12

9. (sc in next 4, s2tog) x 2 = 10, now stuff the egg firmly.

10. sc in each st around = 10

11. s2tog x 5 = 5. Sew the hole closed by putting the needle from the inside out, trough all the outside loops of the 5 st, clockwise. If you do it correctly, you can now pull the tail and it will close the gap. Weave in the end.

Lopi colour numbers. Brown: 0053, orange: 1410, yellow: 1411, pink: 1412, apple green: 1406, grey green: 9422 and mustard: 9264.

Have a lovely spring and Easter festive.


Art, Stories

Upcoming spring pattern

And now for something completely different. Well, perhaps not completely but a bit. My next pattern will be my first bird pattern. Last year I thought of making a duckling and decided to wait till spring this year. Yes, a duckling! I love ducks and especially mallards and white ducks and do think a pattern for a crochet duckling will make a perfect crochet spring project.

If the duckling is going to meet my expectations, I will also make his father someday. I very much hope I can make my duckling as whimsical as he looks in the second sketch. Looking forward to present my first little bird.

Eendjes

A little surprise pattern will follow soon……


Stories

A little too late

Marmot2A while ago, someone suggested that I should make a marmot. I agreed with her and already had thought of making an Alp marmot. It was after my vacation to Switzerland, where I had seen and heard, many of these adorable little fellows.

However, I never actually got to making one, because I simply had other animals in mind to make first and was not quite confident about the shape I should give a crochet marmot. I decided to wait until the period around Groundhog day, which I thought to be somewhere in the end of February or begin March. I should have Googled it.

Last week I discovered it is Groundhog day the 2nd of Februari, oops. Nevertheless, I am working on a marmot pattern at this very moment. I’ve already made some sketches and picked suitable yarn colours. There is one dilemma though, I don’t know what kind of marmot I am going to make, in colour that is. There is the Alp marmot, the woodchuck, the groundhog and my favourite but more uncommon variation, the Vancouver Island marmot with its bear-ish appearance.Marmot1

The Vancouver Island marmot is an endangered species and has beautiful chocolate brown fur and contrasting white patches. I think he’s absolutely stunning, but I am afraid many people won’t immediately recognize my crochet version of one to be a marmot. So I think I will stick to a more traditional coloured marmot and make the chocolate brown coloured one for myself.

Here are some pictures of this lovely animal. The first picture I have found online and in it you see the stunning Vancouver Island marmot. Look at him, what an absolute beauty! The second picture is made by my boyfriend. This marmot we encountered in Switzerland at the Abula pass. When we passed him after we had just started our hike, he quickly fled into his hole, which led into a cold war shelter. When he called out to warn his friends, he made our ears ring. Anyway, we knew where he was, so on our way back, we silently approached his little territorium and there he was. We quickly took his picture, he fled into his little dug out again and made our ears ring some more. We enjoyed ourselves very much.

dscf2732

Screen Shot 2014-02-04 at 17.18.22

This post is a bit longer than I had anticipated and I hope you enjoyed reading it.


Patterns

Wasby, crochet raccoon pattern

What’s with all that racket? It is Wasby, my new crochet raccoon pattern. Here he finally is! I’ve called him Wasby, as raccoons are called ‘wasbeer’ in Dutch.

With a nice frontal picture, meet my crochet raccoon!

This crochet raccoon pattern was a bit of a tricky one to make. When I started, I had many ideas of how to make this animal. I didn’t want the head to be round but it had to have wide cheeks like a real raccoon. The thing I had in mind of how to shape those cheeks didn’t work out that wel, so I had to think of something different. Also, the raccoon should not become too chubby, but just a bit, which meant I had to make a bunch of bodies before I got the right size. I wasn’t sure about the right colour for the hands and feet….dark or light? I made some test versions and decided to go for light and added some extra little details with the dark yarn.

I am very pleased with the end result. Wasby has become the raccoon doll I pictured. He has the right proportions and I love his realistic looking face. The fun thing about patterns like these are, you can do whatever you like, if you prefer dark feet, just go for dark. I’ve chosen rustic colours to make this raccoon, but white, grey and black will do too. You could even give the raccoon a more brown fur colour instead of grey.

Here are some more pictures of Wasby and below them you can find info about and links to buy this pattern.

Isn’t he a ferocious little crochet raccoon? This is my favourite picture of him. Wasby is sitting 5.1 inch/ 13 cm tall.

The crochet pattern for Wasby the raccoon you can find in my shop at Ravelry, Etsy or order it here. Wasby is made with Lett Lopi, a 100% wool. I have chosen to use a light beige for the light parts of the raccoon and the darkest brown you can find for the dark parts. It gives him a more warm and rustic look. In the pattern you can find a clear and colour coded description of how to crochet and assemble this animal, with extra illustrations and example pictures at the bottom to help you get everything right. In the pattern you can also find what materials you need, the yarn colour numbers, in short, everything you need to know to make your own whimsical raccoon amigurumi. All the additional information you need to know about this pattern you can find in the shop listings.

Stories

The long longed project

SketchThis animal is one of the first I wanted to make when I started designing crochet animal patterns. Somehow it got postponed again and again, for animals I thought should have priority.

But now I’m finally going to make him, one of our cutest looking, but not always loved animals, the beautiful raccoon. I do love raccoons and cannot blame them for their bad image. We took away their natural habitat and they had to cope with that.

Every time I’m starting a new project I’m worried I won’t succeed in getting the result I desire. I really hope I’ll get the raccoon’s head right….that is the hardest part. I have three beautiful warm colours of Lopi yarn lie ready, so I’m not worried about that. Let’s start and see.

There will be a new pattern here soon!


Stories

Popkes by you, Happy New Year!

The new year has begun and I want to start it here at Son’s Popkes with a fun and inspiring post, dedicated to all of you who enjoyed and made my patterns. I proudly present a gallery full of pictures of the beautiful animals you all made. This post was a lot of fun to make and I did feel proud myself when I looked at all these lovely dolls. Cheers to your work!

When you click on the picture you can see who made the doll and find their site or blog if they have one. These dolls are made with my patterns, but each and every one of them has its own character. They all have a uniqueness to them, added by the person who made the doll. Something extra and personal which I really love seeing.

I also would like to give a bit of extra attention to Joanne from the United Kingdom, who bought all my patterns and made these lovely versions of them. Look at this, what an awesome bunch!

Joanne

With this post I want to thank you for your support! There will be lots of new patterns this upcoming year and I hope you’ll enjoy them as much as you’ve enjoyed these patterns. I wish you a fabulous and crafty 2014!