Patterns

Floro, crochet red squirrel pattern

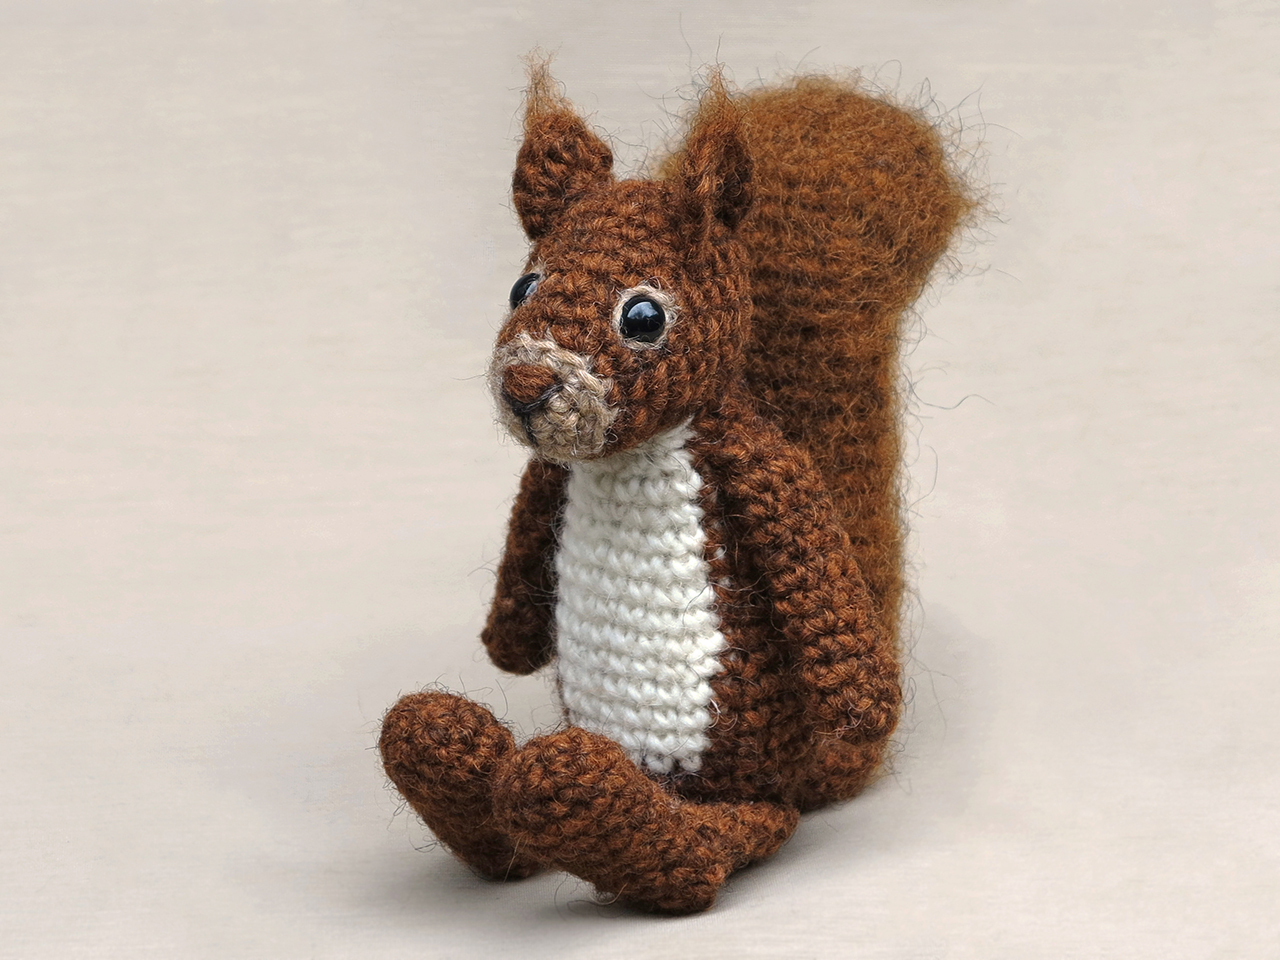
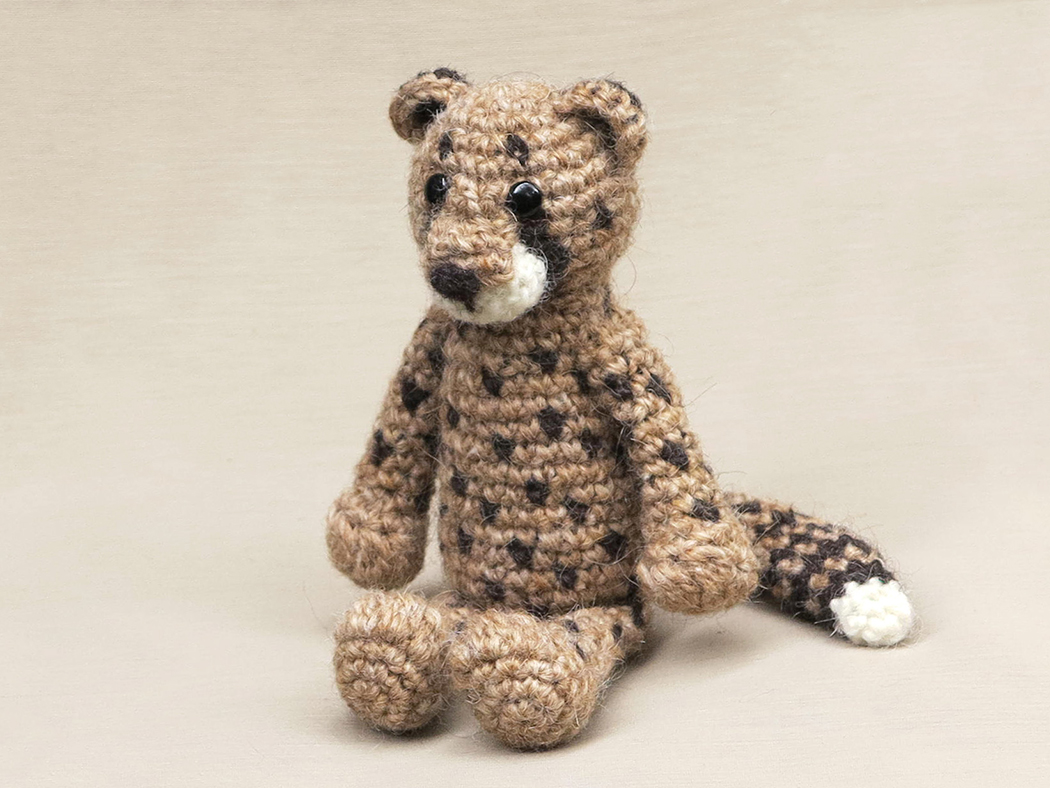
This one looks familiar! Meet Floro 2, the new version of my crochet squirrel amigurumi.

amigurumi squirrel animal

Floro the crochet squirrel has always been one my personal best-liked patterns. Together with badgers, red squirrels are my favourite animals. I’ve had the jolly pleasure to seeing them very often and they are such graceful little characters. I love how they wave their tail when seeing other squirrels and their sneaky attitude when it comes to hiding food. They are ever so entertaining to watch.

Because Floro was one of the first animal patterns I designed, he did not meet up to my recents standards. When I looked at him lately, I only saw what could look better. I decided he needed a makeover.

What has changed with Floro?

First of all, I wanted his head to be easier to make. There is nothing wrong with sewn on muzzles, but with heads shaped like Floro’s there is no need to anymore now I have improved my skills for that. I am able to crochet the muzzle and head in one piece and still have a muzzle shaped little snout. Also, the big eye patches did not seem to work for everyone. I had made Floro’s as small as possible, but it still looked a bit as if he was staring in utter surprise. The eye patches have been replaced by much more subtle lines around the eyes you can easily embroider in four stitches. I also replaced the ears for flat folded ears.

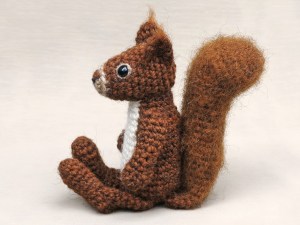
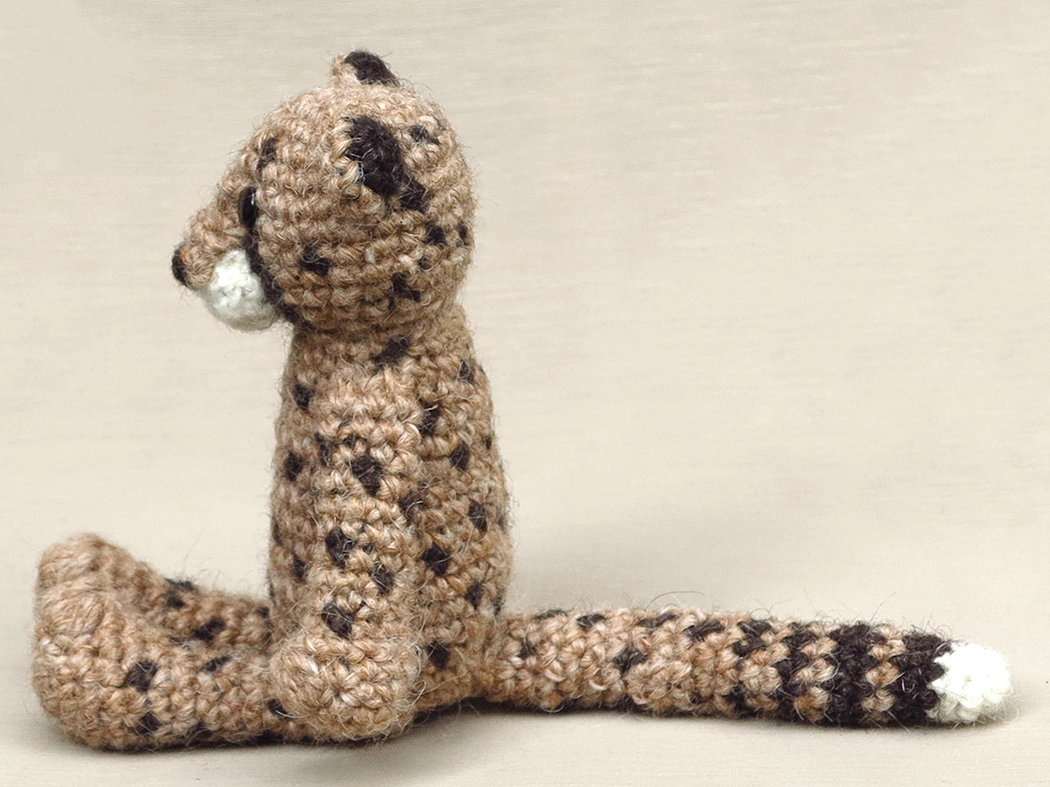
The body has also changed. It has an improved shape and a rounder white belly. The last thing I changed is the tail. I wanted it to look curved by itself, without the need of inserting pipe cleaners to bend it. It now consists of two pieces that make a lovely curved tail.

I am so happy with the result. Floro still is the same, but looks much better! And the good thing is, anyone who has bought the previous pattern, will receive a message about this update with a download link to download the new version for free.

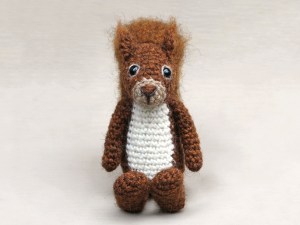
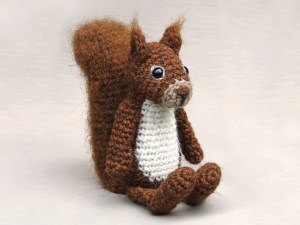
Here are some more pictures of my lovely crochet squirrel and below them you can find info about and links to buy the pattern if you do not have it yet.

Info about & links to buy the pattern

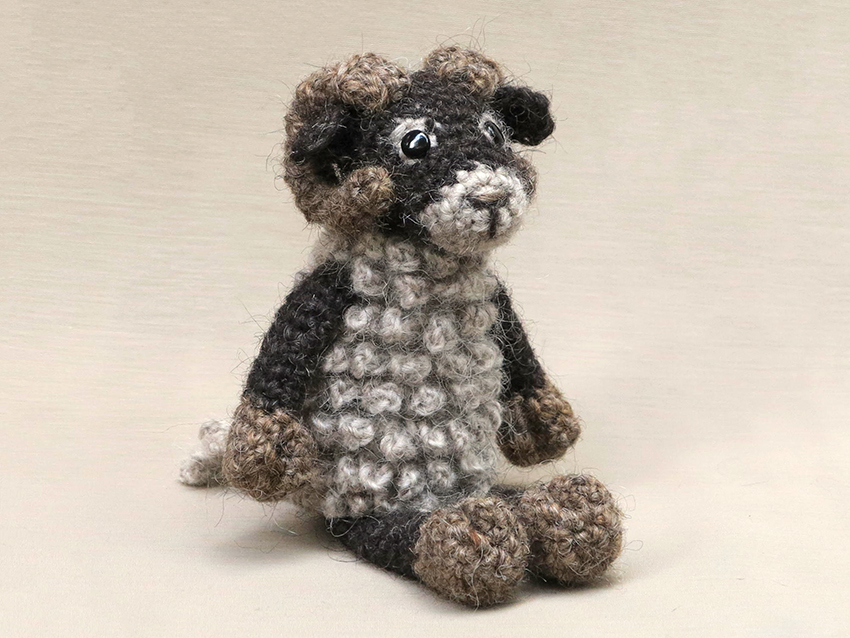
This crochet red squirrel is made with Istex Lett Lopi, a 100% wool with a lot of fuzziness that works very well with brushing. Floro is sitting 6 inch / 15 cm, when made with worsted weight yarn.

The pattern contains a clear and colour coded description of how to crochet and assemble this animal, with extra illustrations and example pictures at the bottom to help you get everything right. In the pattern you can also find what materials you need, the yarn colour numbers, in short, everything you need to know to make your own graceful squirrel amigurumi. All the additional information you need to know about this pattern you can find in the shop listings. You can buy this pattern in my shop at Ravelry, Etsy or order it here.

Despite this being an update, the new pattern has a one dollar release discount till Monday the 26th of February.

Note: Floro’s original post will stay on my blog until google has indexed this one.

Art, Chit and Chat, Uncategorized

A phase

When I look at all the patterns I have made so far, I am quite proud of each and every one of them. Look at them, so many (and I even forgot a few), that is about three years of designing in that picture!

amigurumi patterns

But lately I’ve been so critical about my designs that I am having a hard time finishing them. This must be something every designer goes through every once and a while. Maybe it is just the soggy weather and the grey of winter that makes me judge my work differently.

It started when I was working on my tortoise pattern. I made this gorgeous looking shell, that would be a bit difficult to assemble. And because I couldn’t write it down perfectly scientifically, I had to re-think it so I fooled around with it for a while and did not enjoy it. Then I saw this picture of a gorgeous looking American red squirrel and decided I was going to set aside the tortoise and make a new squirrel that made me all excited. I started all enthusiastic but soon afterwards doubted every part I made. I guess designing the realistic animals got me into this phase. Because now, when I’m designing a doll, I’m not sure anymore how realistic it should look. These crochet animals must look like the real animal for sure, but they also should be a bit more whimsical and playful looking, well you’ve just seen my Popkes. When I look at my sweet little squirrel face, I’m thinking ‘isn’t this looking too complicated?’ or ‘isn’t this head too small, should I make a more round and basic head?’. It’s annoying, I’m doubting my every move, while I can clearly see what I came up with isn’t looking bad at all.

The best thing to do is to just keep working on it. Today I made a very smart looking tail, which doesn’t need pipe cleaners in it to make it look bended. And the body I made has a very formidable looking light belly, so I suppose I am just being a bit too hard on myself. I will just continue working on this sweetie and assemble a prototype. When that is finished I can decide if I find this squirrel whimsical and characteristic enough and if anything needs to be changed.

Yes, that is a good plan. See you when it is finished dear crafters!

Patterns

Realistic crochet badger pattern

realistic amigurumi crochet badger

This is the first animal I have made in a realistic position, well actually the second. Last year I made a guinea pig on all fours but lets be honest, guinea pigs are little potatoes and therefor not the hardest animals to make. This one was much more complicated. In the series of realistic animals I started with a badger because it is my favourite animal, but also because I thought the shape of a badger is easier to design than that of a fox or squirrel for example.

Despite thinking that, I had a hard time designing the body. When I had finished my first prototype, it looked like a potato with a badger head. How on earth would I get a proper badger shape? I got completely stuck there and had to stop and think about how I was going to design the body. After some thinking I had a few ideas and set behind my desk again. The first idea did not work, made the badger look like an armadillo. However, the second solution I had in mind did work. The thing was, I needed to get a shape where the paws seemed to come out of the fur instead of looking attached to it. The simple solution of shoulder and hip pathes did the trick. Even without the fur brushed, the badger looked like a sturdy burrower.

If you would ask me what I like most about this badger, it is the face. I am so happy with it. On my desk I have this framed postcard with a portrait of a realistic badger wearing a jumper. That serious badger is looking at me all the time and I used that face as my example. And the result is so similar I even surprised myself!

The good thing about this pattern is, I did all the hard work. All you crocheters need to do is follow the instructions, easy peasy. This is not a very complicated pattern to make.

In this image you can see how the badger looks before brushing, to get a better idea of the basics before you buy the pattern. My editor complimented me on how extensively I have written the assembling instructions.

I did that to be sure everyone gets all the pieces in the right place, with the correct distances between them etcetera.

Here are some more pictures of the finished badger amigurumi to get you all enthusiastic and below them you can find more info about & and links to buy the pattern.

Info about & links to buy the pattern

This crochet badger is made with Istex Lett Lopi, a 100% wool with a lot of fuzziness that works very well with brushing. He is 7.8 inch/ 20 long from tail to nose when made with this yarn.

The pattern contains a clear and colour coded description of how to crochet and assemble this animal, with extra illustrations and example pictures at the bottom to help you get everything right. In the pattern you can also find what materials you need, the yarn colour numbers, in short, everything you need to know to make your own realistic badger amigurumi. All the additional information you need to know about this pattern you can find in the shop listings. You can buy this pattern in my shop at Ravelry, Etsy or order it here.

This pattern has a one dollar release discount till Friday the 1st of December!

Uncategorized

Choof, crochet cheetah pattern

And here he is, a very spotted feline, meet Choof the crochet cheetah.

cheatah crochet pattern

This was such a fun pattern to create. The basic shapes of this cheetah amigurumi were already known to me. The shape of the head many of my big cats have, did not need much changes and the limbs and body only needed to be a bit slimmer than that of the other cats. You clearly see the difference in shape between the big cats is you put them in a line. But of course the spots make the most difference. Because I knew from the start how many stitches wide I was going to make each body part, I could totally focus on getting the ideal pattern for the spots.

As I always do, I started with the head. The hardest part of designing the cheetah’s face were those distinctive dark lines around the muzzle. As you all are familiar with, crocheting in a spiral does not always create smooth vertical lines when you crochet in multiple colours. On one side of the muzzle I got a very neat dark line, but on the other side I got this rugged line that did not run smoothly around the muzzle at all. I had to try many options before I found a neat combination of stitches to get the right look. I am very pleased with the end result, even though the stitches aren’t all lined up, the stripe runs smoothly around the muzzle and looks realistic.

For the spots of the body I tried a combination of bigger and larger spots, but soon noticed the spots all needed to have the same size. I also figured out pretty soon the spots needed to be placed randomly, not on every other stitch on every other round. So I just worked one round at the time and placed the spots delicately. 

And in all it simplicity, it works so well. Those random spots give this crochet cheetah the perfect cheetah coat and are so easy to make. And the tail, how could I forget about that, I love this tail. I made it exactly like a real cheetah’s tail, white end, striped and then dotted, just look at it! Below the images you can find info about and links to buy the crochet cheetah pattern.

Info about & links to buy the pattern

Choof is made with Istex Lett Lopi, a 100% wool with a lot of fuzziness. He is sitting 5,5 inch/ 14 cm tall.

This cheetah crochet pattern contains a clear and colour coded description of how to crochet and assemble it, with extra illustrations and example pictures at the bottom to help you get everything right. In the pattern you can also find what materials you need, the yarn colour numbers, in short, everything you need to know to make your own spotted feline. All the additional information you need to know about this pattern you can find in the shop listings. You can buy this pattern in my shop at Ravelry, Etsy or order it here.

This pattern has a one dollar release discount till Thursday the 12th!

Chit and Chat

New pattern to arrive soon

What will it be? I’ve been a bit lazy with my updates here. Since I use Instagram I regularly post pictures there of the things I am working on and it kinda slips my mind to also write about it at my blog. Nowadays I use this place to publish the patterns. Hope you don’t mind. If you like to see the WIP’s, just check my Instagram account.

But now I am here, I can tell you all about what I am making at the moment. A big, slender spotted cat, yes a cheetah pattern. It’s almost finished and my dear editor is testing the pattern as we speak.

I never made a cheetah because of its spottiness, but they are one of my favourite big cats. Especially juvenile cheetahs with their silly wild fur are too ridiculously cute to be real. I love the expressive face of cheetahs too and was a little bit worried if I could manage to get that right. But I think I did. What do you think?

You just have to wait till the end of the week to find the pattern here. Enjoy it in all its Autumnal fury!

Patterns

My dapper crochet badger pattern

Dapper crochet badger

Doesn’t he look dapper, this cute crochet badger amigurumi? Almost a year ago I found in a local bookshop, this utterly amusing postcard with the portrait of a rather realistic badger wearing a striped sweater. It inspired me to make a little sweater pattern for Falun and of course I made a portrait of him wearing it. Some of you may even remember seeing it on my Instagram.

It was my intention to add the pattern for that sweater to Falun’s pattern, but somehow it never really came to it. Because of the lovely reactions I got after posting another picture on IG where Falun was wearing the sweater, I decided to update the pattern as soon as possible.

What has changed and what do you need to do if you already purchased the pattern?

The pattern is completely updated. Falun’s original body was on the chubby side, so I rewrote that part and made a better looking version. There is also an instruction for an even slimmer body, which will fit the dapper sweater. And last but not least, the instruction for the cute sweater is included in the pattern.

Good news for those of you who already have the pattern, you’ll receive an automatic update about this and can download the new version (for free) anytime you like, how about that!

If you don’t have the pattern yet, you can buy it in my shop at Ravelry, Etsy or order it from me here.

Now go and make yourselves a bunch of dapper creatures. Have a lovely end of summer dear crafters!

Patterns

Staruman, crochet sheep pattern

With pride and delight, I present to you, Staruman the crochet sheep pattern.

crochet sheep pattern

Staruman is a sheep, but of course a ram too. It is always hard to say which of the amigurumi’s I made is my favourite and it changes occasionally, but this one is very special for sure. The majestic horns and wooly texture of the loop chain stitches of the body make him unique and stunning looking. I had no experience at all with the chain loop stitch (twisted loop stitch) but it is so easy to do and worth the effort.

When I started working on this crochet animal, I had a clear image in my mind of how I wanted him to look. I knew the horns had to be partly worked in the back loops to create the lined structure and the body needed a special stitch too, something that would exaggerate the wooly coat. I started practicing with the loop stitch but didn’t like the result. The loops where thin and when cut the body looked like a pompom. I needed a bulkier, textured sort of loop. That is when I discovered the chain loop stitch. It is easier to make than a loop stitch, just takes more time because of the chains you make before each single crochet stitch. But the result is fabulous.

And about the light spots behind the eyes. For a while now I’m trying to create a more subtile looking eye patch. For this sheep I found a very simple and effective solution and nothing needs to be sewed on, so it always looks the same.

Staruman might look a bit more complicated than most of my patterns, but don’t let it fool you because he is just as easy to make. Crocheting the body and horns only takes a bit more time, that’s all.

Here are a few more pictures of Staruman the crochet sheep and below them you can find info about and links to buy the pattern.

Info about & links to buy the pattern

This impressive, cute and curly sheep is made with Istex Lett Lopi, a 100% wool. He is sitting 14 cm / 5.5 inch tall. Despite his looks, he is quite easy to make and you can finish your sheep in a day or so. I strongly recommend using a fuzzy yarn because it gives the best result for both the eye patches and chain loop stitches.

This crochet sheep pattern contains a clear and colour coded description of how to crochet and assemble the sheep, with extra illustrations and example pictures at the bottom to help you get everything right. In the pattern you can also find what materials you need, the yarn colour numbers, in short, everything you need to know to make your own loopy friend. All the additional information you need to know about this pattern you can find in the shop listings. You can buy this pattern in my shop at Ravelry, Etsy or order it here.

This pattern has a one dollar release discount till Friday the 16th!

Uncategorized

An exciting new design

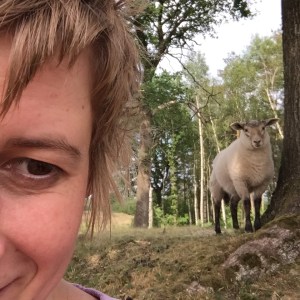
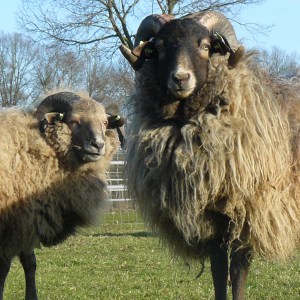
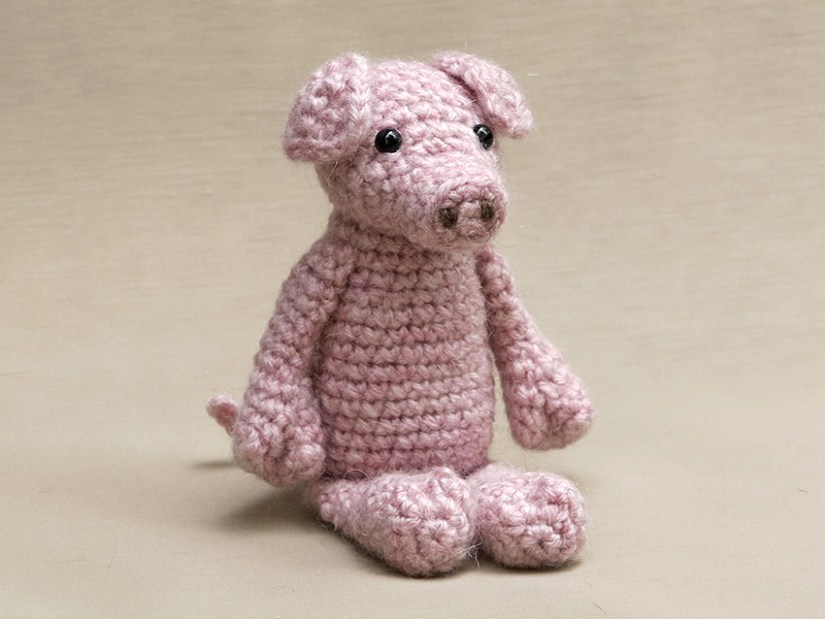
Sometimes a small coincidence can make all the difference. After I finished the piglet pattern, I started thinking about what animal to make next. Usually, I already know what to make next when I am working on another one but this time that wasn’t the case. That was until I saw this lovely crochet horned sheep on someone’s Instagram feed. It was not made in my style but it looked so nice and interesting that I could immediately visualise how I could make a fabulous sheep, it was instant inspiration. In fact, it made me so excited I wanted to start right away!

And I did. The sheep is already finished and looking spectacular. Now only the pattern needs to be written, edited and tested and I can hit publish.

I assume you are curious about the kind of sheep I made. I based my sheep on a local heather sheep called Drents heideschaap. It is a sheep I often see on our hikes through the countryside. The sheep are curious and friendly grazers with a slender build and long tails. The males have these gorgeous horns that grow in a lovely curl.

In my ‘about’ story I added a picture on which you see me walking with a tail of curious sheep, that is them indeed, but just the hornless females. In the last picture below (from the web) you see how the males look with their impressive horns.

Oh, I am so excited to show you the finished sheep and hope to be able to do so by the end of this week. Here are some glimpses and one funny pic of a curious young sheep I met this week.

See you at the end of the week!

Uncategorized

Gus, crochet piglet pattern

The past few weeks I have been working on a very pink animal and today I can publish the pattern. Meet Gus, my crochet piglet!

crochet pig pattern

Pigs are super intelligent and social animals and I’ve been thinking a while of designing a crochet pattern for a piglet. And although I am more fond of the wilder looking brown pig, I decided to make the domestic pink version, as an ode to this special but unrated animal. The reason I postponed making an amigurumi piglet has something to do with my sadness about how pigs are treated by humans. I knew that if I would do the research I normally love doing, I would stumble upon many pictures I prefer not to see. But, I also saw so many lovely and delightful pictures. Thankfully, more and more farmers realise you cannot treat animals like products and biological farms where the pigs can go outside are not as rare as they were in the past. The pictures I saw of happy pigs outside, rolling in the mud or even jumping in pools, really made me smile and it felt good making this crochet version.

I wasn’t able to make this piglet in my favourite Lètt Lopi yarn (no good pink), so I found an alternative. I’ve used Phildar Phil Aventure to make Gus. It is an alpaca acrylic blend, which gives a smooth but slightly fuzzy texture. To add enough realisme to this pattern, I decided to go for split-hoofed paws. It was a bit of a kerfuffle to find out how to make them, but in the end it was very striking looking and easy to make. I am very happy with this pink piglet amigurumi and I think I will make him a boarlet friend someday soon.

Here are some more pictures of this fuzzy crochet pig and below it you can find info about and links to buy the pattern.

Info about & links to buy the pattern

This fuzzy and cute piglet is made with Phildar phil aventure, a worsted weight wool blend. Gus is 13 cm / 5 inch when sitting. The pattern is easy to crochet and you can make this doll in a day.

All the additional information you need to know about this pattern you can find in the shop listings. You can buy this pattern in my shop at Ravelry, Etsy or order it here. It contains a clear and colour coded description of how to crochet and assemble the piglet, with example pictures at the bottom to help you get everything right. In the pattern you can also find what materials you need, the yarn colour numbers, in short, everything you need to know to make your own special friend.

This pattern has a one dollar release discount till Thursday the 25th of May.

Patterns

Mr. Creeper says Hi

There are several free patterns to find at my blog, but Mr. Creeper is my favourite and he deserves some extra attention. If you feel linke making something creepy but cute, try this pattern, it is fun. The legs acquire some patience to crochet but this amigurumi is so worth the effort because let’s face it, Mr. Creeper is one cute spider. You can find the free pattern below the image, go for it!

crochet animal patterns

For this pattern you’ll need worsted weight yarn and hook US E/3.5 mm. to get an approximately 6 inch / 15 cm tall spider, measured from front to back paw. I’ve used the darkest brown colour of Lètt Lopi, a 100% wool. You will also need fiberfill, animal eyes, I used 7 mm eyes. Safety eyes with big backs won’t fit in the head so make sure you are going to use eyes that do fit. You also need pipe cleaners for the legs, so you can bend them into shape.


Body

1. magic ring of 6

2. 2 sc in each around = 12

3. (sc in next, 2 sc in next) x 6 = 18

4. (sc in next 2, 2 sc in next) x 6 = 24

5. 2 sc in next 2, sc in next 10, 2 sc in next 2, sc in next 10 = 28

6-7. sc in each around = 28

8. s2tog, sc in next 10, s2tog x 2, sc in next 10, s2tog = 24

9. (sc in next 2, s2tog) x 6 = 18

10. (sc in next, s2tog) x 6 = 12

11. s2tog x 6 = 6

Now close the gap by inserting the needle from the inside out, trough all the outside loops of the 6 st clockwise. If you do it correctly, you can pull the tail and it will close the gap. Sew in the end.


Head

1. magic ring of 5

2. 2 sc in each around = 10

3-4. sc in each around = 10

Leave yarn end for sewing.


Legs (make 8)

1. magic ring of 4

2-11. sc in each around = 4

Leave yarn ends for sewing. You can now insert the pipe cleaners. Stretch the paws so they get the desired length and leave the tip of the pipe cleaner sticking out, so you can later push it into the body.


Jaws

ch of 2, in 2nd ch from hook sl st. (leave both tails long enough for sewing)


Assembling the spider.

Finish the spiders face by attaching the eyes and sew on the jaws. I sewed Mr. Creepers jaws tight by sewing both ends to the head. Now you can attach the head to the body. After this I attached the paws neatly opposite to each other, by inserting the ends of the pipe cleaners first. If they are in the right spots, sew them tight.

There, your creepy crawler is finished, Happy Friday!