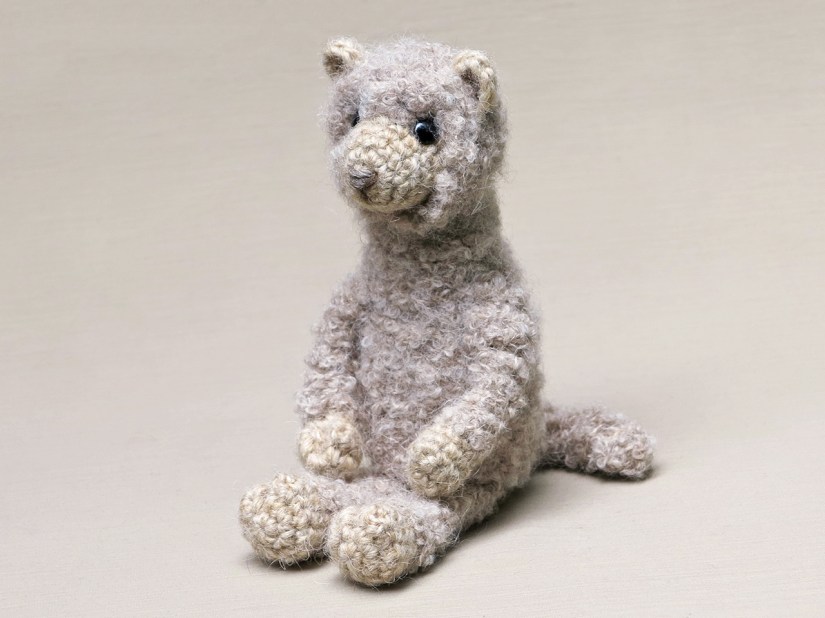
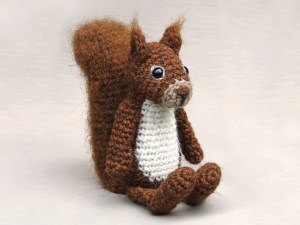
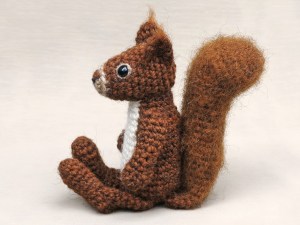
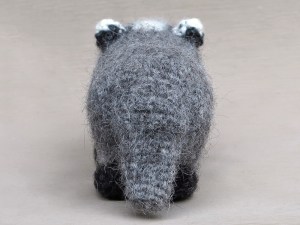
And here he is, the fuzziest and softest crochet animal you can imagine, this is Pacu the crochet alpaca amigurumi.
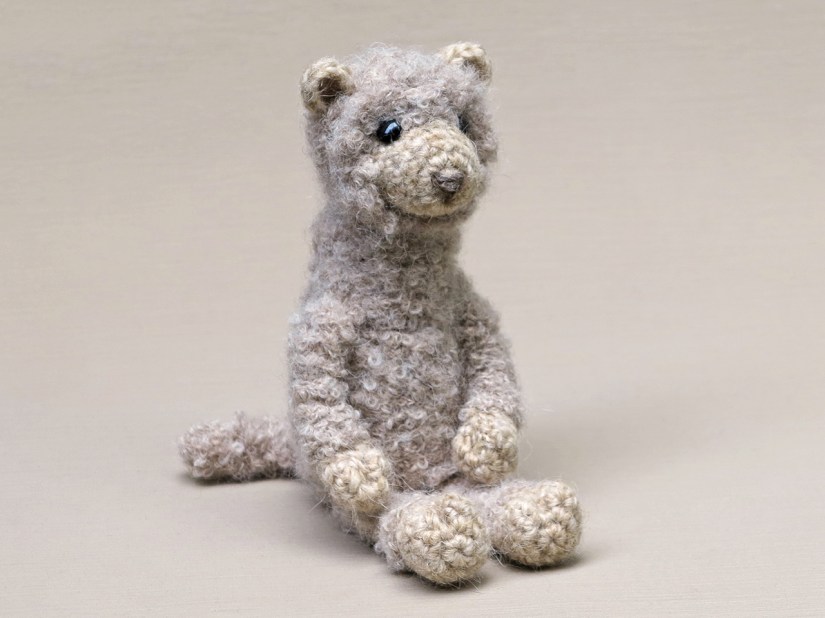
Ever since I started knitting, I’ve been in love with alpaca yarn. This alpaca crochet pattern is an ode to this soft and utterly fluffy animal. And the perfect yarn to create that gorgeous fur is alpaca yarn of course. I prefer alpaca yarn to knit with, because it feels so delightfully soft on my skin to wear, but for my crochet patterns I’ve always worked with a more rough Icelandic wool. For this alpaca I’ve combined my two favourite yarns to create a perfect doll. Each part of Pacu is made in two steps. First a base is made with the Lett Lopi wool, partly worked in the back loops only, and to the unworked front loops the drops alpaca yarn is attached. Like this you can create a perfect looking fluffy fleece.
For this crochet alpaca, I found it very important to create a dense outer layer that made it look like there was an animal hidden somewhere beneath all the fur. Honestly, alpacas are very sweet but a bit silly looking animals, especially after they have had a shave. There isn’t much of them left when the hair comes off. I shaped the fur very precisely around the snout and eyes to create that look and it gives Pacu that characteristic sweet expression. His long neck and small hooves make him a lovely doll shaped alpaca. Isn’t he the softest looking doll I ever made a pattern for?


Info about & links to buy the pattern
Pacu is made with a combination of Istex Lett Lopi, a 100% wool and Garnstudio Drops alpaca bouclé, a fuzzy loopy yarn. For those of you who can’t find a very fuzzy alpaca yarn I added alternative instructions to the pattern to create the furry look with a less fuzzy yarn. Pacu is 6.5 inch/ 16,5 cm when sitting. The pattern is written in standard American crochet terms and contains a clear and colour coded description of how to crochet and assemble this animal, with extra illustrations and example pictures at the bottom to help you get everything right. In the pattern you can also find what materials you need, the yarn colour numbers, in short, everything you need to know to make your own super soft alpaca amigurumi. All the additional information you need to know about this pattern you can find in the shop listings, like the yarn you need etc. You can buy this pattern in my shop at Ravelry, Etsy or order it here.
This pattern has a one dollar release discount till Wednesday the 1st of August!
Note: how very silly, it is the warmest weather one can image and I am publishing a fluffy, woolly alpaca, how appropriate!


