Art, Stories

Leaves and hedgehogs

Hedgehogs are fond of leaves. They love to rustle through them, to find food and when winter is arriving they nestle themselves in a nice pile of leaves and other bedding materials to keep them warm and cosy.

I couldn’t think of a better season to design a crochet hedgehog pattern. Here’s a first glimpse of Flims in a beautiful coloured autumn scenery.

Flims-leaves

I’m not finished yet with the pattern but it will be available next week.

Now I’m back to enjoying my favorite season, like hedgehogs rustling through the leaves, sniffing in all the lovely smells and watching the beautiful colours of autumn. I wish it could last forever….


Patterns

A free Halloween pattern, Mr. Creeper the spider.

Halloween is something that isn’t celebrated in the Netherlands, but I would love it. It looks and sounds like an exciting time with fun ‘rituals’ and attributes.

As a thanks to all of you who bought my patterns and because it’s just fun, I designed a cuddly Halloween spider. A fearsome fuzzy crochet spider called Mr. Creeper.

A warning for scared mums….here he is!
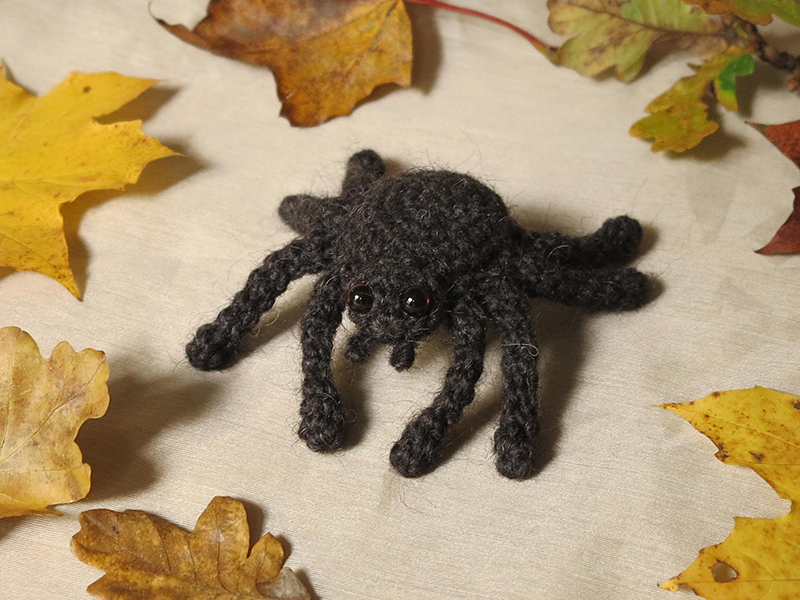
gehaakte spin, amigurumi spider, crochet spider

And now, the pattern to make Mr. Creeper.

For this pattern you’ll need worsted weight yarn and hook US E/3,5 mm. to get an approximately 6 inch / 15 cm tall spider, measured from front to back paw. I used the darkest brown colour of Lètt Lopi, a 100% wool. You will also need fiberfill, animal eyes, I used 7 mm eyes. Safety eyes with big backs won’t fit in the head so make sure you are going to use eyes that do fit. You also need pipe cleaners for the legs, so you can bend them into shape.

 Body

1. magic ring of 6

2. 2 sc in each around = 12

3. (sc in next, 2 sc in next) x 6 = 18

4. (sc in next 2, 2 sc in next) x 6 = 24

5. 2 sc in next 2, sc in next 10, 2 sc in next 2, sc in next 10 = 28

6-7. sc in each around = 28

8. s2tog, sc in next 10, s2tog x 2, sc in next 10, s2tog = 24

9. (sc in next 2, s2tog) x 6 = 18

10. (sc in next, s2tog) x 6 = 12

11. s2tog x 6 = 6

Now close the gap by putting the needle from the inside out, trough all the outside loops of the 6 st, clockwise. If you do it correctly, you can now pull the tail and it will close the gab. Sew in the end.

 Head

1. magic ring of 5

2. 2 sc in each around = 10

3-4. sc in each around = 10

Leave tail for sewing.

Legs (make 8)

1. magic ring of 4

2-11. sc in each around = 4

Leave tails for sewing. You can now insert the pipe cleaners. Stretch the paws so they get the length you want them to have and leave a bit of pipe cleaner sticking out, which you can later push into the body.

 Jaws

ch of 2, in 2nd ch from hook sl st. (leave both tails long enough for sewing)

 Assembling the spider.

Finish the spiders face by attaching the eyes and sew on the jaws. I sewed Mr. Creepers jaws tight by sewing both ends to the head. Now you can attach the head to the body. After this I attached the paws neatly opposite to each other, by pushing in the ends of the pipe cleaners. If they are in the right spots, sew them tight.

Ah, now he’s finished! Here’s another image to help you get everything right.
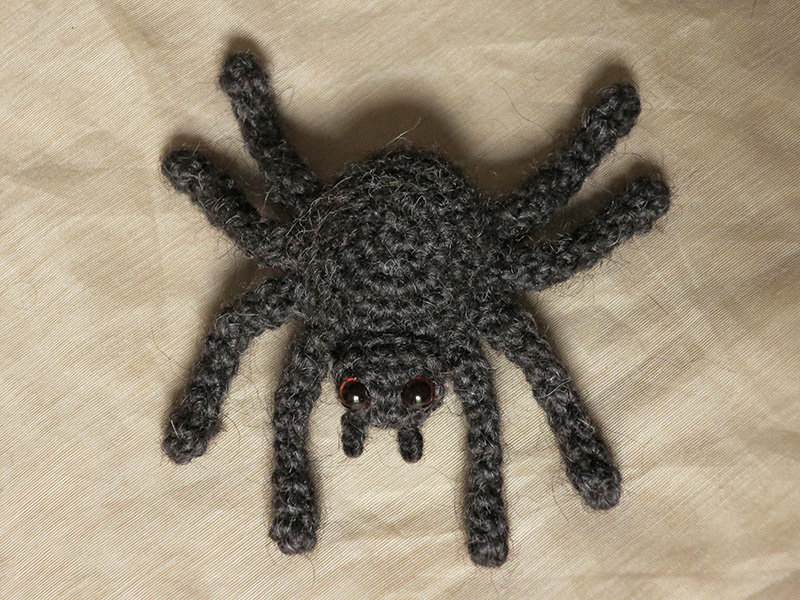
Spider

Happy Halloween!


Stories

A new project

This time I’m going to make a hedgehog. I’ve thought much about how to give him a prickly appearance and still I’m not sure what I’m going to do.

There are two options I consider. The first is simple, brushing. If I’ll get the features right and you see clearly it’s a hedgehog, brushing is a good option and easy to do for everyone who’s going to make him. My second option is using a loop stitch and a mixed colour yarn for the spikes. I’ve never done a loop stitch and I have no idea what it will look like. Also, it’s a small risk to use this for a pattern, because it can hold people back from trying to make the hedgehog, because he might look too difficult. I absolutely think the end result is most important, but I have to keep in mind I design my animals so other people can make them too.

Well, I’ll try out both things, and first I must find a suitable mixed yarn. If that’s too hard to find, option two is ‘out’ already.

Enough text! Here’s the sketch. I just made one and loved him right away.

hedgehog sketch

Sometimes I make ten sketches for a doll and still I’m not satisfied, this one was enough, how that works, I honestly don’t know.


Stories

For wildlife lovers….

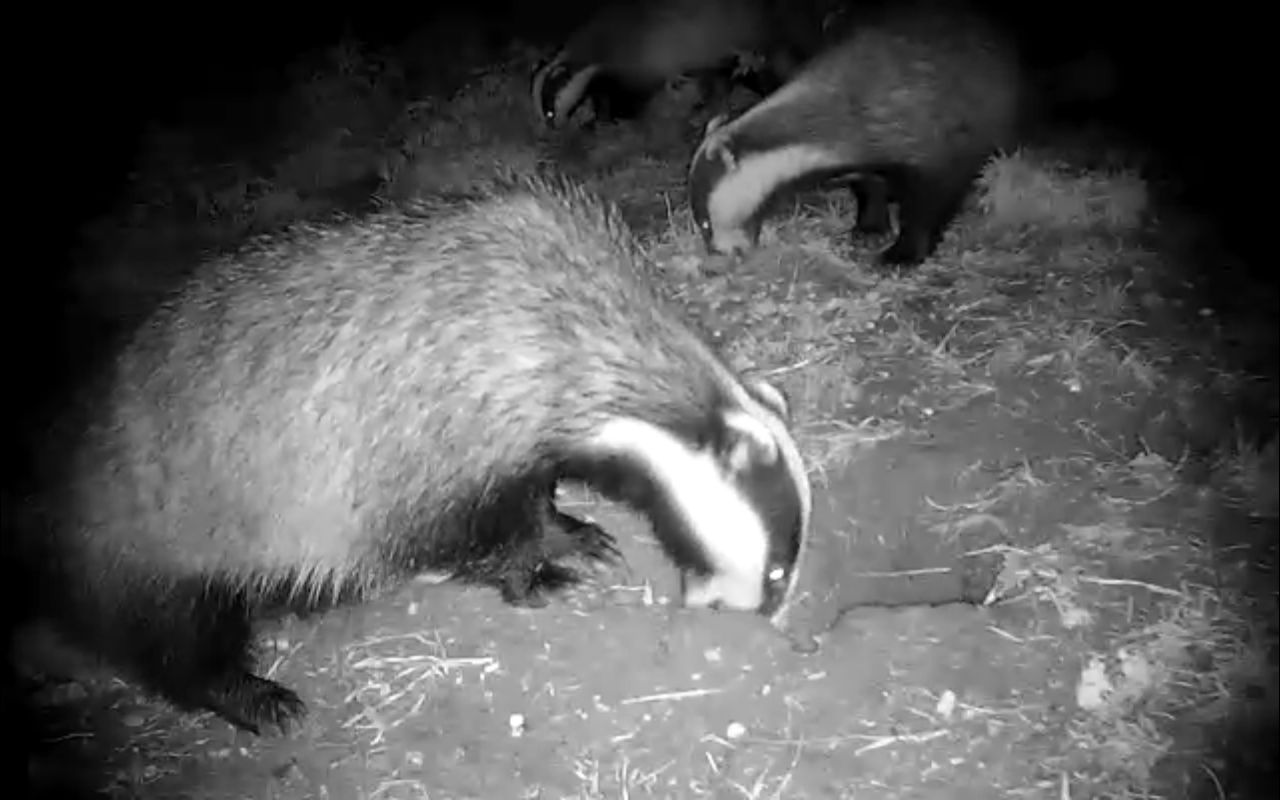
I’ve just discovered a very useful source of great inspiration for badger crochet: Simon King’s badger fox feeder cam. It’s absolutely amazing, you can see badgers, sometimes eight at a time, eating and playing live! It’s almost like your there. Foxes visit too. Look at this!

Screen Shot 2013-09-08 at 00.45.50

I already got a lot of good info about badger features because of this cam. I never realized a badgers head is dark at the bottom. A bit silly because it’s quite logical, but you just don’t see it in most badger pics and I was too focused on the dark stripes of the face. This unfortunately did meant I had to make another head. It’s finished now though.

Enjoy the cams! I’ve spotted the badgers from around 9.30 PM till late in the night, European time.


Stories

The chubby badger sketch

This week I made a bunch of sketches and showed them to my boyfriend. He said ‘that one’, I agreed. This is the crochet badger I have in mind. A sweet and cute looking, chubby little badger.

BadgersketchI’ve been thinking much about how to do the colour changes for this badgers head. Should I crochet in two colours right away, so the dark stripes are worked into the design, or should I add the dark stripes later as patches. It’s an issue. Working in two colours usually would have my preference and sewing on patches I sometimes consider as ‘the easy way’ to get a two coloured animal. But, I also think worked in colour changes aren’t an end in itself, and if it limits the design, sewed on patches aren’t such a bad choice.

To me the character and expression of the animal is the most important goal. It’s a matter of experimenting to get it right. For example, Floro the red squirrel needed to have a beige nose. In order to try it out, I added a beige patch to a finished head, just to see how the two colours looked together. But by doing that I noticed the added patch gave the squirrel just the right little muzzle. A worked in beige colour nose didn’t add that bit of character, so I choose to use a patch. As for the eyes it’s the same thing. To me a worked in eyepatch isn’t round enough so I prefer to use a patch. Sizing it is much easier too.

For the badger I’ll try to work in the colours and I already decided to work in rows for that, because if I crochet in a spiral, the vertical stripes will be impossible to get. If the worked in stripes won’t look good, I’ll use patches. Secretly I think for a badger, sewed on patches will give the best result for what I want, but let’s wait and see.

Let’s hope the crochet badger will be much like this sketch, then I love him already!


Stories

I’m all badger’y

Yes, I can honestly say badgers are my ultimate favorite animals. For me it’s hard to choose one, because I’m fond of so many animals like squirrels, hedgehogs, ducks, foxes, sparrows, starlings, many rodents…..I just love animals.

But badgers are ultimate beauties. Their shape and colour, their playful character and little voices. There’s just so much to love about them. Unfortunately there is one downside about these fluff balls, they’re one of the toughest animals to crochet, all thanks to their beautiful striped head. But let’s forget about that for now, I’ll explain all about that and my plans on how to get it right in my next post. Yep, my next project will be a crochet badger pattern. I was going to make an adventurer badger first, but I just can’t wait to make a ‘normal’ badger doll.

Let’s now enjoy badger cuteness with a few pic’s I found online.

Wheeeeee!!!!!

931588

Badger from The Burrowers

These are both baby badgers. The second picture is from one of the badgers from the BBC program, The Burrowers.

For my smartphone I needed a new fabric case, so I made one with a badger. And….I recently discovered ‘Badger Balm’, how cool is that! It’s an American brand so American badgers, but they’re lovely too. The balms are completely organic and mostly of beeswax and olive oil. I adore the tins and the balms smell delicious.

BadgerB

And here’s something nice to close this post with, a badger painting I made years ago. Badger Castle.

badger illustration

Enjoy and I promise, this week I’ll post a first sketch of my crochet badger and I’ll explain all about the colour changes for this pattern and my vision about it.